05/10
32
Inbetriebnahme des Modells
Getting started with the model
Zum Ausbalancieren des Modells müssen die
Rotorblätter aber vorübergehend um 180° zu-
einander ausgerichtet fixiert werden.
Weiterhin muss die Trainerhaube aufgesetzt
bzw. der Rumpf montiert sein!
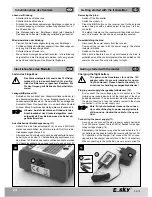
Überprüfen Sie den Wuchtzustand der Rotorblätter.
Richten Sie die Rotorblätter um 180° zueinander aus und
fixieren Sie die Rotorblätter vorübergehend, durch Anziehen
der Halteschrauben.
Hängen Sie den Heli am Rotorkopf, mittig über dem Dreh-
punkt auf. Oder:
Heben Sie den Heli zwischen Zeige- und Mittelfinger rechts
und links an den beiden Paddelstangen vom Boden. Richten
Sie die Paddelstangen senkrecht zur Heli-Längsachse aus.
Der Heli darf nicht nach vorne oder hinten kippen, egal in
welcher Position sich die Hauptrotorblätter befinden.
Wenn sich die Nase senkt, ist das Modell kopflastig.
Verschieben Sie den Flugakku geringfügig nach hinten.
Wenn sich das Heck absenkt, verschieben Sie den Flugakku
nach vorne, um den Schwerpunkt einzustellen.
Sichern Sie den Flugakku, wenn Sie die optimale Schwer-
punktlage ermittelt haben, mit dem Klettband.
Seitliches Ausbalancieren
Unterstützen Sie den Helikopter am Ende des Heckausle-
gers und so weit wie möglich vorne, an der Längsachse.
Der Heli darf nicht nach einer Seite kippen, egal in welcher
Position sich die Hauptrotorblätter befinden.
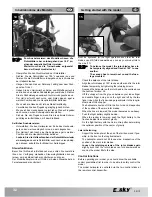
Lockern Sie die Halteschrauben der Rotorblätter wieder
ein wenig, so
dass die Rotorblätter noch nach unten abklap-
pen können, sobald Sie Ihr Modell zur Seite kippen.
Steuerfunktionen
Bevor Sie Ihr Modell in Betrieb nehmen, sollten Sie zuerst die
Ihnen zur Verfügung stehenden Steuermöglichkeiten kennen
lernen, um das Modell sicher kontrollieren zu können.
Der Modellhelikopter wird mit Hilfe der beiden Steuerhebel am
Fernsteuersender kontrolliert.
-
-
-
-
-
-
-
-
-
-
-
-
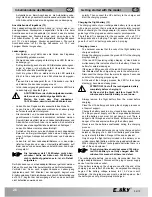
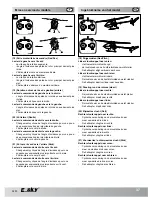
must be tightened for the flight operation such that the rotor
blades can still fold downwards as soon as your model tilts to
the side (17).
To balance the model, the rotor blades have to
be temporarily aligned and fixed at 180° to one
another.
The canopy has to remain set on and the fuse-
lage mounted.
Check the balance of the rotor blades.
Align the rotor blades at 180° to one another and fix the rotor
blades temporarily by tightening the retaining screws.
Suspend the helicopter on the rotor head in the centre above
the centre of motion. Or:
Lift the chopper from the ground between your index finger
and middle finger, doing so on the right and left by the two
flybar rods. Align the flybar rods perpendicular to the longitu-
dinal axis of the chopper.
The helicopter should not tilt to the front or back, irrespective
of the position of the main rotor blades.
When the nose is lowered, the model becomes nose-heavy.
Push the flight battery slightly behind.
When the rudder is lowered, push the flight battery to the
front and adjust the center of gravity.
Fix the flight battery with the Velcro strap after determining
the optimum position of the center of gravity.
Lateral balancing
Support the helicopter at the end of the tail boom and if pos-
sible, in the front on the longitudinal axis.
The helicopter should not tilt to one side, irrespective of the
position of the main rotor blades.
Loosen the retaining screws of the rotor blades again
slightly such that the rotor blades can fold downwards as
soon as the model tilts to the side.
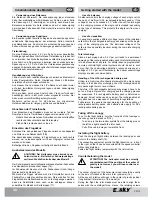
Control functions
Before operating your model, you should know the available
control possibilities first in order to be able to safely control the
model.
The model helicopter is controlled via the two control sticks at
the remote control transmitter.
-
-
-
-
-
-
-
-
-
-
-
-
16
17
15
14


