background image

Description  

Programming 

All wash protocols on the 

Opsys 

MW™ Microplate Washer are user-defined. 

Up to 40 wash protocols can be contained on the system. 


Note: Memory limitations may restrict the size 
and complexity of an individual wash protocol. 

In addition, the system can be configured with up to ten different plate types 
so that the wash head positions for each plate type can be specified. 

Programming of a new wash protocol (or modifying an existing one) and 
configuration of the system are carried out using the keypad and display.     


2


Opsys

 MW™ 

User’s Guide


Summary of Contents for Opsys MW

Page 1: ...Opsys MW Microplate Washer User s Guide IMPORTANT Please read carefully before using the Opsys MW ...

Page 2: ... VA 20151 1683 USA Tel 703 631 7800 800 288 2354 Fax 703 803 1441 OPSYS MW TM is a trademark of DYNEX Technologies Inc 2006 This document is the copyright of DYNEX Technologies and must not be copied or reproduced in any form without prior consent DYNEX Technologies reserves the right to make technical improvements to this equipment and documentation without prior notice as part of a continuous pr...

Page 3: ...efect by registered mail within thirty days of the discovery thereof shall constitute a waiver of any claim for breach of warranty When a product is required by DYNEX Technologies to be installed by a DYNEX Technologies engineer or technician the period of this Warranty shall begin on the date of such installation provided however that any use of the product prior to such installation shall at sol...

Page 4: ......

Page 5: ...22 Chapter 3 Configuration 23 The Keypad 23 Menus 26 The SETUP Menu 27 The PROGRAM Menu 27 Configuring the System 28 Specifying the Wash Head 29 Specifying Plate Parameters 30 Displaying the Software Version 35 Specifying the Pump Parameters 36 Selecting Clean 37 Chapter 4 Wash Protocols 39 Wash Protocol Operations 39 Creating a New Wash Protocol 41 Specifying the Header 41 Specifying Wash Cycle O...

Page 6: ...ontainers 70 Replacing the Tubing 71 Pump Calibration 74 Chapter 7 Troubleshooting 77 Operational Problems 77 Chapter 8 Service 81 Service Procedures 81 Spare Parts 82 Returning a Washer for Service 83 Contact DYNEX Technologies 85 Index 86 ii Opsys MW User s Guide ...

Page 7: ...tem This manual gives you the information needed to Review safety precautions Install the Opsys MW system Understand the Opsys MW menus Set the Opsys MW system up to suit your exact needs Create or modify wash protocols Run wash protocols using the Opsys MW system Perform required preventive maintenance Troubleshoot the system Opsys MW User s Guide iii ...

Page 8: ...About this Manual This page is intentionally left blank iv Opsys MW User s Guide ...

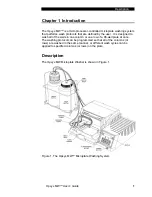
Page 9: ...ll of the wells in one column or one row of a 96 well plate at once The washing protocol can be programmed so that all of the columns or rows are washed in the same manner or different wash cycles can be applied to specified columns or rows on the plate Description The Opsys MW Microplate Washer is shown in Figure 1 Figure 1 The Opsys MW Microplate Washing System Opsys MW User s Guide 1 ...

Page 10: ...y restrict the size and complexity of an individual wash protocol In addition the system can be configured with up to ten different plate types so that the wash head positions for each plate type can be specified Programming of a new wash protocol or modifying an existing one and configuration of the system are carried out using the keypad and display 2 Opsys MW User s Guide ...

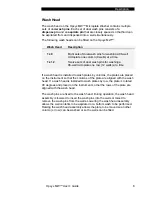
Page 11: ...wash head is installed to wash plates by columns the plates are placed on the instrument so that the columns of the plate are aligned with the wash head If a wash head is installed to wash plates by row the plate is rotated 90 degrees and placed on the instrument so that the rows of the plate are aligned with the wash head The wash pins are fixed to the wash head During operation the wash head ass...

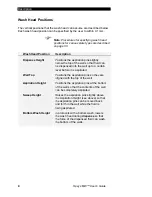
Page 12: ...to a certain level before it is aspirated Well Top Positions the aspiration pins so they are aligned with the top of the well Aspiration Height Positions the aspiration pins at the bottom of the well so that the contents of the well can be completely aspirated Sweep Height Raises the aspiration pins slightly above the Aspiration Height see above so that the aspiration pins can be moved back and fo...

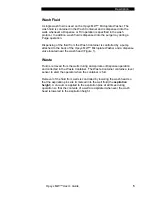
Page 13: ...oplate Washer and a dispense valve located near the wash head Figure 1 Waste Fluid is removed from the wells during an Aspirate or Dispense operation and collected in the Waste Container The Waste Container contains a level sensor to alert the operator when the container is full Removal of the fluid from wells is controlled by lowering the wash head so that the aspiration pins are immersed into th...

Page 14: ...Description This page is intentionally left blank 6 Opsys MW User s Guide ...

Page 15: ...sed below Small footprint Up to 40 wash protocols can be programmed Up to ten plate types can be programmed Two wash head configurations 1 x 8 and 1 x 12 On board self diagnostics SHOW function allows visual verification of wash head height settings High level alarm on Waste Container Opsys MW User s Guide 7 ...

Page 16: ...Features This page is intentionally left blank 8 Opsys MW User s Guide ...

Page 17: ...cle wash 5 min 30 sec Power 100 W Display 2 by 20 character back lit LCD Keypad 21 key tactile membrane Output Display Printer RS232 Environmental Operating Range 15 C to 30 C 15 to 85 relative humidity non condensing 2000m altitude Computer Interface Port Serial RS 232 port Service Access Baud Rate 19200 Character format Character Format 7 data bits 1 stop bit no parity Power Requirements Voltage...

Page 18: ...1 Dispense 50 999 Increment 1 µL Purge 50 9999 Increment 1 µL Fill 50 300 Increment 1 µL Soak 1 999 Increment 1 second Plate Setup Plate Name Up to 10 characters Dispense Height 001 999 Increment 1 Top of Well Height 001 999 Increment 1 Aspirate Height 001 999 Increment 1 Sweep Height 001 999 Increment 1 Sweep Stroke 001 999 Increment 1 Bottom Wash Dispense Height 001 999 Increment 1 Standards The...

Page 19: ... system are described below Label Description Alternating current is present English Caution symbol Refer to the Routine Maintenance chapter French Attention voir documents d accompagnement English Caution hot surface French Attention surface chaude Protective conductor terminal Earth ground terminal English Caution risk of electric shock French Attention risque de choc électrique Opsys MW User s ...

Page 20: ...Warning Labels This page is intentionally left blank 12 Opsys MW User s Guide ...

Page 21: ...Power Cable 1 Cleaning Wire Aspirate 1 Cleaning Wire Dispense 1 Instrument Configuration Report 1 User s Guide 1 Declaration of Conformity 1 Wash Head 1 x 8 or 1 x12 1 Plate Holder 1 A sub carton contains the wash container and waste container assemblies The contents of this carton are listed below Article Quantity Wash Container Assembly 1 Waste Container Assembly 1 Opsys MW User s Guide 13 ...

Page 22: ...ap at the rear of the instrument 3 Examine the packaging to be sure that the power cord and other materials have been removed Please save packaging material for future use 4 Verify that all of the materials listed above have been unpacked 5 Inspect the components for damage If damage is observed contact your shipper or service representative immediately 14 Opsys MW User s Guide ...

Page 23: ...of a dispense pin and an aspirate pin closely spaced so that fluid can be aspirated from a well while fluid is being dispensed into the same well The wash head moves back and forth to wash each row or column depending on the wash head that is used of the plate by lowering the wash pins into the corresponding wells Plate Carrier The plate carrier holds the plate in a fixed position so that the wash...

Page 24: ...rnal computer can be connected for technical service purposes Wash Container Shown in Figure 1 The wash container contains the wash fluid that is used for Dispense Fill and Purge operations Waste Container Shown in Figure 1 The waste container contains the fluid that is aspirated from the wells A level sensor is contained inside of the waste container 16 Opsys MW User s Guide ...

Page 25: ... Connections for the power cord dispense pump power waste bottle level sensor waste bottle vacuum line and an external computer are made at the rear of the system Important Be sure that the vacuum exhaust is not obstructed Figure 3 Rear View of the Opsys MW System Opsys MW User s Guide 17 ...

Page 26: ...ing the Instrument Determine the area where the system will be located You will need a firm and level area that is approximately 51 cm 20 inches wide 62 cm 24 inches deep and 40 cm 16 inches high for the Opsys MW 18 Opsys MW User s Guide ...

Page 27: ...Position the Arm over the Purge Reservoir portion of the Plate Holder 2 Place the Wash Head on the two Arm Pins being careful to properly seat the Wash Head on the support pins 3 Level the Wash Head in relation to the Plate Holder and tighten the two thumbscrews at the front of the Wash Head Arm Assembly Opsys MW User s Guide 19 ...

Page 28: ...e pump tubing to the mating connector in the cap 3 Route the dispense tubing through the upper slot at the front corner of the instrument and through the routing clips at the front of the instrument 4 Connect the end of the dispense tubing to the wash tubing connector on the wash head 5 Thread the dispense tubing through the dispense valve Figure 1 Note The tubing must be inserted fully into the d...

Page 29: ... rear of the instrument Figure 3 2 Screw on the Waste Container cap 3 Route the waste tubing through the lower slot at the front corner of the instrument and through the routing clips at the front of the instrument 4 Connect the end of the waste tubing to the waste tubing connector on the wash head 5 Connect the waste level sensor cable to the waste level sensor connector at the rear of the instru...

Page 30: ...re properly grounded Before connecting the power cable be sure that the components have been connected to each other as outlined in the previous section 2 Push the instrument power switch once After a series of self tests the software version is displayed momentarily Opsys MW v1 0 before the main menu is displayed 1 SETUP PROGRAM Note The self test results indicate whether the system is operating ...

Page 31: ...W entering new wash protocols and running the wash protocols The keypad contains scroll keys function keys and alphanumeric keys The keys on the keypad are shown in Figure 4 1 ABC DEF GHI JKL MNO PQR STU VWX YZ _ 2 3 DEL ENTER START CANCEL 4 5 6 7 8 9 0 Scroll Keys Display Panel Function Keys Scroll Keys Alphanumeric Keys Figure 4 Keys on the Keypad ...

Page 32: ...y to delete the characters from the existing name NOTE To delete the entire name either type over it or press the right arrow key and DEL to delete all characters to the right of the cursor The first character of an existing name cannot be deleted but it can be overwritten Function keys Two function keys select the item or execute the command shown directly above each key on the second line of the...

Page 33: ...hown on the key is displayed by pressing the key once If the key is pressed two to seven times rapidly one of the letters on the key will be displayed The letter that is displayed depends upon the number of times the key is pressed Opsys MW User s Guide 25 ...

Page 34: ...ins SETUP and PROGRAM menu headers 1 SETUP PROGRAM Note Dashes are initially displayed after the wash protocol number i e 1 in the above example if a wash protocol has not yet been named Once a wash protocol is named the name is displayed after the protocol number Refer to page 41 for the procedure to create and name a wash protocol Display a different wash protocol number and name there can be up...

Page 35: ...nu Press the function key under PROGRAM to display the PROGRAM menu Figure 6 The PROGRAM menu contains commands to name and create a new wash protocol or to edit an existing wash protocol 1 TESTNAME SETUP PROGRAM Enter name Edit name 4 WASHNAME If selected protocol has been named and has no password or Enter password If selected protocol has been named and has a password or If selected protocol ha...

Page 36: ...ommand Purpose HEAD Specify the type of head that is fitted PLATE Displays the PLATE menu The commands on this menu allow parameters such as well top height dispense height and wash height for various plate types to be specified VERSION Displays the version number of the software CAL Displays the CAL menu The commands on this menu allow the pump parameters to be specified CLEAN The CLEAN command e...

Page 37: ...ead Select option HEAD PLATE 2 Select HEAD The current wash head selection is displayed in the upper line Wash head 8 8 If needed scroll right to view the remaining selection Wash head 8 12 3 Select the desired option using the function key After the selection is made the display will again read Select option HEAD PLATE Opsys MW User s Guide 29 ...

Page 38: ... one millimeter of vertical pin travel 20 1mm up 20 1mm down The SHOW command is available when setting each wash head position Select SHOW to move the wash head to the indicated position so that the height can be observed For example when setting dispense height the default value is 180 DISP HEIGHT 180 SHOW If after selecting SHOW the dispense pins are found to be too low by approximately 1 0 mm ...

Page 39: ...number using the up or down scroll keys or use the keypad to enter the desired plate number When the desired plate number is displayed press ENTER The display will read Enter name 5 Use the keypad to enter the plate name up to 10 characters Note Refer to page 23 for instructions on entering alphabetic characters 6 Press ENTER The display will read DISP HEIGHT 180 SHOW Note The default value is dis...

Page 40: ...ermine the correct value as outlined on page 30 Repeat the procedure as needed 9 Enter the desired value using the keypad and press ENTER The display will read Sweep NO YES NO 10 Select YES to specify a sweep The display will read All cycles NO YES NO Note If a sweep is specified the wash pins are moved up and down and across the bottom of the well during aspiration to better remove all droplets o...

Page 41: ...SHOW function for the sweep stroke Determine optimum sweep stroke setting by starting with a small number and increase it if the residual aspirate volume is not acceptable If you run a protocol and the wash pins strike the sides or bottom of the well reduce the sweep stroke and review your plate setup parameters 13 Enter the desired value using the keypad and press ENTER The display will read Bott...

Page 42: ...stem 15 Enter the desired value using the keypad and press ENTER The display will read Select option HEAD PLATE Note If NO is selected for Bottom wash Step 13 the display will read as shown above 34 Opsys MW User s Guide ...

Page 43: ... MW instrument 1 Select SETUP if needed The display will read Select option HEAD PLATE 2 Scroll right to display the next selection Select option VERSION CAL 3 Select VERSION The display will momentarily read Opsys MW v1 0 Note The software version that is displayed will depend on the version installed in the instrument Opsys MW User s Guide 35 ...

Page 44: ...high or low The display will read Pump speed 190 4 Enter the desired value using the keypad and press ENTER The display will read Slope 2 1 Note The Slope and Intercept values should only be changed by DYNEX Technologies Service Personnel 5 Press ENTER to keep the existing value The display will read Intercept 24 6 Press ENTER to keep the existing value The display will again read Select option VE...

Page 45: ... will read Interval Hrs 1 4 Enter the desired interval using the up down scroll keys and press ENTER Note The minimum interval is 1 hour and the maximum interval is 9 hours The display will read Fluid Volume 2500 5 Enter the desired volume of fluid to be dispensed Note A cleaning volume ranging from 50 to 9 999 microliters can be entered Follow the instructions on page Error Bookmark not defined f...

Page 46: ...Configuring the System This page is intentionally left blank 38 Opsys MW User s Guide ...

Page 47: ...over the purge tray Note Purge is usually carried out at the beginning of a wash protocol to rinse the dispense wash pins and remove air bubbles Move Performs Aspirate Dispense Fill and or Soak operations on specified strips of the Microplate Aspirate Removes the contents of a well by positioning the wash pins at the aspiration height in the well and aspirating the liquid from the wells A sweep ma...

Page 48: ...der to prevent a well overflow If a bottom wash is specified the wash head is then lowered to the bottom wash position so that fluid will be aspirated from the bottom of the wells while fluid is being dispensed Note The dispense height for a particular plate type is specified during system configuration page 30 Soak The contents of the wells are allowed to equilibrate for the specified number of s...

Page 49: ...so lost or or use keypad Select the plate type Variable strips Specify whether the operator will be prompted at run time to enter the number of strips to be washed avoids reprogramming the number of strips Constant timing If Variable strips is YES Specify whether the time for washing any number of strips on a plate is constant Figure 8 Specifying the Wash Protocol Header After the wash protocol he...

Page 50: ...f the wash protocol is displayed in the lower line Enter name 4 Use the keypad to enter the protocol name up to 9 characters and press ENTER The display will read Password YES NO Note Refer to page 24 for instructions on entering alphanumeric characters 5 Select YES if the protocol is to be password protected The display will read Enter password Note If NO is selected the Select plate prompt Step ...

Page 51: ...er strips than originally specified in the MOVE cycle s of an established protocol If YES is selected the operator will be prompted at run time to specify the number of strips that are to be washed Processing will begin on the first strip selected in the MOVE cycle and will end on the total number of strips entered at run time e g the protocol states Move 3 12 1 cycle s and at run time 2 strips ar...

Page 52: ... the total elapsed time for washing any number of strips within a plate is to be constant The display will read Select option MOVE PURGE The sequential steps in the wash protocol can now be specified as outlined on page 45 44 Opsys MW User s Guide ...

Page 53: ...Microtiter plate are allowed to soak equilibrate for another 600 seconds PURGE Purge the dispense pins MOVE 2 Cycles Specify the starting strip and ending strip for each cycle and the number of cycles to be performed DISPENSE 3 Times For each strip perform dispense three times ASPIRATE For each strip perform one aspiration cycle END LOOP End the cycle SOAK After the two Move cycles have been compl...

Page 54: ...ash protocol as outlined on page 41 The display will read Select option MOVE PURGE 2 Select PURGE The display will read Fluid volume 350 3 Use the keypad to enter the volume of fluid to be dispensed Note A purge volume ranging from 50 to 9 999 microliters can be entered 4 Press ENTER The display will read Select option MOVE PURGE 46 Opsys MW User s Guide ...

Page 55: ...ber where the move cycle should end 6 Press ENTER The display will read Cycles 1 7 Using the keypad enter the number of the specified move cycles that are to be sequentially performed Note Between 1 and 9 Move cycles can be specified 8 Press ENTER The display will read Select option ASPIRATE DISPENSE 9 Specify Aspirate Dispense Soak and Fill operations in the sequence as they are to be carried out...

Page 56: ...ense must be performed within a Move cycle 1 Select ASPIRATE The display will read Cycles 1 2 Using the keypad enter the number of aspiration cycles that are to be to be performed within the MOVE cycle 3 Press ENTER The display will read Select option ASPIRATE DISPENSE 48 Opsys MW User s Guide ...

Page 57: ...the display will read Bottom Wash NO YES NO Note If the protocol requires bottom washing that must first be specified in the plate definition used in the protocol If a bottom wash is not specified for the plate being used or if NO is selected for the Bottom Wash prompt the display will read Select option ASPIRATE DISPENSE 4 Select YES if a bottom wash is to be included The display will read Fluid ...

Page 58: ...rotocol 6 Press ENTER The display will read Cycles 1 7 Use the keypad to enter the number of bottom wash cycles to be performed and press ENTER The display will read Select option ASPIRATE DISPENSE 50 Opsys MW User s Guide ...

Page 59: ...e procedure for specifying a Soak outside of a Move cycle is described on page 50 1 Scroll right to display the next selection The display will read Select option SOAK FILL 2 Select SOAK The display will read Duration 5 3 Enter the desired soak duration using the keypad Note A soak duration ranging from 1 to 999 seconds can be entered 4 Press ENTER The display will read Select option SOAK FILL Ops...

Page 60: ...next selection The display will read Select option SOAK FILL 2 Select FILL The display will read Fluid volume 50 3 Use the keypad to enter the volume of fluid to be dispensed during well filling Note A volume ranging from 50 to 300 microliters can be entered 4 Press ENTER The display will read Select option SOAK FILL 52 Opsys MW User s Guide ...

Page 61: ...ight to display the next selection The display will read Select option SOAK FILL 2 Scroll right to display the next selection The display will read Select option END LOOP 3 Select END LOOP The display will read Select option MOVE PURGE Opsys MW User s Guide 53 ...

Page 62: ...procedure for specifying a Soak within a Move cycle is described on page 47 1 Scroll right to display the next selection The display will read Select option SOAK END 2 Select SOAK The display will read Duration 5 3 Enter the desired soak duration 1 to 999 seconds using the keypad Note A soak duration ranging from 1 to 999 seconds can be entered 4 Press ENTER The display will read Select option SOA...

Page 63: ...Protocol To specify the End of the wash protocol 1 Scroll right to display the next selection The display will read Select option SOAK END 2 Select END The display will read 1 NAME_01 SETUP PROGRAM Opsys MW User s Guide 55 ...

Page 64: ...ll read Enter password Note If a Password is not specified for the selected wash protocol the display will read as shown in Step 5 4 Enter the Password using the keypad and press ENTER Note If the Password is entered incorrectly an error message is displayed The operator is allowed three attempts to enter the password After the third attempt the main menu Step 1 will again be displayed Note If the...

Page 65: ...12 1 Cycles DELETE EDIT Note The example above shows the MOVE operation as the first step in the protocol The actual operation that is shown will depend upon the protocol that is being modified Note For each step that is displayed the operation being carried out and the value for that operation are displayed In the MOVE example above the Start Strip is 1 the End Strip is 12 and the number of cycle...

Page 66: ...dures as when creating a new wash protocol MOVE 1 10 1 Cycles DELETE EDIT Note In the example above the End Strip was changed from 12 to 10 The actual values that are displayed will depend upon the operation being modified and the new value s entered Note Once the move loop is modified the display will no longer read as shown above Instead it will display the first command in the move loop or End ...

Page 67: ...ration 1 Select DELETE while the operation is displayed The operation is removed from the wash protocol Note If a MOVE operation is deleted all operations within the MOVE i e Aspirate Dispense Soak and Fill are also removed Opsys MW User s Guide 59 ...

Page 68: ...is displayed MOVE 1 10 1 Cycles INSERT Note The inserted operation will take place immediately before the operation that is displayed 2 Select INSERT The display will read Select option MOVE PURGE 3 Select the option that is to be inserted using the same procedure as when creating a new wash protocol 60 Opsys MW User s Guide ...

Page 69: ... PROGRAM 3 Select PROGRAM If the wash protocol is password protected the display will read Enter password 4 Enter the Password using the keypad and press ENTER Note If the Password is entered incorrectly an error message is displayed The operator is allowed three attempts to enter the password After the third attempt the main menu will be displayed 5 After a password is successfully entered the di...

Page 70: ...the number of the wash protocol that the commands are to be copied to If a wash protocol already exists at that location the display will read Overwrite test NO YES NO 8 Select YES The display will read 7 NAME_04 SETUP PROGRAM 62 Opsys MW User s Guide ...

Page 71: ...e containers if necessary To empty the waste container 1 Unscrew the cap of the Waste Container Lay the cap and level sensor assembly on a paper towel 2 Discard the waste in accordance with local regulations 3 Rinse the waste container with deionized water Discard the rinse water Note If desired the waste container can be disinfected with a 10 v v solution of household bleach in water 4 Place the ...

Page 72: ...lter on a clean paper towel 3 Fill the Wash Container with the wash fluid that is being used Note If the wash solution is being changed discard the contents of the Wash Container and thoroughly clean it before filling it with the new wash solution 4 Place the Pick Up Filter into the Wash Container and screw the cap on Re connect the dispense line quick connector 64 Opsys MW User s Guide ...

Page 73: ...ample if a 1 x 8 head is used be sure that the plate is positioned with the columns aligned with the wash head rather than perpendicular to the wash head 3 Select the desired wash program using the up or down scroll keys or by entering the wash protocol number using the keypad Note Before starting the wash protocol verify that the correct wash protocol name is displayed 4 Press the START key The w...

Page 74: ...Washing a Plate This page is intentionally left blank 66 Opsys MW User s Guide ...

Page 75: ...l Weekly maintenance Empty the Wash Container and clean it The wash solution should be replaced at least once a week The Wash Bottle should be cleaned whenever fresh wash solution is required Note If particulate matter is observed in the Wash Bottle the wash solution should be discarded at once To replace the wash solution 1 Discard any wash solution that is left in the Wash Bottle 2 Rinse the Was...

Page 76: ...nd the severity of operating conditions Contact DYNEX Technologies for information on replacement tubing Replace the in line hydrophobic filter If the system will not be used for a period of time the system should be flushed with de ionized water so that buffers and or reagents used to wash the plates are not deposited on the Wash Head or other components of the system As required maintenance Pump...

Page 77: ...ent clean the system and then decontaminate it as described below CAUTION Always disconnect the power cable before cleaning the instrument To clean the system 1 Clean external surfaces with a cloth moistened with mild laboratory detergent Note If needed dilute the laboratory detergent according to the manufacturer s instructions before using To decontaminate the system 1 Wipe the surfaces with a c...

Page 78: ... with a 10 v v solution of household bleach in water 4 Place the level sensor and tube back into the Waste Container and screw the cap on To refill the wash container 1 Separate the dispense line quick connector in the cap of the Wash Container Unscrew the cap and lay it and the Pick Up Filter on a clean paper towel 2 Fill the Wash Container with the wash fluid that is being used Note If the wash ...

Page 79: ...to a new length of Pump Tube and attach the free end of the tube to the Pump Inlet 7 Disconnect both ends of the Dispense Tube that is attached to the Pump Outlet and the Wash Head remove the tubing from the dispense valve and discard 8 Attach the short length of larger diameter tube to the Pump Outlet and to the other end fit the larger barb of the Reducer Fitting To the small end of the Reducer ...

Page 80: ...owel 2 Discard the contents of the Waste Container in accordance with local regulations Thoroughly rinse the container with deionized water and let it dry 3 Disconnect the vacuum tubing from the connector in the Cap and from the connector in the Foam Aerosol Trap Discard the old tube 4 Obtain a new length of vacuum tubing 5 Connect one end of the vacuum tubing to the connector in the Waste Contain...

Page 81: ...te Container cap and from the waste tubing connector on the wash head 4 Remove the waste tubing from the instrument 5 Obtain a new length of waste tubing 6 Route the waste tubing through the lower slot at the front corner of the instrument and through the routing clips at the front of the instrument 7 Connect one end of the waste tubing to the waste tubing connector on the wash head and connect th...

Page 82: ... your assay using the appropriate dispense volume pump speed and fluid density Calibration Protocol 1 Define a flat bottom plate profile using the SETUP PLATE function refer to page 30 for Specifying Plate Parameters 2 Program an assay to dispense 200µl well into columns 1 12 refer to page 41 for Creating a New Wash Protocol 3 Obtain a clean dry flat bottom 96 well styrene plate 4 Weigh the plate ...

Page 83: ... corresponds to a well volume change of 10µl 9 If the dispensed volume is too low increase the pump speed using the SETUP CAL function refer to page 36 A pump speed change of 10 units roughly corresponds to a well volume change of 10µl 10 Repeat Steps 3 9 until fluid is dispensed with the accuracy required e g Error less than or equal to 5 Opsys MW User s Guide 75 ...

Page 84: ...Pump Calibration This page is intentionally left blank 76 Opsys MW User s Guide ...

Page 85: ...hat the electrical outlet is not controlled by a switch or timer Verify that there is power at the electrical outlet by plugging in and checking another device The powerstrip is faulty Replace the powerstrip The fuse is blown Service is required The breaker is tripped Service is required The power supply is defective Reset the breaker Liquid is not dispensed from the dispense pins The dispense pin...

Page 86: ...ease it Replace the tubing into the dispense valve at a different location Purge the tubing more frequently Replace the tubing The dispense valve does not open Service is required The wash head manifold tubing is blocked Remove the wash head assembly and clean it using the manifold head cleaning wire Then run a purge Service is required if problem persists There is a pressure leak Check the seals ...

Page 87: ...ns are clogged Remove the wash head assembly and clean it using the manifold head cleaning wire Service is required if problem persists The aspiration pin height is set too high Repeat the plate setup procedure page 30 The seal on the waste container is leaking Check the seal and waste tubing for leaks The wash protocol is not optimized If the bottoms of the plate wells are flat use a sweep Add ad...

Page 88: ...ocked Remove the waste tubing from the rear of the instrument see page 17 Check the waste tubing and aspiration tubing and remove any blockages or kinks The waste container is damaged or defective Replace the waste container X Motor Home Error is displayed Motion of the wash head is being blocked Check the wash head vicinity and remove any obstacles The motor is defective Service is required Z Mot...

Page 89: ...taining pins on the Arm 3 Lift the wash head and tubing clear of the instrument If necessary remove the wash tubing and waste tubing from the retainer clips at the front of the instrument To clean the wash head assembly 1 Pass the Cleaning Wire through the inside of each wash pin and waste pin on the wash head 2 Run a PURGE to rinse any material from the wash pins To replace the wash head assembly...

Page 90: ...lter 43000491 Quick Connect Fitting Dispense 43000540 Pick Up Filter 816400500 Silicon 5 64 ID x 1 8 OD Dispense 816400600 Tubing Silicon 4 x 7 2 MM Aspirate 816400700 Tubing Silicon 3 x 5 MM Dispense 62503160065 Quick Connect Fitting Aspirate 43000540 Pick Up Filter Major Assemblies 13001541 Bottle Assembly 13001555 Chassis Assembly 13001572 X Z Drive Assembly 43000320 Dispense Pump 582050204 PCB...

Page 91: ...ials Note Refer to page 69 for cleaning and decontamination instructions To return a Washer for service 1 Contact the nearest DYNEX Technologies technical service facility for return authorization 2 Clean and decontaminate the Washer 3 Fill out an Equipment in Transit form Figure 10 4 Pack the Washer and the Equipment in Transit form for shipment 5 After you receive a return authorization ship the...

Page 92: ...dicate fault condition or reason for return ________________________________________________________ CERTIFICATE OF DECONTAMINATION I certify that the equipment described above has been disinfected decontaminated and is clean dry and fit for transport Signed Title Date _ ________________ DYNEX Technologies reserves the right to refuse improperly cleaned equipment Shipping Address DYNEX Technologie...

Page 93: ... Technologies Contact DYNEX Technologies DYNEX Technologies 14340 Sullyfield Circle Chantilly VA 20151 USA Tel 703 631 7800 Toll Free 800 288 2354 Fax 703 803 1441 www dynextechnologies com Opsys MW User s Guide 85 ...

Page 94: ...aintenance 67 as required 67 daily 67 six month 67 weekly 67 MOVE 39 47 name changing 57 Opsys MW description 1 features 7 illustration 1 overview 1 programming 2 specifications 9 parity 9 password 41 56 plate carrier 15 plate number displaying 31 plate parameters 30 specifying 31 positioning 18 power ON 22 Printer 9 problems 77 PROGRAM 41 Program menu 26 27 protocol number displaying 42 pump para...

Page 95: ...1 installing 19 positions 4 removal 81 replacement 81 types 3 wash pins 3 wash pins 3 wash protocol copying 61 deleting 59 inserting 60 modifying 56 operations 39 45 wash protocols programming 2 washing a plate 63 65 waste 5 Waste Container 16 cleaning 63 emptying 63 waste tubing 73 weekly maintenance 67 well top 4 Opsys MW User s Guide 87 ...

Reviews: