background image

31 

ISO


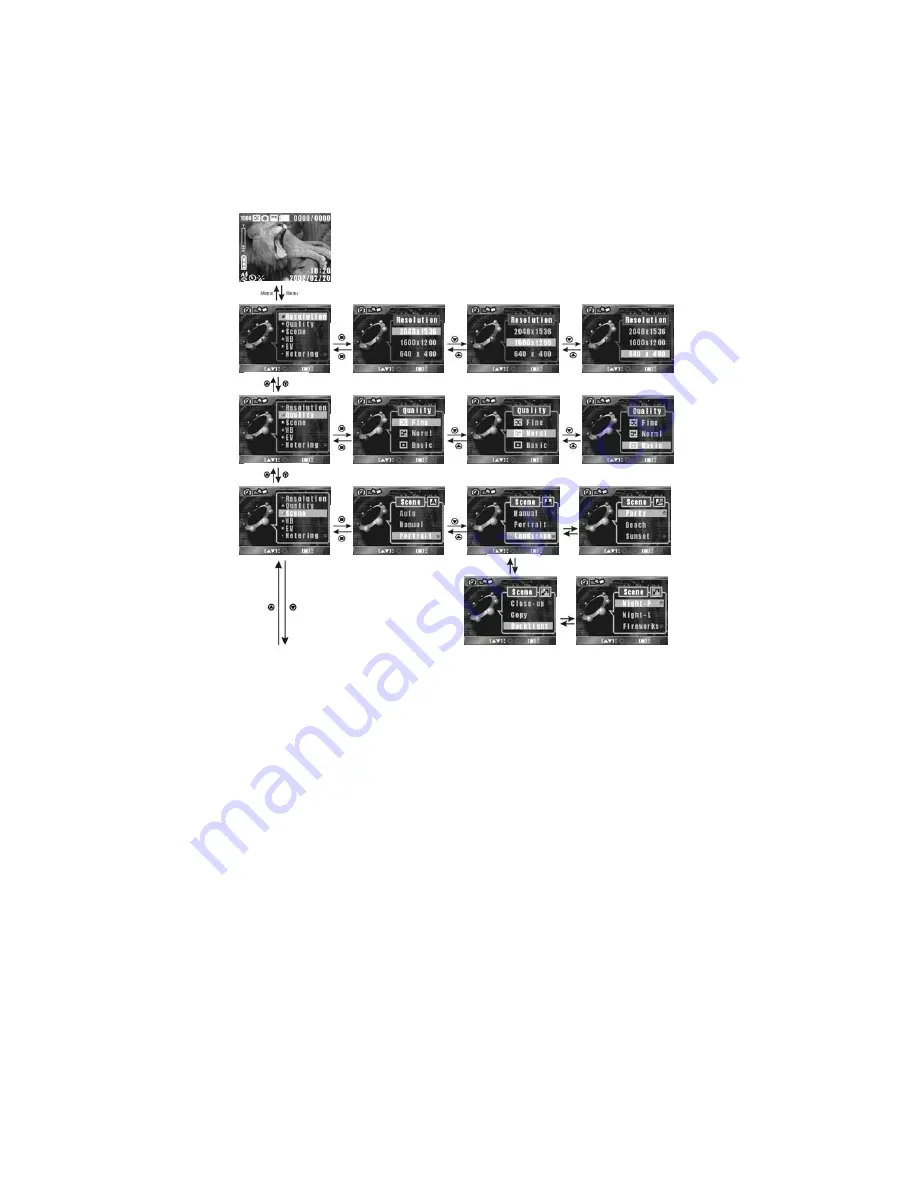
ISO (Sensitivity) settings control the DV camera's sensitivity to light. The 
lower sensitivity is, the higher exposure value is needed. When you increase 
the sensitivity, the shutter speed will be faster and exposure value will be 
reduced. There might be noises on the images. The DV camera provides 4 
ISO settings: Auto, 100, 200 and 400. (100 is equivalent to the ISO 100 film, 
and so on.) 


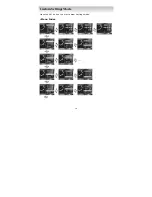
Menu Index


Press the MENU button to show/hide the menus. 


Summary of Contents for DVC301

Page 1: ...0 Digital Video Camera User s Manual...

Page 2: ...and Internal Memory Loading and Removing the Memory Card 12 Using the Internal Memory 14 Adjusting the Wrist Strap 15 Using Your DV Camera Power on and LED Indicators 16 Setting the Date Time and Lang...

Page 3: ...cators on the LCD Monitor 33 LCD Monitor Display 34 Thumbnail Display 34 Adjusting Volume 34 Viewing Images 35 Viewing Videos 35 Delete Videos Images 35 Protecting Unprotect Videos Images 35 Slideshow...

Page 4: ...ty and no compensation will be given Copyright information Unless agreed by the owner all pictures taken with this DV camera cannot be used in violation of copyright law Moreover when No Photography r...

Page 5: ...strong magnetic field 6 Rainy or snowy environment Do not open the battery cover when the power is on If water gets into the DV camera turn the power OFF and remove the batteries immediately Basic ca...

Page 6: ...owing items inside If any was missing or damaged please contact with your vendor immediately 1 DV Camera 4 AA Alkaline Batteries x 4 7 AC DC Adapter Optional 2 USB Cable 5 Software CD incl Camera Driv...

Page 7: ...n Press the Shutter button to take a picture or start recording a video MENU button Press the MENU button in the Snapshot Record and Playback modes the operation menus of each mode will display on the...

Page 8: ...ton 11 Flash button 5 Fast rewind 12 MENU button 6 LCD monitor 13 Shutter button 7 Memory card slot DISPLAY button Press this button to change between the display modes RWD PLAY STOP and FWD buttons I...

Page 9: ...jack 3 Connector cover 7 Mode buttons 4 TV OUT port 8 Power button Multi selection button Use this button to access the menus and perform digital zoom and volume adjustment Mode buttons Press those bu...

Page 10: ...The directions and lock position of the LCD monitor is shown as follows Open Clockwise 90 degrees clockwise Counterclockwise Counterclockwise 90 degrees counterclockwise 180 degrees counterclockwise...

Page 11: ...the battery cover Slide the battery cover open as indicated by the arrow Insert the batteries as indicated in the inner side of the cover Close and lock the battery cover Using Batteries Do not open...

Page 12: ...llow the instructions below Open the connectors cover and connect one end of the AC adapter to the DC in jack on the DV camera Connect the other end to an electrical outlet Using the AC DC Adapter Mak...

Page 13: ...er open as indicated by the arrow Insert the memory card as indicated by the arrow Removing the Memory Card Turn the DV camera off and follow the instructions below Slide the battery cover open as ind...

Page 14: ...ad the card again Memory card malfunction Get in touch with the vendor of the memory card for assistance Memory card slot malfunction Get in touch with the vendor of the DV camera for assistance The a...

Page 15: ...be used for storing data because some memory space will be in use by the OSD program If a memory card is loaded in the DV camera these actions e g format memory card save images play video transfer im...

Page 16: ...15 Follow the instructions below to adjust the wrist strap Open the wrist strap pouch Adjust the wrist strap to fit your wrist Close the wrist strap pouch Adjusting the Wrist Strap...

Page 17: ...mera Status Description Red Blinking Busy Status LED Green On The camera is powered on and standby Self timer LED Red Blinking The self timer function is activated The self timer LED blinks quicker fo...

Page 18: ...the date and time correctly before using the DV camera Please refer to the Custom Settings Mode section for more information Setting the Language Select the preferable OSD language for displaying inf...

Page 19: ...18 Press the SET button to enter Custom Settings mode Menu Index Custom Settings Mode...

Page 20: ...all stored data and cannot be retrieved Make sure you backup important data in the memory card before applying this function The Frequency option helps to adjust the video quality caused by the use of...

Page 21: ...al zoom Enable audio recording Remaining battery power Disable audio recording Full battery power Memory status Medium battery power Memory card is full Low battery power Memory card is half full Virt...

Page 22: ...ed on and the Record mode indicator will show on the LCD monitor Set preferable the image resolution and quality refer to page 24 View the scene on the LCD monitor press the Record button to record Th...

Page 23: ...0 cm to 1 m The subject will be standing out and the background will be out of focus Macro range focal length is suitable to take photographs in a distance of 30 cm especially for close up shot Image...

Page 24: ...ing However for digital video cameras there are different white colors under different lighting conditions because RGB value varies for each kind of white color To get close vision of human eyes the D...

Page 25: ...24 press the MENU button to show hide the menus Menu Index...

Page 26: ...tal zoom Memory status Memory card is full Memory card is half full Memory card is empty Memory ca rd is protected Internal memory is full Internal memory is empty Remaining battery power Full battery...

Page 27: ...LCD monitor Set the preferable image resolution and quality refer to page 31 Compose the picture on the LCD monitor and press the Shutter button Press the Shutter button halfway down and the DV camer...

Page 28: ...tically Slow Synchronize This mode is applicable to take a picture with night scenes or dark lights Tripod is recommended Self timer Mode Press the Self timer button to perform the Self timer function...

Page 29: ...door party Beach This mode is applicable to take photographs of bright scenes such as beaches snowfields or lakes Sunset This mode is applicable to take photographs of sunrise or sunset scenes Night P...

Page 30: ...to fast moving objects EV Compensation The EV compensation of the camera can be adjusted manually from 2 0EV to 2 0EV It is divided into 9 steps Metering Mode The DV camera provides 4 metering modes a...

Page 31: ...of the LCD monitor This mode is applicable to objects with very bright or dark background Auto focus area the metering system will only focus on the current focus area and the indicator will be displ...

Page 32: ...re value is needed When you increase the sensitivity the shutter speed will be faster and exposure value will be reduced There might be noises on the images The DV camera provides 4 ISO settings Auto...

Page 33: ...32...

Page 34: ...Remaining battery power Full battery power Medium battery power Low battery power Virtually no battery power Image video recorded date and time Length of recorded video Previous next image video Video...

Page 35: ...l display mode press the left arrow right arrow to select the previous next image video press the up arrow down arrow to select the previous next page After selecting the image video press the center...

Page 36: ...the unwanted images videos in the internal memory or memory card NOTE The deleted images videos cannot be retrieved If the image video is protected remove the protection before deleting images videos...

Page 37: ...mmediately Set One set the printing quantity for each image one by one press the up arrow down arrow to increase or decrease the volume printing quantity press the left arrow right arrow to select the...

Page 38: ...ton to show hide the menus If a memory card is loaded in the DV camera all actions user performs will be on memory card If you prefer to use the internal memory remove the memory card For more informa...

Page 39: ...38 If the selected image video is protected If the selected image video is protected the Remove sub menu will appear automatically...

Page 40: ...39...

Page 41: ...40 If you choose Slideshow mode it plays only the images not including videos stored in the internal memory or memory card...

Page 42: ...41 If no image stored in the memory...

Page 43: ...en Turn on the DV camera and there will be no images videos shown on the LCD monitor All the images videos and their information will be shown on the output device You can operate the DV camera normal...

Page 44: ...en shows as follows If your CD ROM drive doesn t support the auto run function please double click on the My Computer icon on the desktop Then double click the CD ROM drive icon and click the Setup ex...

Page 45: ...s follows If your CD ROM drive doesn t support the auto run function please double click on the My Computer icon on the desktop Then double click the CD ROM drive icon and click the Setup exe file in...

Page 46: ...e installation wizard to select the folder location and application components 8 Select the program folder 9 After the installation is completed the following screen shows Press Finish to complete the...

Page 47: ...e JPEG Video ASF Compression format Image JPEG Exif2 2 DCF standard Video MPEG4 standard Image resolution Image 2048x1536 1600x1200 and 640x480 Video VGA 640 x 480 15fps CIF 320 x 240 30fps Self timer...

Page 48: ...ter computer system for optimal performance The minimum system requirements listed as follows OS Microsoft Windows 98SE Me 2000 XP CPU Intel Pentium 166MHz or higher Memory 32 MB memory or above CD RO...

Reviews: