


Settings via software (OP7000)
Operating Instructions 650-10 - 03.0 - 08/2016
81
AUTO mode
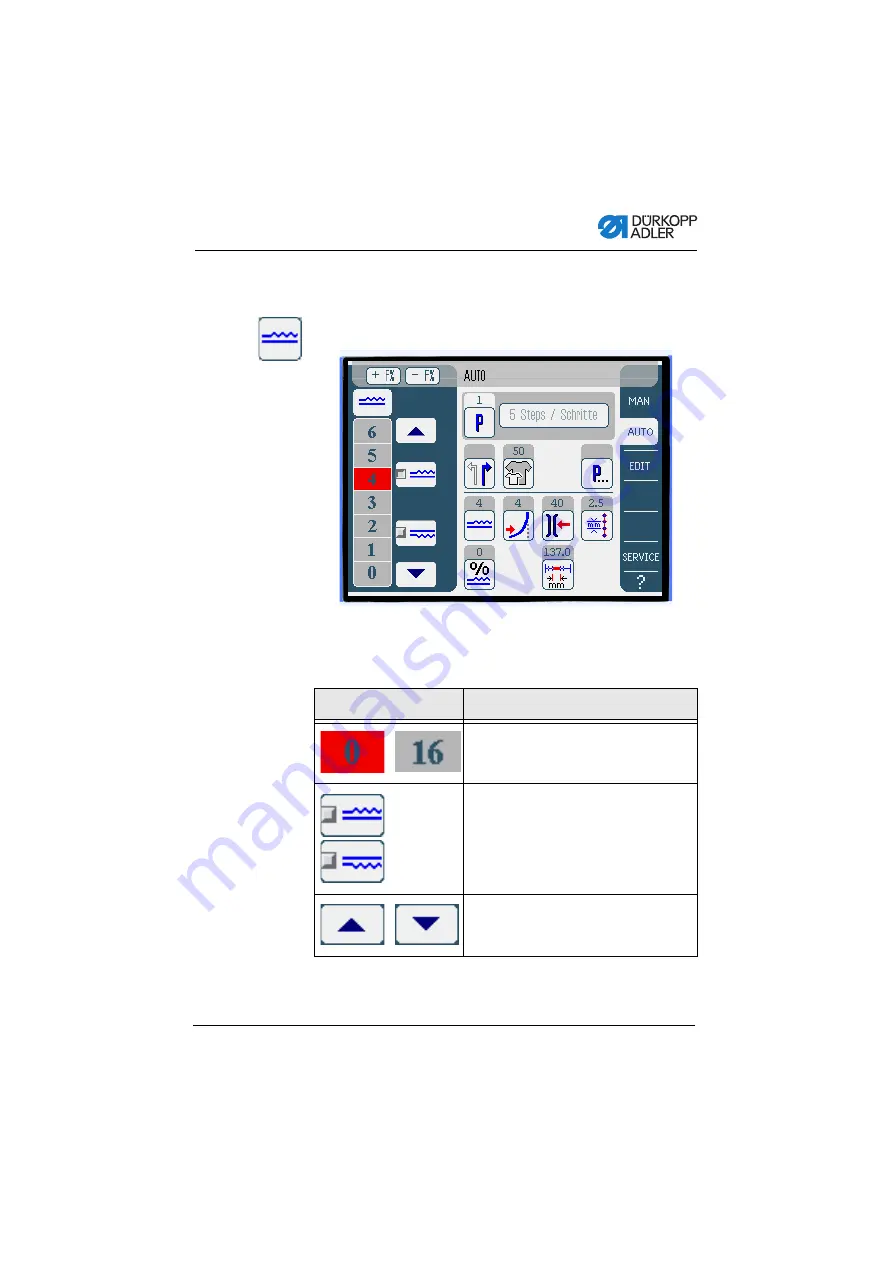
Temporarily correcting the fullness value until the next
sewing step
Fig. 50: Temporarily correcting the fullness value until the next sewing
step
Buttons for manually inputting the fullness are displayed in the left
pane.
Symbol/button
Meaning
Input the fullness.
The fullness setting is displayed by a
button highlighted in red.
Select the type of fullness:
• Upper (upper transport)
• Lower (lower transport)
The fullness selected is displayed in an
activated control field.
Display of further buttons for inputting the
fullness. The buttons 0 to 16 are available
for input.
Summary of Contents for 650-10
Page 1: ...650 10 Operating Instructions ...
Page 6: ...Table of Contents Operating Instructions 650 10 03 0 08 2016 4 ...
Page 16: ...Safety Operating Instructions 650 10 03 0 08 2016 14 ...
Page 20: ...Machine description Operating Instructions 650 10 03 0 08 2016 18 ...
Page 66: ...Service settings via software OP3000 Operating Instructions 650 10 03 0 08 2016 64 ...
Page 112: ...Settings via software OP7000 Operating Instructions 650 10 03 0 08 2016 110 ...
Page 118: ...Maintenance Operating Instructions 650 10 03 0 08 2016 116 ...
Page 136: ...Decommissioning Operating Instructions 650 10 03 0 08 2016 134 ...
Page 138: ...Disposal Operating Instructions 650 10 03 0 08 2016 136 ...
Page 160: ...Troubleshooting Operating Instructions 650 10 03 0 08 2016 158 ...
Page 162: ...Technical data Operating Instructions 650 10 03 0 08 2016 160 ...
Page 168: ...Appendix Operating Instructions 650 10 03 0 08 2016 166 Fig 95 Wiring diagram 1 ...
Page 175: ......


