background image

Disposal

Operating manual H868 Version 00.0 - 07/2013

73

8 Disposal

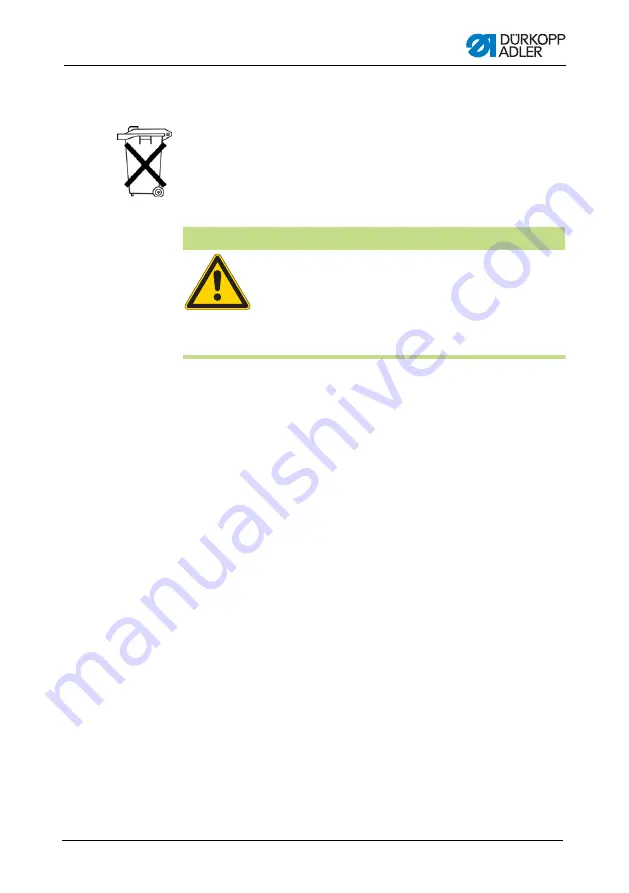
The machine must not be disposed of in the normal household 
waste.

The machine must be disposed of in an appropriate and correct 
manner according to the national regulations.

When disposing of the machine, be aware that it consists of a 
range of different materials (steel, plastic, electronic components, 
etc.).

Observe the applicable national regulations for disposal.

Risk of environmental damage due to incorrect 
disposal

Incorrect disposal of old oil can result in severe 
environmental damage.
Always observe the legally prescribed regulations 
for disposal.

ATTENTION

Summary of Contents for H868

Page 1: ...H868 Operating Manual ...

Page 2: ...reserved Property of Dürkopp Adler AG and protected by copyright Any reuse of these contents including extracts is prohibited without the prior written approval of Dürkopp Adler AG Copyright Dürkopp Adler AG 2013 ...

Page 3: ...ower supply on and off 17 5 2 Inserting and replacing the needle 18 5 3 Threading in the needle thread 19 5 4 Inserting and winding on the hook thread 22 5 5 Replacing the hook thread bobbin 25 5 6 Adjusting the thread tension 26 5 6 1 Adjusting the needle thread tension 27 5 6 2 Adjusting the hook thread tension 28 5 7 Setting the thread regulator 29 5 8 Lifting the sewing feet 30 5 9 Locking the...

Page 4: ...achine upper section 55 6 10 Fitting the oil extraction line 56 6 11 Fitting the knee lever 57 6 11 1 Fitting the electric knee lever 57 6 11 2 Fitting the mechanical knee lever 58 6 12 Fitting the control panel 59 6 13 Electrical connection 61 6 13 1 Fitting the sewing lamp 61 6 13 2 Fitting and connecting the sewing lamp transformer 62 6 13 3 Connecting the direct drive 64 6 14 Pneumatic connect...

Page 5: ...duct on to third parties together with the operating manual 1 1 Area of applicability This manual describes the intended use and the set up of the special sewing machine H868 1 2 Target group The operating manual is intended for Operating personnel This group of employees has been trained in operating the machine and can access the operating manual Specifically Section 5 Operation is important for...

Page 6: ...t or left must always be regarded from the operator s point of view if the figure gives no other obvious indication for determining the location 1 4 Other documents The device contains built in components from other manufactur ers The respective manufacturers have carried out hazard as sessments for these purchased parts and confirmed compliance of the design with the applicable European and natio...

Page 7: ...e machines devices and packaging material in the condition they were at the time the damage was identified That secures any claims towards the transport company Report all other complaints to Dürkopp Adler immediately after receiving the product 1 7 Intended use The Dürkopp Adler H868 is for intended for sewing moderately heavy to heavy material Moderately heavy material requires needles strengths...

Page 8: ...held liable for damage resulting from improper use Danger due to high voltage crushing and sharp objects Improper use can result in injuries Please follow all instructions in the manual WARNING Improper use could result in material damage Please follow all instructions in the manual ATTENTION ...

Page 9: ... sewing pedal Asafetysnap oncouplingpreventsanymisadjustmentordamage to the hook in the event of a thread jamming Automatic wick lubrication with an oil level indicator at the column eases lubrication of the machine and hook The special sewing machine is equipped with a 6 key keypad An additional switch is located in easy reach of the sewer and can be assigned 6 functions Possible operating functi...

Page 10: ...90361 H868 290361 0868 590014 Residual thread monitor for the hook thread 3XL hook 1 needle machines 0868 590024 Residual thread monitor for the hook thread 3XL hook 2 needle machines 0867 490010 Operating panel bracket 9822 510003 Halogen sewing lamp for upper sewing machine section 9880 867100 Sewing lamp attachment set 0798 500088 Sewing lamp transformer for halogen sewing lamp 9880 867103 1 di...

Page 11: ...andwheel MG55 400364 Frame set for motor attached to the upper section table plate 1060 x 600 mm with pedal MG 55 3 Order number Additional equipment H868 190361 H868 290361 Technical data H868 190361 H868 290361 Length width height mm 650 280 690 Weight without with direct drive kg 72 74 stitch type Lockstitch 301 Hook type Vertical oversize 3XL Number of needles 1 2 Needle system 328 794 and 7x2...

Page 12: ...of the number of stitches with stroke exceeding 4 mm 1500 Reduction of the number of stitches with stroke exceeding 6 mm 1200 Reduction of the number of stitches with stroke exceeding 9 mm 1000 Maximum stroke height only with reversing mechanism 25 Maximum sewing foot stroke 9 Positive operating pressure bar 6 Air consumption NL 0 7 Rated voltage V Hz 1x230 V 50 60 Hz Rated power kVA 375 W Technic...

Page 13: ...the main switch or by disconnecting the power plug Replacing the needle or other sewing tools Leaving the workplace Performing maintenance work and repairs Incorrect or faulty spare parts can impair safety and damage the machine Therefore only use original spare parts from the manufacturer Feed Use a sturdy lifting carriage or forklift for transporting the machine Raise the machine max 20 mm and s...

Page 14: ...hine may not be used any more Safety equipment Safety equipment may not be removed or put out of service If this cannot be avoided for a repair operation the safety equipment must be refitted and put back into service immediately afterwards 3 2 Signal words and symbols used in warnings Warnings in the text are distinguished by color bars The color scheme is oriented towards the severity of the dan...

Page 15: ...te looks like for a hazard that will result in serious injury or even death if not complied with DANGER Type and source of the danger Consequences in the event of noncompliance Measures for avoiding the danger This is what a hazard note looks like for a hazard that could result in serious injury or even death if not complied with WARNING Type and source of the danger Consequences in the event of n...

Page 16: ... the danger This is what a hazard note looks like for a hazard that could result in material damage if not complied with ATTENTION Type and source of the danger Consequences in the event of noncompliance Measures for avoiding the danger This is what an hazard note looks like for a hazard that could result in environmental damage if not complied with ATTENTION ...

Page 17: ...el holder 2 Handwheel 3 Bobbin winder for the hook thread 4 Oil level indicator 5 Adjusting wheels for the stitch length 6 Stitch adjustment lever 7 Hook 8 Sewing foot with needle 9 Keypad on the machine arm 10 Thread tensions 11 Adjusting wheel for the sewing foot pressure 12 Adjusting wheels for the sewing foot stroke 2 3 4 5 6 7 8 9 10 11 12 1 ...

Page 18: ...Device description Operating manual H868 Version 00 0 07 2013 16 ...

Page 19: ...itching the power supply on and off To switch on the power Press the main switch 2 down to position I The indicator lamps 3 and 4 light up To switch off the power Press the main switch 2 up to position 0 The indicator lamps 3 and 4 go out 1 Switch for the sewing lamp 2 Main power supply switch 3 Indicator lamp on the controller 4 Indicator lamp on the keypad for quick functions 4 1 3 2 ...

Page 20: ...le in such a way that the groove 4 faces the hook 3 6 Tighten the needle screw 2 2 needle machines Note on 2 needle machines The procedure for the second needle of 2 needle machines is identical Align the needles in such a way that the grooves face away from each other Each groove then faces the hook that belongs to this needle Risk of injury by the needle point and moving parts Switch off the sew...

Page 21: ...e unwinding bracket 2 Damage to the hook point or needle possible due to incorrect distance from the hook The distance between the hook and the needle only needs to be adjusted if the new needle has a different size After changing the needle size adjust the hook distance For more information see Service manual WARNING Risk of injury by the needle point and moving parts Switch off the sewing machin...

Page 22: ...nally from below to above through the left hole 3 Guide the thread clockwise around the pre tensioner 3 4 Guide the thread counterclockwise around the additional tensioner 4 5 Guide the thread clockwise around the main tensioner 5 6 Guide the thread under the additional screw 6 to the thread tensioning spring 7 Lift the tightening lever 9 with the thread 8 Pull the thread under the spring tip 8 1 ...

Page 23: ... thread guide 15 13 Insert the thread through a hole in the lower thread guide 14 14 Insert the thread through the thread guide on the needle bar 13 15 Insert the thread through the needle eye 12 in such a way that the loose thread end faces the hook 16 Pull the thread through the needle eye 12 until the loose thread end has a length of 4 cm in the highest position at the thread lever 10 10 Thread...

Page 24: ...uch a way that the threads do not intersect 2 First guide the left hand needle thread through the left hand guideholesandaroundtheleft handtensioningscrewtriangle 3 Then guide the right hand needle thread through the right hand guide holes and around the right hand tensioning screw triangle 5 4 Inserting and winding on the hook thread 1 Tensioning screws in triangular arrangement for the second ne...

Page 25: ...d part 1 1 Insert the thread from the rear to the front through the right hole in the 1st thread guide 1 2 Insert the thread in a wavelike manner through the 3 holes of the 2nd thread guide 5 from top to bottom through the left hole from bottom to top through the hole in the middle and finally from top to bottom through the right hole 2 1 1 Thread stand 2 Guide on the unwinding bracket 1 1st threa...

Page 26: ...er 2 3 Turn the bobbin clockwise until it clicks 4 Pull the bobbin lever 3 up The hook thread is normally wound on when sewing is in progress However you can also wind on the hook thread without sewing material e g if you require a full bobbin in order to start sewing 1 Switch on the sewing machine 2 Press the foot pedal forwards The machine sews and winds the hook thread from the thread 1 Cutter ...

Page 27: ...lacing the hook thread bobbin 6 Repeat the winding on procedure with an empty bobbin as described above 5 5 Replacing the hook thread bobbin Figure 11 Replacing the hook thread bobbin 1 Lift the hook flap 1 2 Remove the empty bobbin 3 Insert the full bobbin so that it moves in the opposite direction of the hook when the thread is pulled out Risk of injury by the needle point and moving parts Switc...

Page 28: ...ook thread and needle thread back together and hold them tight when sewing starts to avoid jamming the threads 5 6 Adjusting the thread tension The tension of needle thread and hook thread determines the position of the thread interlacing If the tension of needle thread and hook thread is identical the thread interlacing lies in the middle of the material to be sewn Figure 12 interlacing q w e 1 I...

Page 29: ...sewing e g for thickened seams The additional tension 2 is switched on and off using the keypad The additional tension 2 must always be selected lower than the main tension 3 In the basic position the top of the adjusting wheel is flush with the screw in the center To increase the tension Turn the adjusting wheel clockwise To reduce the tension Turn the adjusting wheel counterclockwise The pre ten...

Page 30: ...The hook thread tension is adjusted using the adjusting screw 1 To increase the tension Turn the adjusting screw 1 clockwise To reduce the tension Turn the adjustment screw 1 counterclockwise Risk of injury by the needle point and moving parts Switch off the sewing machine before adjusting the hook thread tension WARNING 1 Adjusting screw 1 ...

Page 31: ...nsionoverthethickest point of the hook Figure 15 Setting the thread regulator 1 Loosen the regulator screw 2 2 To increase the tension Slide the thread regulator 1 to the right To reduce the tension Slide the thread regulator 1 to the left 3 Tighten the regulator screw 2 Risk of injury by the needle point and moving parts Switch off the sewing machine before setting the thread regulator WARNING 1 ...

Page 32: ...ain up as long as the foot pedal is pressed back half the way If the foot pedal is pressed back completely the machine sews an end strip and stops sewing Machines with automatic thread cutter cut the thread off 5 9 Locking the sewing feet in the upper position There is a lever at the back of the machine for holding the sewing feet in the upper position Figure 17 Holding the sewing feet in the uppe...

Page 33: ...ved 5 10 Sewing foot pressure Theadjustingwheelatthetopleftdeterminesthecontactpressure of the sewing foot on the material to be sewn The pressure can be adjusted continuously by turning the wheel Figure 18 Adjusting wheel for the sewing foot pressure To increase the sewing foot pressure Turn the adjusting wheel 1 clockwise Risk of crushing when lowering the sewing foot Do not hold your hands unde...

Page 34: ...oot stroke To increase the sewing foot stroke Turn the adjusting wheel clockwise To reduce the sewing foot stroke Turn the adjusting wheel counterclockwise The left adjusting wheel 1 determines the normal sewing foot stroke Damage to the material possible if the sewing foot pressure setting is incorrect If the sewing foot pressure is too high the material could tear If the sewing foot pressure is ...

Page 35: ...ight to switch on the elevated sewing foot stroke 3 Press the knee lever 1 to the right again to switch off the elevated sewing foot stroke For temporary conversion 1 Turn the switch 2 down 2 Press the knee lever 1 to the right and hold it in position to switch on the elevated sewing foot stroke The elevated sewing foot stroke is retained as long as the knee lever is pushed to the right 3 Release ...

Page 36: ...Figure 21 Adjusting wheels for the stitch length Machine damage possible if the adjusting wheels are turned using brute force The machine is designed in such a way that the sewing foot stroke at the right adjusting wheel cannot be set lower than at the left adjusting wheel Do not attempt to use brute force to set a smaller sewing foot stroke at the right adjusting wheel ATTENTION 0 1 2 4 3 5 6 7 8...

Page 37: ...ive the stitch length button 4 on the keypad on the machine arm lights up The larger stitch length must not be shorter than the smaller stitch length Always select the same or a higher stitch length at the upper adjusting wheel 1 than at the lower adjusting wheel 2 The stitch adjustment lever on the machine arm reduces the stitch length down to sewing backwards in the lower end position Machine da...

Page 38: ...5 13 Setting quick functions at the keypad The keys activate specific functions during sewing Figure 23 Keypad for quick functions 1 Stitch adjustment lever 0 1 2 4 3 5 6 7 8 9 1 0 11 12 0 1 2 4 3 5 6 7 8 9 10 11 1 2 mm mm 1 1 Key for sewing backwards 2 Key for the position of the needle 3 Key for the start and end strips 4 Key for the stitch length 5 Key for the additional thread tension 6 Key no...

Page 39: ...e switched on pressing the key 3 sews the next strip For the general setting for sewing start and end strips refer to the manual DAC Classic control Key for the stitch length 4 If the key 4 is selected the machine sews using the larger stitch length selected at the upper adjusting wheel for the stitch length Key for the additional thread tension 5 If the key 5 is selected the additional thread ten...

Page 40: ...st be turned back to their horizontal basic position To transfer a key function 1 Turn all screws to their basic position 6 so that the slots are horizontal 2 Turn the screw under the desired key 90 so that the slot is vertical 7 1 Key for sewing backwards 2 Key for the position of the needle 3 Key for the start and end strips 4 Key for the stitch length 5 Key for the additional thread tension 6 S...

Page 41: ...d 2 Push the material to be sewn into the initial position Sewing Press the foot pedal forwards in pedal position 1 The machine sews The sewing speed increases the further forward the pedal is pressed Risk of injury from the needle tip when sewing is started unintentionally Take care not to accidentally press the foot pedal when your fingers are in the needle tip area WARNING 1 Pedal position 1 se...

Page 42: ...sion using the key for the quick function Section 5 13 Switching on the quick functions at the keypad To sew intermediate bartacks Reverse sewing with the stitch adjustment lever Section 5 12 Stitch length or the quick function key Section 3 13 Keypad for quick functions To finish a seam 1 Press the foot pedal back completely in pedal position 2 The machine sews the end strip and the thread cutter...

Page 43: ...ghly Areas particularly susceptible to soiling Cutter on the bobbin winder for the hook thread 1 Hook 2 Area around the needle at the column 3 Risk of injury by the needle point and moving parts Switch off the sewing machine before carrying out maintenance work WARNING Malfunctions possible due to machine contamination Sewing dust and thread remains can impair the operation of the machine Clean th...

Page 44: ...nto the oil pan WARNING Possible damage to the paintwork from solvent based cleaners Solvent based cleaners damage the paintwork of the machine Use only solvent free substances for cleaning the machine ATTENTION Skin injuries due to contact with oil Oil can cause a rash if it comes into contact with the skin Avoid any skin contact with the oil If oil gets on your skin wash the affected skin WARNIN...

Page 45: ... for machines with CLASSIC equipment If the oil level falls below the minimum level marking 3 on CLASSIC machines the oil level indicator lights up in red Switch the sewing machine off and on again after filling with oil so that the red lamp goes out Oil to be used Only DA 10 or an oil of equivalent quality may be used for the machine which has the following properties Viscosity at 40 C 10 mm s Fl...

Page 46: ...tant and must not enter the sewage system or the soil Carefully collect waste oil and dispose of the waste oil and oil contaminated machine parts in the legally prescribed manner ATTENTION 0 2 8 4 6 10 w q 1 Reference value 6 bar 2 Pressure indicator Machine damage possible due to incorrect pressure An incorrect pressure can cause damage to the machine Check the pressure on a daily basis Have the ...

Page 47: ...ewing machine at the main switch 2 Place the collection tray under the drain screw 3 3 Unscrew the drain screw 3 completely 4 Allow water to drain into the collection tray 5 Re tighten the drain screw 3 6 Switch on the sewing machine at the main switch 0 2 8 4 6 10 w e q 1 Filter element 2 Water separator 3 Drain screw Machine damage possible if there is too much water Too much water can cause dam...

Page 48: ... 46 5 16 Customer service Contacts for repair in the event of damage to the machine Dürkopp Adler AG Potsdamer Str 190 33719 Bielefeld Germany Tel 49 0 180 5 383 756 Fax 49 0 521 925 2594 E mail service duerkopp adler com Internet www duerkopp adler com ...

Page 49: ...ecking the scope of delivery The delivery scope depends on the order Prior to set up check that all parts required are present Risk of injury The machine may only be set up by trained specialists Wear safety gloves and safety shoes when unpacking and setting up WARNING ...

Page 50: ...Version 00 0 07 2013 48 Figure 30 Delivery scope 1 Thread stand 2 Machine upper section 3 Oil pan 4 Controller 5 Pneumatics 6 Knee lever 7 Pedal 8 Frame 9 Drawer 10 Table plate 11 Control panel 0 2 8 4 6 10 1 3 2 4 6 5 7 8 9 10 11 ...

Page 51: ...sport securing devices must be removed prior to set up 1 Remove the lashing straps and wooden blocks from the machine upper section the table and the frame 2 Remove the supporting wedges between the machine arm and needle plate 6 3 Fitting the frame components Figure 31 Fitting the frame components 1 Screw the cross bars 4 onto the frame bars 3 2 Screw the oil can holder 7 at the rear to the upper...

Page 52: ...d sections 1 have the same height 6 4 Fitting the pedal Figure 32 Fitting the pedal 1 Fit the pedal 1 on the cross strut 2 and align it in such a way that the middle of the pedal is under the needle 2 Screw the pedal 1 firmly onto the cross strut 2 6 5 Completing the table plate Making your own table plate The table plate belongs to the optional delivery scope If you want to make your own table pl...

Page 53: ...ate 2 Screw the oil pan 4 in place under the recess for the machine 3 Screw the cable duct 7 to the underside of the table plate 4 Insert the thread stand 1 into the hole 5 Fasten the thread stand 1 with nut and washer 1 Thread stand 2 Hole in the table plate 3 Corner projections 4 Oil pan 5 Drawer 6 Recesses for the rubber mounts of the hinge 7 Cable duct 1 2 4 5 3 6 7 ...

Page 54: ...e plug 2 in the hole 8 Insert the rubber mounts of the hinge in the recesses 6 9 Insert the rubber corners in the corner protrusions 3 of the recess for the machine 6 6 Fastening the table plate to the frame Figure 34 Fastening the table plate to the frame 1 Place the table plate on the head sections of the inner bars 2 Screw the table plate firmly in place at the 4 screw holes 1 1 Screw holes and...

Page 55: ...e 35 Fitting the controller 1 Screw the controller 2 onto the 4 screw holders 1 under the table plate 2 Clamp the power cable of the control 2 into the strain relief mechanism 3 3 Screw the strain relief 3 under the table plate 1 Screw holder 2 Controller 3 Strain relief mechanism 1 2 3 ...

Page 56: ...6 Fitting the setpoint device 1 Screw the angle 1 under the table plate 2 Screw the setpoint device 2 onto the angle piece 1 3 Pull the pedal rod 3 to the correct length 10 inclination with pedal 4 released 4 Attach the pedal rod 3 10 1 2 3 4 1 Angle piece 2 Setpoint device 3 Pedal rod 4 Pedal ...

Page 57: ...er section Figure 37 Inserting the machine upper section 1 Screw the upper hinge parts 1 onto the machine upper section 2 Insert the upper hinge parts 1 into the rubber inlays 2 3 Fold the machine upper section down and insert it in the recess 1 Upper hinge parts 2 Rubber inlays 1 2 ...

Page 58: ...tion line Figure 38 Fitting the oil extraction line 1 Fold the machine upper section back 2 Screw the felt mat 2 into the oil pan with the plastic adapter on the right 3 Insert the tube of the oil extraction line 1 into the plastic adapter 1 Oil extraction line hose 2 Felt mat 1 2 ...

Page 59: ... Figure 39 Fitting the electric knee lever 1 Screw the knee lever 1 under the oil pan firmly in place under the table plate 2 Guide the connecting cable 2 to the back between the oil pan and the control 3 Insert the plug 3 of the connecting cable in the socket of the control 1 Knee lever 2 Connecting cable 3 Plug 1 2 3 ...

Page 60: ...0 Fitting the mechanical knee lever 1 Fold the machine upper section back 2 Fit the transmission rod 1 in the oil pan 3 Screw the knee lever 3 rods together 4 Guidetherod 3 throughtheholeintheoilpan 2 andconnect it to the transmission rod 1 1 Transmission rod 2 Hole in the oil pan 3 Knee lever rod 1 2 3 ...

Page 61: ... the control panel Part 1 1 Unscrew the valve cover 4 and upper machine cover 5 2 Screw the control panel 1 firmly onto the control panel bracket 2 3 Install the connecting cable through the cable duct 3 1 Control panel 2 Control panel bracket 3 Cable duct 4 Valve cover 5 Upper machine cover 1 2 3 4 5 ...

Page 62: ...gh the hole in the table plate 6 Insert the plug of the connecting cable in the socket of the control Covers If you have an additional sewing lamp to install as additional equipment Leave the cover open until the sewing lamp has been installed and the sewing lamp cable has been laid 7 Screw the valve cover 4 and upper machine cover 5 back into place 6 Connecting cable 6 ...

Page 63: ...k The machine may only be connected by trained electrical specialists Disconnect the power plug before carrying out work on the electrical equipment Make sure the power plug cannot be unintentionally reinserted The voltage on the type plate of the sewing drive must correspond to the mains voltage DANGER Danger to life due to electric shock When you disconnect the sewing machine from the power supp...

Page 64: ...the control panel 4 Stick the sticker with safety instructions onto the front of the control 6 13 2 Fitting and connecting the sewing lamp transformer 1 Large hole 2 2 small holes 1 2 Danger to life due to electric shock The sewing lamp transformer is connected directly to the power supply If you disconnect the sewing machine from the power supply at the main switch the sewing lamp transformer is ...

Page 65: ...onnecting cable under the table plate using cable ties 3 Establish the plug connection to the supply line for the sewing lamp Figure 45 Connecting the sewing lamp transformer to the control 1 Loosen the screw holder 4 for the control far enough to allow the control to be removed 1 Sewing lamp transformer 2 Pre drilled holes 1 2 1 2 3 4 1 X3 connection 2 24V X5 connection 3 Adapter cover screws 4 S...

Page 66: ...Insert the plugs of all connecting cables in the sockets on the back of the controller Connect the cable for equipotential bonding Connect the controller to the power supply using the power cable 6 14 Pneumatic connection 6 14 1 Fitting the maintenance unit The pneumatic unit is an additional component that is not part of the standard delivery package Machine damage possible due to incorrect press...

Page 67: ... the upper cross bar 4 of the frame using the bracket screws and clip 2 Connect the machine tube 1 coming out of the upper section to the maintenance unit 2 at the top right 3 Connect the system connection tube 3 to the pneumatic system 0 2 8 4 6 10 1 2 3 4 1 Machine hose 2 Maintenance unit 3 System connection hose 4 Cross bar ...

Page 68: ...he pressure Turn the turning handle 1 clockwise To reduce the pressure Turn the turning handle 1 counterclockwise 3 Push the turning handle 1 down Machine damage possible due to incorrect pressure An incorrect pressure can cause damage to the machine The operating pressure for the pneumatic unit is 6 bar Make sure that the operating pressure is set correctly before putting the machine into operati...

Page 69: ...ontact with the skin Avoid any skin contact with the oil If oil gets on your skin wash the affected skin areas thoroughly WARNING MAX MIN q w e 1 Refill opening 2 Maximum level mark 3 Minimum level mark Machine damage possible due to incorrect oil level Too little or too much oil can cause damage to the machine During initial filling only pour in oil up to 2 mm below the maximum level mark ATTENTI...

Page 70: ...scosity at 40 C 10 mm s Flash point 150 C Pour oil through the refill opening 1 up to no more than 2 mm below the maximum level marking 2 Risk of environmental damage from oil Oil is a pollutant and must not enter the sewage system or the soil Collect waste oil carefully and dispose of it and oily machine parts in accordance with the applicable statutory regulations ATTENTION ...

Page 71: ...ial to be sewn 7 Adjust the thread regulator to the material to be sewn 8 Adjust the sewing foot pressure to the material to be sewn 9 Adjust the sewing foot stroke to the material to be sewn 10 Adjust the stitch length 11 Transfer the desired quick function from the keypad to the additional switch 12 Start the sewing test at low speed 13 Increase the sewing speed continuously until the working sp...

Page 72: ...Set up Operating manual H868 Version 00 0 07 2013 70 ...

Page 73: ...pneumatic connection 4 Remove residual oil from the oil pan under the sewing material support using a cloth 5 Cover the operating panel to protect it from soiling 6 Cover the machine to protect it from dirt and damage Risk of injury due to a lack of care A lack of care or a lack of sufficient technical knowledge when decommissioning the machine can result in serious injuries Only clean the machine...

Page 74: ...Decommissioning Operating manual H868 Version 00 0 07 2013 72 ...

Page 75: ...o the national regulations When disposing of the machine be aware that it consists of a range of different materials steel plastic electronic components etc Observe the applicable national regulations for disposal Risk of environmental damage due to incorrect disposal Incorrect disposal of old oil can result in severe environmental damage Always observe the legally prescribed regulations for dispo...

Page 76: ...Disposal Operating manual H868 Version 00 0 07 2013 74 ...

Page 77: ...Appendix Operating manual H868 Version 00 0 07 2013 75 9 Appendix Dimensions for manufacturing a tabletop part 1 ...

Page 78: ...Appendix Operating manual H868 Version 00 0 07 2013 76 Dimensions for manufacturing a tabletop part 2 ...

Page 79: ......

Page 80: ...er Str 190 33719 Bielefeld Germany Phone 49 0 521 925 00 E Mail service duerkopp adler com www duerkopp adler com Subject to design changes Printed in Germany Dürkopp Adler AG Original Instructions 0791 868760 EN 00 0 07 2013 ...

Reviews: