


Set-up
Operating manual H868 Version 00.0 - 07/2013
63
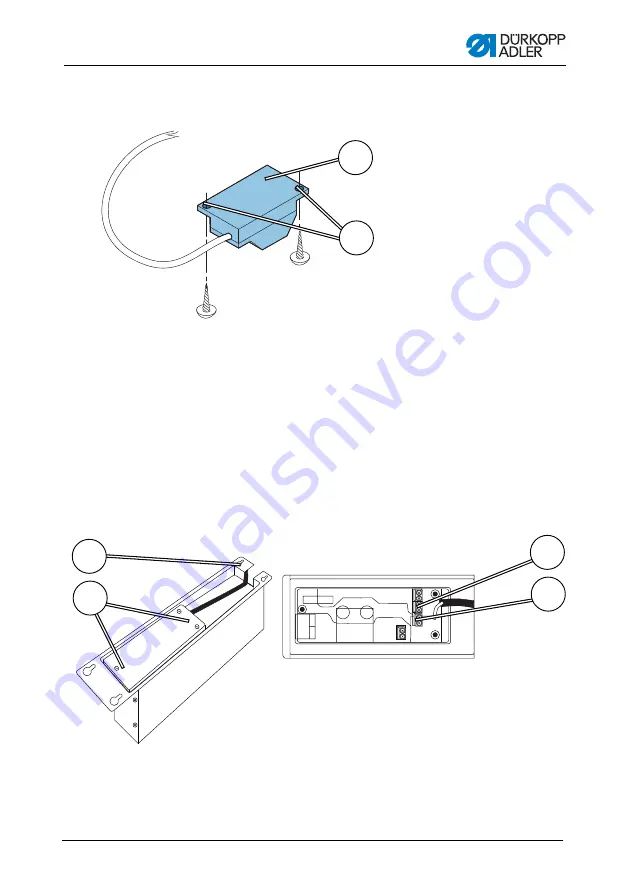
Figure 44: Fitting the sewing lamp transformer
1. Screw the sewing lamp transformer (1) in place at the pre-
drilled holes (2) under the
table plate.
2. Fasten the connecting cable under the table plate using cable
ties.
3. Establish the plug connection to the supply line for the sewing
lamp.
Figure 45: Connecting the sewing lamp transformer to the control
1. Loosen the screw holder (4) for the control far enough to allow
the control to be removed..
(1) - Sewing lamp transformer
(2) - Pre-drilled holes
1
2
1
2
3
4
(1) - X3 connection
(2) - 24V/X5 connection
(3) - Adapter cover screws
(4) - Screw holder
Summary of Contents for H868
Page 1: ...H868 Operating Manual ...
Page 18: ...Device description Operating manual H868 Version 00 0 07 2013 16 ...
Page 72: ...Set up Operating manual H868 Version 00 0 07 2013 70 ...
Page 74: ...Decommissioning Operating manual H868 Version 00 0 07 2013 72 ...
Page 76: ...Disposal Operating manual H868 Version 00 0 07 2013 74 ...
Page 79: ......