17) At the bottom, click the Files of Type dropdown menu.
18) Click on the All Files item, then find the file name of the Excel document you
plan to merge into Word.
19) Note -- make sure you are looking in your My Documents folder.
20) Double-click on the correct Excel document.
21) On the next box you see, “ENTIRE WORKBOOK” will be blue highlighted. Click
OK.
22) You will then see a pop up box with a question mark. Click OK.
23) On your Word document, click on Tools, then Mail merge.
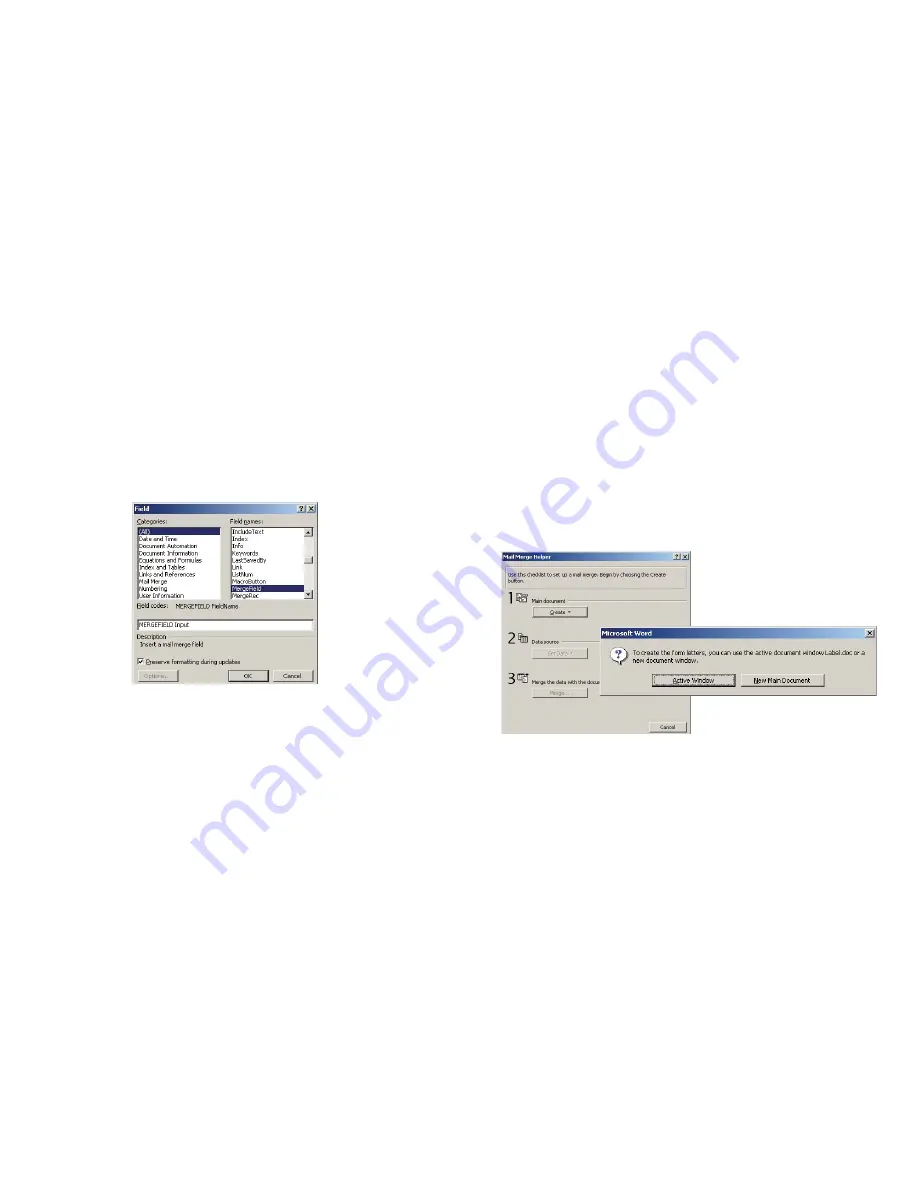
24) Click on Create, then Form Letters, then click Active Window. (See below)
25) Click on Get Data, then click on Open Data Source.
26) At the bottom, you will see Files of Type.
27) Click on the drop down of All Files at the bottom.
28) Find and double-cclick on the file name of your Excel document.
29) Click OK.
45
6) When the text cursor is blinking in the text box, click on the Insert menu and
select Field.
7) The box on the left should remain with the blue highlighting of the word “All”.
8) On the right column, move the cursor so the blue highlight is over MergeField.
9) In the long horizontal box below, “MERGEFIELD” will appear.
10) Put a space after “MERGEFIELD” then type in the column heading from your
Excel document that you will want to merge into the label (i.e., “Input”).
11) It will then look like this: “MERGEFIELD Input” (See below)
12) Click OK and the box will vanish.
13) At this point, you should have the word “Input” (for example) in your text box.
14) Create an additional text box(es) within the label and repeat steps 3-12 for each
additional cell you plan to transfer from the Excel document into the Word label.
15) Close the Excel document.
16) On the word toolbar, click on Tools then Merge documents.
44


