


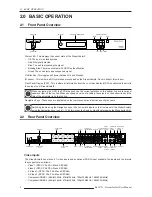


2.0 BASIC OPERATION
R699751 - DreamScaler3 User Manual
11
To install the remote control batteries:
1) Locate the battery compartment on the back of the remote control.
2) Remove the cover from the back. To do this, press the tab attached to the cover and pull the cover with the
guide on the back of the remote control.
3) Remove the old batteries (if applicable).
4) Insert two new AA batteries in the compartment as shown on the inside of the battery compartment. Make sure
the batteries are correctly inserted, observing the proper polarity.
5) After installation, replace the cover and dispose of the old batteries (if applicable).
Menu Navigation
You can control the DreamScaler3 as follows:
•
From the front panel controls
•
From the remote control
•
From a programmed universal remote control
•
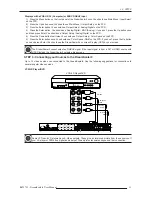
Using the serial connection on the back panel
The menu navigation controls on the remote control are duplicated on the front panel of the DreamScaler3.
To navigate the menu:
1) Press the Menu button.
2) Use the directional buttons to highlight the parameter you want to change.
3) Press the Enter button to select the parameter and the Left and Right arrow buttons to change the chosen
parameter.
4) Press the Exit button to exit out of the menu/OSD.
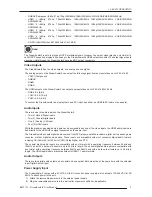
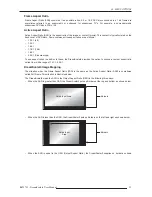
Info Screen Button
Press the Info button to display a window that shows information about the system including:
Input Status
Video Source
Signal Type
Audio Source
Aspect Ratio (Frame/Active)
Output Status
Resolution
Frame Rate
Line Rate
Aspect Ratio (Display/Screen)
This screen can be helpful during troubleshooting.