Dover Imaje S7 Mega Manual Download Page 86

84

A19620 C

Use of the Terminal

6.4.4

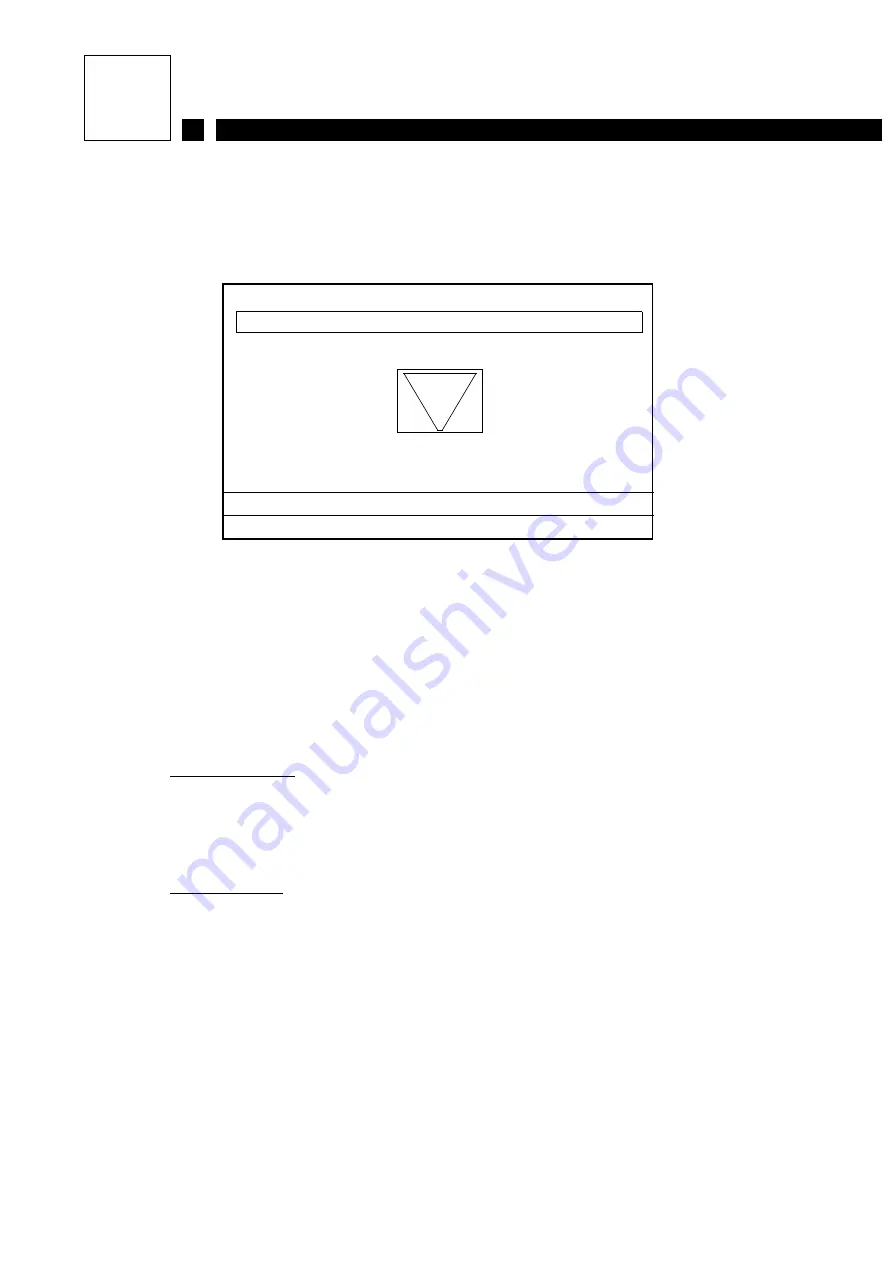
Symbol display screen

This screen can be used to display and select a symbol from an existing font in order to enable the
shape, size or number to be modified if desired.

format = symbol format: height * width.

num = number of the symbol in the font/number of symbols in the font.

ref = symbol reference in decimals (the reference begins at 32 ($20)).

Selecting a symbol:

Key

d

to display the following symbol.

Key

c

to display the preceding symbol.

Access to edition:

Key

h

.

S7

FRANCE

: 202 003/004

Symbol

Size

Choice of a symbol in the selected font

← →

ALT

ALT

selection and VALID

Format: 016*016 num: 003/004 ref: 034

Summary of Contents for Imaje S7 Mega

Page 1: ......

Page 2: ...r šŒ ˆ Œ šˆ ˆ t ˆ šŒ Š c ˆ tˆ Œ ˆ Œ Œ šŒ i šO š š ˆ šŒ gˆ ˆ i š šŒ š š ˆ Œ šˆ u ˆ š ˆ šˆ Œ u ˆ š ˆ ˆ š Œ šˆ ˆ 1 7 17 85 101 115 129 135 141 A19620 C ...

Page 3: ...trix characters 2 1 2 Deflected continuous ink jet 3 2 Preparing the printer 4 2 1 Initialization 4 2 2 Functions depending on the type of printer 4 3 Editing a message 5 3 1 Message 5 3 2 Font 5 3 3 Variables 5 3 4 Parameters 6 4 Editing symbols 6 5 Production 6 ...

Page 4: ...1 Dot matrix characters Each symbol letter digit punctuation mark etc is contained within a rectangular area known as the matrix divided into columns known as trames and defined by height and width Example 7 x 6 matrix 16 x 12 matrix The first digit is the number of dots per trame and the second digit is the number of trames per matrix time between trames empty trame full trame 7 x 6 matrix 16 x 1...

Page 5: ...tter 6 to be re used The droplets used for printing are polarized electrically by a charge electrode 4 and then deflected from their initial path by two deflector plates 5 to produce the required symbol The deflection of a droplet depends on its polarization value The droplets are deposited on the item to be printed A character is formed trame by trame these trames may be full partial or empty Mov...

Page 6: ...first time the machine is used They will then be stored in memory This is used to choose the language for operator dialog to adjust the clock and to configure the link between the printer and another device 2 2 Functions depending on the type of printer Some functions may or may not be present depending on the type of printer SIGMA MEGA SUPRA ...

Page 7: ...nted or modified when required 3 2 Font A font is the graphic style of a character The same character may be printed in different fonts Example Each character thus defined may be stretched Example Similarly adjustable spaces may be inserted between characters this is known as the tabulation 3 3 Variables A variable is an element which varies with time such as a time or date stamp or a counter func...

Page 8: ...ection In the same way the variable parameters counter and time and date functions must be set to be updated as required 4 Editing symbols Editing symbols means the creation of characters signs drawings or logos and storing them in memory for later use 5 Production Now that your printer is ready initialized and the messages are programmed you can start production Simply switch on the printer and s...

Page 9: ...view 8 2 The printer body 9 2 1 The ink and additive cartridges 9 2 2 The operator interface 9 3 The print head 10 4 The Terminal 12 5 The Industrial Interface cassette 13 6 The Extension cassette 14 7 The head pressurisation accessory and the head drying kit 15 ...

Page 10: ...tration below gives an overall view of the printer to enable you to identify the different parts of the unit 1 Extension cassette 2 Ink and additive cartridges 3 Print head 4 Umbilical 5 Terminal 6 Printer body 7 Industrial interface cassette 7 6 3 1 2 4 5 Figure 1 ...

Page 11: ...electrical and hydraulic control modules NOTE The Extension cassette provides a means of extending the printer features The printer body can be moved by means of the two holding points which can be accessed above the Operator Interface beneath the S7 SIGMA MEGA label 2 1 The ink and additive cartridges There are two models of ink and additive cartridge Small capacity of 0 42 l Large capacity of 0 ...

Page 12: ...ad Single or twin jet M type head This means that between 1 and 8 lines of symbols can be printed depending on the head and fonts used The type G or M depends on the application in use and is recognised by different size sub assembly electrodes For all types of head the removable cover is opened and closed as shown in figure 1 Figure 1 Opening and closing the print head cover Figure 1 ...

Page 13: ...er Figure 2 Single and twin jet heads covers removed 1 Removable cover 2 Recuperation tap 3 Recuperation gutter 4 Deflection plates 5 Detection electrode 6 Charge electrode 7 Cannon 8 Top front cover 9 Umbilical Figure 2 8 7 6 5 4 3 2 1 9 ...

Page 14: ...rge liquid crystal screen which is used to display messages in WYSIWYG format what you see is what you get and for providing help messages for programming and maintenance The Terminal is both tough and user friendly and is therefore very well suited for use in an industrial environment Four types of terminal are available a standard Latin terminal and Chinese Arabic and Hebrew terminals Figure 1 S...

Page 15: ...ions associated with various functions reversing the direction of the message initialising the counter message selection Parallel Interface Message Increment etc NOTE The printer cannot operate correctly if the Industrial Interface cassette is not in position It is essential that this cassette is connected or disconnected after the printer has been switched off when the ON OFF message has cleared ...

Page 16: ...in another printer with the same configuration The cassette is only connected to the machine for message transfer operations This casette can also be used to drive the printer from a controller or PC using a serial link Depending on the type of cassette fitted to your printer you can use CurvePrint fonts an RS232 V24 serial link capable of current loop operation an RS422 serial link WARNING It is ...

Page 17: ...cessory is also recommended within dusty and humid environments Clean air supply maintains a constant hygrometry in the print head for the best performances with slow and medium drying inks The blower is used for drying the head electrodes quickly whenever cleaning has been carried out with slow and medium drying inks Figure 1 Printer head pressurisation accessory and drying kit 1 Blower 2 Head pr...

Page 18: ...16 A19620 C Introduction to the printer NOTES ...

Page 19: ...b menus functions or commands are organised 26 3 PRODUCTION Menu 27 3 1 Printer 27 3 2 Message 28 3 3 Status 30 3 4 mAint 31 4 MESSAGE EDITING Menu 33 4 1 Message 33 4 2 Font 36 4 3 Variables 46 4 4 Parameters 52 4 5 Example of message programmation 59 5 PRINTER PREPARATION Menu 67 5 1 Initialization 67 5 2 Options 76 5 3 Access codes 76 6 SYMBOL EDITING Menu 77 6 1 Symbol 77 6 2 Size 79 6 3 Gener...

Page 20: ...s bar is always displayed A function or command box is shown for each sub menu when validated A function or command can then be selected and validated and the box is cleared from the screen to leave the working area free NOTE The sub menus and functions cannot be accessed when they are shown in dotted line form The sub menu and functions selected are displayed in white against a black background S...

Page 21: ...components of a message in the MESSAGE EDITING menu font date and time stamp bar code tabulation etc Display pictograms ñ upper case for latin alphabet or upper character of a key for Chinese Arabic or Hebrew characters tab mode For Chinese Arabic and Hebrew terminals a symbol indicates that the keyboard is in non Latin character mode Example in the case of an Arabic terminal Arabic character mode...

Page 22: ... lower case letters for latin alphabet In upper case mode a symbol is shown at the bottom right of the screen Ý If you use Chinese Arabic or Hebrew characters this key alternates between the top character and the bottom character for each key When upper case letters are activated a pictogram appears at the bottom right of the screen Ý g This key is used in Message editing to select one of the foll...

Page 23: ...e e g kFfor Font m This key is used to insert an empty space in the font selected in Message editing mode This key is also used for making choices in the various dialog boxes which you will come across while using the printer In this respect the ikey serves the same purpose ne These keys are to go to the message end from any position You can also use them to reach the last item of a list e g libra...

Page 24: ... Font Tabulation function When the cursor is placed in front of a tabulation the help zone shows tabulation x where x is the number of trames for this tabulation Trames can be inserted one by one by pressing the d key and can be deleted by pressing the ckey The cursor can be moved one point upwards towards the top of the message by pressing the a key and one point downwards by pressing the b key T...

Page 25: ...SSAGE EDITING Set up a new message for selection and VALID Message Font Variables Parameters New Open Save save As Load printer Delete Close h f S7 MESSAGE EDITING Message name capture VALID EXIT to quit Message Font Variables Parameters Message name FRANCE f You are offered another choice Continue step by step until you come to the function or command required three levels at the most The various...

Page 26: ...rent keys for moving in the library The Name number selection mode can be used for searching for a message with only a few contiguous letters The printer will then provide a list on the basis of these characters in alphanumerical order With the Number name selection it is possible to position in the library or choose a message by inputting a three figure number in Select S7 PRODUCTION Mode Selecti...

Page 27: ... creating messages modifying them and setting their parameters PRINTER PREPARATION the PRINTER PREPARATION menu contains all the functions used for initialising the printer when it is used for the first time SYMBOL EDITING the SYMBOL EDITING menu contains all the functions and commands used to create and modify symbols logos and drawings This menu is only present on S7 MEGA and SUPRA printers S7 M...

Page 28: ...inter Jet start jEt stop Manual print Message Select message sAve library Load library Display init counters mAint Jet maintenance Fault override List of faults Exchange date Software version Status Message New Open Save save As Load printer Delete Close Font select Font Select symbols Bolderization Tabulation barCodes Parameters Message Counter Postdate Barcode Variables Counter Hour Date Autodat...

Page 29: ... the variable items which are updated every second 3 1 Printer The PRINTER submenu is used to start up or shut down the printer as well as to start or stop the jets It can also be used to perform a print test The printer is usually started up and shut down from the operator interface using the pkey S7 PRODUCTION Printer Message Status mAint Printer Start up printer sHut down printer Jet start jEt ...

Page 30: ...ette It is only available for S7 Mega and Supra printers A warning message is displayed to indicate that this operation will delete all messages present in the cassette The operation must be confirmed twice CAUTION 1 Messages you create with the extension cassette connected are saved in the extension cassette 2 If the memory in the command module is empty and you use the save function the extensio...

Page 31: ...t of printer 1 the one containing the data you want to retrieve 2 Connect the cassette to printer 2 the one you want to copy the data to 3 Copy the data using the Load library function 4 Take the cassette out of printer 2 and reinsert the original cassette 5 If you would like to copy the new data onto the original cassette use the sAve library function CAUTION It is essential that the Extension ca...

Page 32: ...e inlet gutter T C Shows the printer operating temperature Jet speed 1 Shows the speed of jet number 1 With a twin jet machine the speed parameter shown is for jet no 2 Display acknowledgement of faults and alarms When faults or alarms occur they are displayed in clear text in a dialog box The figure at the top right indicates the number of faults A recommendation is displayed as to how to correct...

Page 33: ...structions displayed on the screen For further details see the section USE OF THE OPERATOR INTERFACE The procedures associated with these functions are described in the section ROUTINE MAINTENANCE 3 4 2 Fault override You can use this function to deactivate open cover control and or control jet recuperation i e no supervision of these faults is performed Whenever the printer is stopped this functi...

Page 34: ...is used to call up or enter the replacement dates of ink management modules Ink M print management modules Print M power supply modules Power M and command modules Cmde M A counter displays the number of hours of operation for Ink M and Print M and the number of hours during which power has been supplied to Power M and Cmde M Example for the Ink Module 3 4 5 Software version This function is for t...

Page 35: ...o cancel a message from memory or to transfer a message to the printer to be able to test it in print 4 1 1 New The NEW command enables you to create a new message When NEW is selected a dialog box asks you to give a name to your message The name can contain eight numbers or letters After validation a cursor appears at the bottom left of the work zone on the bottom line of your message CAUTION In ...

Page 36: ... stage if required This is the purpose of the SAVE command When this function has been completed your message is still open and remains displayed on the screen It must be closed using the CLOSE command 4 1 4 save As The SAVE AS command is used for saving a new version of an existing message when it has been modified in some way contents font variables or parameters select the original message usin...

Page 37: ...ever it cannot replace the SELECT MESSAGE function on the Operator Interface 4 1 6 Delete This command enables you to delete a message from your printer s memory CAUTION Once a message has been cancelled it cannot be recovered The message to be cancelled is selected from the library in a dialog box As a safeguard you are prompted to confirm cancelling of the message selected 4 1 7 Close Once you h...

Page 38: ...font selected The letters of the Latin alphabet are available in industrial font with matrices 5 7 9 11 and 16 points high in rapid and quality types You also have other fonts Asian Arabic etc depending on the terminal s language option These fonts correspond to the keyboard characters for Chinese Arabic Hebrew and languages using the Latin alphabet For other languages Thai Korean etc they corresp...

Page 39: ...t fonts three types of fonts are available 1x8 2x8 and 16 dots offering heights of 7 11 and 16 dots A special extension cassette is required to use these fonts To enable CurvePrint fonts in this menu the CRV line must be selected in the Algorithm number MESSAGE function of the PARAMETERS sub menu REMARK 1 Once CurvePrint fonts are selected other fonts are no longer available 2 To change from stand...

Page 40: ...s superior to 80 rasters will be not display in the vizualisation window Type of head Number of algorithms Characteristics G 030 3 lines of 5 points high 040 3 lines of 7 points high 041 4 lines of 5 points high 047 2 lines of 7 points high 048 2 lines of 5 points high 050 4 lines of 7 points high M 035 3 lines of 5 points high 036 3 lines of 7 points high 037 4 lines of 5 points high 049 2 lines ...

Page 41: ...ll the characters A window is available under the font for selecting symbols The symbol created is then positioned in the message at the cursor position This function is very useful if you use special fonts with characters which are not included on the keyboard e g logo or the characters Ñ and Ö It is therefore used for creating messages in Korean Thai etc S7 MESSAGE EDITING Train N 006 Message Fo...

Page 42: ...he bolderization factors chosen incorporated what you see on the screen is what you get on the print out 4 2 4 Tabulation This function is used for defining a blank space between two characters or symbols which are not the same as the standard space in the font used The space normally has the same width as a standard character but with this command you can set the width yourself 1 to 255 points In...

Page 43: ...serted as in the message The dialog boxes are identical Extern elemt is used to reserve locations within a code for variable characters to be sent over the external RS232 V24 or RS422 link REMARK 1 In message editing mode when the cursor is placed in front of a bar code that has already been entered use the oand Vkeys simultaneously to display how this bar code was composed 2 At the time of editin...

Page 44: ...2 If you want to enter the shiftcode in your 2 5 interleaved bar code only the numerical representation is possible 3 If you want to enter date and or postdate data items in your 2 5 interleaved bar code only the numerical representation of the month is possible Code 39 Used to transcribe alphabetic characters numbers and the following symbols space These characters may be variables counter date M...

Page 45: ...n be positioned above or below By modifying these three parameters you can place the bar code in a large number of different positions in the message EAN 13 EAN 8 UPCA UPCE Used to transcribe numerical characters only into bar code form These characters may be variables counter date 13 characters for EAN 13 8 characters for EAN 8 13 characters for UPCA the first digit is always equal to 0 8 charac...

Page 46: ...har includes control characters NUL SOH and special characters FNC1 SHIFT AI The contents of the dialog bog depend on the selection for Mode 128 Two AI characters framing a data field of any length make the field appear in unencoded parentheses in the plain text These characters may be variables counter date CAUTION 1 The A B or C reverse video characters appear as codes A B or C when they appear ...

Page 47: ...o print all types of variable Maximum encoding capacity The dialog box is identical to the one used for 2 5 interleaved CAUTION 1 The resolution of the message is given by the resolution of the Datamatrix code 2 In certain cases it may be necessary to increase the distance between the head and the object in order to avoid the drops being superimposed and enable the code to be read correctly Bolder...

Page 48: ...his menu allows you to insert up to 15 counters into your message one or more times each The counters can be linked The initial value of the counter is shown in your message NOTE Counter details are set using the COUNTER function in the PARAMETERS sub menu under the MESSAGE EDITING menu Counters 3 to 15 are only available for the S7 SUPRA printer Variables Counter Hour Date Optional autodating Pos...

Page 49: ... characters to be used in the order you require Mode allows you to display AM PM or a blank in 24 mode The composition line displays the time data items as they are set NOTE The printer time is set using the PRINTER function in the INITIALIZATION sub menu under the PRINTER PREPARATION menu S7 MESSAGE EDITING FRANCE N 001 Message Font Variables Parameters Time composition TAB SPACE VALID EXIT Hours...

Page 50: ...INITIALIZATION sub menu under the PRINTER PREPARATION menu The composition line displays the date data items as they are set NOTE The printer date is set using the PRINTER function in the INITIALIZATION sub menu under the PRINTER PREPARATION menu Day of the week X o Day of the month DD o Day of the year JJJ o Last figure of the year y o Week of the year ww o Month of the year Figure MM o Month 1 o...

Page 51: ...sed to insert all time and date variables encoded using the autodating table NOTE The variables are encoded in the PRINTER PREPARATION menu INITIALIZATION sub menu MESSAGE function Hours H t o Minutes N t o Month M t o Day of the week X t o Day of the month D t o Day of the year J t o Week of the year W t o Year Y t o Separator Composition ...

Page 52: ...7 MEGA and S7 SUPRA printers NOTE The postdates value setting is made using the POSTDATE function in the PARAMETERS sub menu under the MESSAGE EDITING menu PostDay month o D1 PostDay year o J 1 PostDay year programmab o J 1 PostWeek year o W1 PostMonth year Figure o M1 PostMonth 1 year Letter o m 1 PostMonth 2 year Letter o m 1 Postyear o Y1 Separator Composition PostDay of month o D4 PostDay year...

Page 53: ... under the PRINTER PREPARATION menu 4 3 7 External This function is used for reserving within a message locations for variable characters for external delivery RS232 V24 or RS422 Example weight supplied by scales or information sourced from an automaton or a barcode reader If no information is sent by the external link these reserved locations are shown when printing by the selected display symbol...

Page 54: ... can be changed for each message in this menu NOTE The default value of these parameters is set using the MESSAGE function in the INITIALIZATION sub menu under the PRINTER PREPARATION menu 4 4 1 Message A dialog box shows all the items which will adapt the message to the printer production site Parameters Message Counter Postdate Barcode Head sense Tacho mode o Tacho division 0015 Object speed 010...

Page 55: ...ation requires a speed detector or tacho which informs the printer about the speed of the product In this case you must also define the next function Tacho division CAUTION Do not tick this box if your installation does not include a tacho Tacho division Only use this function if you have already selected tacho mode This step requires you to enter a number to obtain the width of character you wish...

Page 56: ...er defines the space between the point of detection of the item and the start of printing in normal message direction mode Return margin This parameter defines the space between the point of detection of the item and the start of printing in the reverse message direction mode Repetitive interval This parameter defines the space between two prints in repetitive start mode IMPORTANT The minimum valu...

Page 57: ...99999999 Last figure 000000000 to 999999999 When this end value has been printed the counter goes back to the start value REMARK To make the counter move in decreasing order the start value must be greater than the end value Counter step 00 to 99 this is the value by which the counter is incremented Batch counter 0000 to 9999 this is the number of items in a batch The counter is incremented when t...

Page 58: ...with RAZCPA input B reset to start value with RAZCPB input A or B reset to start value with RAZCPA or RAZCPB input Activate output x yes or o no it is possible to validate an Industrial Interface Cassette output ETAT which changes state when the counter reaches its end value CAUTION The Counting function must not be set to Tach puls nb See ETAT output INPUT OUTPUT CONNECTIONS section Zero before f...

Page 59: ... menu INITIALIZATION sub menu PRINTER Date hour function NOTE The default value for these postdates is set by using the MESSAGE function in the INITIALIZATION sub menu under the PRINTER PREPARATION menu 4 4 4 Barcode A dialog box appears with a maximum of three code choices barcodes or Data Matrix code Interleaved 2 of 5 barcodes are proposed by default To access the types and settings select a co...

Page 60: ...istribution and Datamatrix codes Narrow space from 1 to 4 raster the default value is 1 for distribution and Datamatrix codes Wide bar from 2 to 9 raster the default value is 2 for distribution and Datamatrix codes Wide space from 2 to 9 raster the default value is 2 for distribution and Datamatrix codes Inverse print enables printing in reverse video yes x or not o Except datamatrix Check digit m...

Page 61: ...reating a message are gathered in the MESSAGE EDITING menu Press hto validate the Message sub menu Message only can be accessed at this point 7 dot font 16 11 03 7 dot font 16 dot font Bolderization 2 Postdate Bestbefore B a t c h 4 8 9 2 7 S7 MAIN MENU Printer status Message selection for selection and VALID pRoduction Message editing Printer preparation Symbol editing S7 MESSAGE EDITING Set up m...

Page 62: ...ameters commands can now be accessed The cursor can be moved by using the c a b dkeys The type of character appearing on the screen is what will be printed WYSIWYG The font used here is a font by default seen in the help zone S7 MESSAGE EDITING Set up a new message for selection and VALID Message Font Variables Parameters New Open Save save As Load printer Delete Close Message name S7 MESSAGE EDIT...

Page 63: ...ker the character will be printed Type Batch 48927 What you see on the screen is what you get printed Message S7 MESSAGE EDITING Choose a character type Font Variables Parameters TEST N 006 Bestbefore I select Font Select symbols Bolderization Tabulation barCodes for selection and VALID Message S7 MESSAGE EDITING Bolderization capture Font Variables Parameters TEST N 006 Bestbefore I Bolderization...

Page 64: ...a message Press i or m enter the elements which form the postdate and then press h Generally using i or m key allows you to select or insert parameters Bestbefore B a t c h 4 8 9 2 7 Message S7 MESSAGE EDITING Modify message parameters Font Variables Parameters TEST N 006 Message Counter Postdate Barcode for selection and VALID Bestbefore B a t c h 4 8 9 2 7 Message S7 MESSAGE EDITING Postdate val...

Page 65: ...d font If you move the cursor in different zone of the message it takes the characters height of this zone Bestbefore B a t c h 4 8 9 2 7 Message S7 MESSAGE EDITING Choose a character type Font Variables Parameters TEST N 006 select Font Select symbols Bolderization Tabulation barCodes for selection and VALID Message S7 MESSAGE EDITING Choose a character type Font Variables Parameters TEST N 006 B...

Page 66: ... Date Autodating table Postdate Shift code External for selection and VALID Bestbefore B a t c h 4 8 9 2 7 Bestbefore B a t c h 4 8 9 2 7 Postdate composition Message S7 MESSAGE EDITING Font Variables Parameters TEST N 006 TAB SPACE VALID EXIT PostDay month o D1 PostDay year o J 1 PostDay year programmab o J 1 PostWeek year o W1 PostMonth year Figure o M1 PostMonth 1 year Letter o m 1 PostMonth 2 ...

Page 67: ... PREPARATION menu S7 MESSAGE EDITING Font Latin Ind 16 Message Font Variables Parameters TEST N 006 16 11 03 Bestbefore B a t c h 4 8 9 2 7 16 11 03 Bestbefore B a t c h 4 8 9 2 7 Message S7 MESSAGE EDITING Modify message parameters Font Variables Parameters TEST N 006 Message Counter Postdate Barcode for selection and VALID 16 11 93 Bestbefore B a t c h 4 8 9 2 7 Parameters message Message S7 MES...

Page 68: ... in the library whenever you need Use the message selection function of the operator interface to print it 16 11 03 Aconsommeravant L o t 4 8 9 2 7 S7 MESSAGE EDITING Set up a new message for selection and VALID Message Font Variables Parameters New Open Save save As Load printer Cancel Close TEST N 006 16 11 03 Aconsommeravant L o t 4 8 9 2 7 S7 MESSAGE EDITING Close a message and EXIT for select...

Page 69: ...re version and to program an access code in order to protect the menus against unauthorised access It therefore play an essential part in the printer installation process 5 1 Initialization This sub menu is used for configuring the printer i e not only message parameters but also language date and time code or even the type of ink S7 PREPARATION Initialization Options Access code Initialization Me...

Page 70: ... same as the dialog boxes in PARAMETERS sub menu of the MESSAGE EDITING menu Optional autodating this function encodes time and date information as a code with one to three alphanumeric characters It is only available for the S7 Mega and S7 Supra printers NOTE You can also code the shift codes 2 and 3 in this Optional autodating General parameters Counter Postdate Shift code Barcode Optional autod...

Page 71: ... separate When you select a table you can display the values in the different fields Use the arrows abto move in the table To change these values press the key i 2 If the size of the fields in a table is not uniform 1 to 3 characters the printed code is the size of the largest field Shift code this function allows you to enter parameters values for the shift code used by all the messages This valu...

Page 72: ...copy function allows you to assign the parameters programmed for one day to all the other days of the week REMARK Shift codes 2 and 3 are only available for the S7 MEGA and S7 SUPRA printers The characters used for printing the shift codes 2 and 3 are to be entered into the Optional autodating see previous item Starting day 00 Starting month 00 Starting time 00 00 Day interval 00 Hour interval 00 ...

Page 73: ...g of the message is completed even if the pulse signal is cut Operation std message this is selection of the message to be printed by the operator interface mess n select this is selection of the message by the parallel interface function library this is selection of message by the message number increment function S7 operation with the Serie 7 printer message structure Month language 1 and 2 allo...

Page 74: ...fset by or 23 59 This function also applies to Day of the year dates in the VARIABLES sub menu Language The language used on the operator interface and the terminal can be set via a dialog box Ink These parameters are selected when the printer is installed by an IMAJE technician They should not be altered as any change could affect the performance of the printer Date hour Language Ink Head level C...

Page 75: ...r off Stand by Start phase Machine ready to print Alarm Consumable alarm Stop phase Mode 1 Non activated Non activated Non activated Non activated Activated Activated Non activated Mode 2 Non activated Non activated Activated Non activated Activated Activated Activated Mode 3 Non activated Non activated Non activated Non activated Non activated Activated Non activated Format 8 W O parity 1 stop Sp...

Page 76: ...ject to be printed varies This helps guarantee that the message is correctly positioned The print speed must be between 500 and 5500 mm s Count value or Offset add µs The displayed function depends on the Tach puls nb or fly tim ofst selection See the Counting function Count value enter a number of tacho pulses Offset add µs to compensate for the delay caused by the Dtop trigger chain cell opto et...

Page 77: ...the use of the pkey Flat PDE M head This box must always be ticked when the printer is equipped with an M head with a plane phase detection electrode 5 1 3 Visualization A dialog box offers the list of the different algorithms available in your printer 5 1 4 Jet alignment This function is only available for twin jet printers The Jet alignment function allows you to align jet writes with one anothe...

Page 78: ...3 Access codes This function is used to program an access code to protect certain menus against unauthorised access Enter a code and then select the menus to be protected in the dialog box To delete a code enter three spaces instead of the code If no code is entered the menus in this window are displayed in dotted line form When a code is entered the PREPARATION menu is automatically check by the ...

Page 79: ... is created To enable it to be printed an Imaje font with at least the same height as the symbol must be present in the printer 6 1 Symbol The SYMBOL Sub menu is used for creating a new symbol for modifying or copying an existing symbol for storing a symbol in memory or for deleting it The menu can be accessed at any time whether the printer is switched on or off Symbol Editing Symbol Size Symbol ...

Page 80: ...idth from 1 to 127 points 6 1 2 Open The Open command is for accessing an existing symbol for modification When you select Open a dialog box shows the start of the list of existing symbol fonts You can scroll through the titles and choose the one which interests you or display a cursor by pressing the ior mbar and enter the title of the font you are looking for 6 1 3 Save The Save command is for s...

Page 81: ... Close command is for leaving a font in which you have just created or modified a symbol When using Close the contents of the font in which you have just been working are saved 6 2 Size This command is for modifying the height and width of the symbols defined in a font CAUTION If you reduce the size the symbols drawn will be truncated If you increase the size the symbols drawn will be lodged at th...

Page 82: ...he symbols a height 5 to 48 points max depending on the algorithms present in the machine Give the symbols a width 1 to 127 points To create the symbol Drawn the symbol Save the symbol To create a new symbol Recall the font by name or number Give the new symbol a number Draw the symbol Save To close the font The font is saved NOTE You are advised not to use the first symbol number in the font 001 ...

Page 83: ... printer will display the following screen S7 FRANCE 201 001 003 001 001 TAB INS INV V ZOOM Details of the cursor in the grid Drawing mode dot by dot lines zone Dot colour black white change with i change with g Reverse video Vkey Zoom Simultaneously keys eand or eand Number of symbols existing in the font Symbol number Name of the font Number of the font ...

Page 84: ...mode 3 9 7 1 a b c d g The cursor can be position in the drawing grid in the direction of the arrows For changing the colour of the dot pointed by the cursor 3 9 7 1 a b c d g The lines can be traced in the direction of the arrows For selecting the colour of the line white or black ...

Page 85: ...the cursor is at the bottom left of the screen coordinate 001 x 001 Press or key to enlarge or reduce the grid Home function Key eto position the cursor at the bottom left of the screen Key oeto position the cursor at the top right of the screen Delete symbol Key jwith request for confirmation 3 9 7 1 a b c d g Depress 2 keys repeatedly to define a zone For selecting the colour of the zone white o...

Page 86: ...at symbol format height width num number of the symbol in the font number of symbols in the font ref symbol reference in decimals the reference begins at 32 20 Selecting a symbol Key dto display the following symbol Key cto display the preceding symbol Access to edition Key h S7 FRANCE 202 003 004 Symbol Size Choice of a symbol in the selected font ALT ALT selection and VALID Format 016 016 num 00...

Page 87: ...HE OPERATOR INTERFACE 4 Contents 1 Description of the Operator Interface 86 1 1 Overall view of the Operator Interface 86 1 2 Overall view of the menus 90 1 3 Operating mode 91 2 MESSAGE 91 3 PARAMETERS 95 4 MAINTENANCE 97 ...

Page 88: ...interface 1 Description of the Operator Interface 1 1 Overall view of the Operator Interface The Operator Interface includes Two line liquid crystal display p q s r tu v wxy z 15 NOV 03 08 50 No 001 ESSAI 15 NOV 03 08 50 No 001 ESSAI ...

Page 89: ...Numbers are shown on the screen when the equipment is started up and shut down these correspond to the successive printer operating and test phases q Jet key light This indicator light tells you the status of the jet flashing yellow light jet not ready non flashing yellow light jet ready orange light jet printing light off jet not in service This button can be used for a print test r Ink level ind...

Page 90: ...p to the original display Whatever has not been validated is not taken into account u Move forward in the menu v Validates the selection displayed Move backward in the menu Used to select a message z Display and reset the counters y Jet maintenance w Provides a second function level for the following keys z y ...

Page 91: ...s code wy Printer maintenance wu Adjusting the contrast of the display x Obtain information on a fault alarm clear a fault alarm When a fault occurs the red xindicator glows and when an alarm occurs the red xindicator flashes Push this button to display the fault on the screen in clear text with the figures at the top right showing the number of faults detected in the printer ...

Page 92: ...E CLEANING SOLUTION CHECK JET STABILITY ADJUST THE JET w y w z w FLUSH THE INK CIRCUIT DRAIN COMPLETELY DRAIN PARTIALLY TEST THE ELECTROVALVES OPEN COVER CONTROL YES CONTROL JET RECUPERATION YES AUTOCALIBRATION PRINTER YES STATUS OF PRINTER PARAMETER SET TIME 14 32 SET DATE 10 11 03 PROTECTED ACCESS MODIFY ZONE No 001 IMAJE SAVE LIBRARY LOAD LIBRARY INIT COUNTER No 03 VALUE 000000000 INIT COUNTER ...

Page 93: ...started from If no menu is selected the display shows the date and time on the first line and the name of the active message for printing on the second line Each menu key has a second menu level which can be entered by using the wkey First press the wkey and then the menu key to access this second level 2 MESSAGE This key is used to select the message to be printed Use the arrows to choose the mes...

Page 94: ... message can be changed from the operator interface without changing the number of characters The example of an active message given below illustrates how this menu is used The procedure for changing the batch number is as follows w MODIFY ZONE No 006 FRANCE Fixed batch number 28 02 MADE IN FRANCE B A T C H 4 8 5 2 4 This variable element Date cannot be modified by the operator interface Fixed cha...

Page 95: ...x 8 u MODIFY ZONE 02 02 BATCH 48524 The cursor is at the item which you want to change v MODIFY ZONE 02 02 BATCH 48524 The cursor is no longer displayed and the character flashes on and off Cursor u MODIFY ZONE 02 02 BATCH 48924 Now scroll through all the characters in the font being used You can select 0 1 2 A B or a space v MODIFY ZONE 02 02 BATCH 48924 You have just replaced one of the characte...

Page 96: ...tte is connected or disconnected after the printer has been switched off Not even the ON OFF should be showing on the display These two functions are only available for the S7 MEGA and S7 SUPRA printers See the Use of the Terminal section for more information This command displays a counter This counter increments by one unit each time a message is printed regardless of the triggering mode used It...

Page 97: ...e by pressing v The initial value is then displayed The key allows you to set the printer time and date and to insert a code to lock access Example of setting the time z INIT COUNTER No 01 VALUE 000000000 w z w SET TIME 17 54 z v SET TIME 17 54 u SET TIME 18 54 Change the hour using the arrows then validate v INSERT MINUTE 18 54 The zindicator light goes on ...

Page 98: ...the same procedure for setting the day month and year w SET TIME 17 54 z PROTECTED ACCESS 1 2 3 4 correspond to the x y z key respectively Program a 3 digit code using the 4 keys Each time a key is pressed the cursor moves forward by one x After the third digit the printer prompts you to confirm your code by entering it again This code locks access to the following menus w y z w z w v CODE XXX 1 2...

Page 99: ...g a jet to malfunction or not operate Follow the instructions shown on the screen If you validate this function you will clean the cannon orifice Follow the instructions shown on the screen If you validate this function you will check the stability of the jet in the recuperation gutter Follow the instructions shown on the screen CAUTION In order to ensure that the printer will start again correctl...

Page 100: ... by a fault indication If you validate this function the printer will carry out a complete drain and then automatically flush out the ink circuit with the additive Follow the instructions on the screen If you validate this function you will drain all the ink out of the printer This function enables you to carry a partial drain for carrying out particular maintenance tasks ADJUST THE JET FLUSH THE ...

Page 101: ...to start it up again by pressing the p key This function allows you to set an updating index for the printing module R6 or R7 To modify this setting contact Imaje s technical support You can override the open cover check i e the check to see whether the cover is open is no longer made Whenever the printer is stopped this function goes back to its initial value CAUTION This function should only be ...

Page 102: ... with different ink bases in different positions or in different places certain parameters have to be entered ink type head offset etc This auto calibration function is used for validating these parameters CAUTION This function is only used by the Imaje technician when he installs the printer or when he carries out after sales servicing This function tells you the pressure negative pressure and je...

Page 103: ... 1 week 104 2 3 Before a shut down lasting for more than one week 105 3 Start up procedures 106 3 1 Daily start up 106 3 2 Start up after a shut down lasting between 3 days and 1 week 107 3 3 Start up after a shut down lasting for more than 1 week 107 4 Routine maintenance procedures 108 4 1 Cleaning the head 108 4 2 Difficult start up 110 4 3 Changing the ink or additive cartridge 112 ...

Page 104: ... at least every two months in the case of a prolonged shut down Frequency Operation Time Comments Daily start up Press p 2 mins 8 mins after draining or flushing Start up after a shut down lasting between 3 days and 1 week 2 mins Only applies to twin jet heads Start up after a shut down lasting for more than 1 week 8 mins See procedure chapter 3 3 Frequency Operation Time Comments When clogging ca...

Page 105: ...o not clean the head CAUTION Perform a shutdown of this type at least once per week STOP PRINTER VALID p Stop the printer with the jet s running STOP IN PROGRESS PLEASE WAIT v Position the head on its servicing support ON OFF When the printer is stopped fit the anti block stopper if specified on the ink usage specification sheet 1 2 3 ...

Page 106: ...ters with a dual jet head NOTE Do not clean the head Position the head on its servicing stand 1 Stop the printer with the jet s running press p 2 After the machine stops close the recuperation gutter 3 Fit a pad soaked with anti clogging liquid if specified on the ink usage specification sheet Otherwise fit the protection nozzle 4 ...

Page 107: ...rm a full flush every two months Perform this procedure Before a shut down lasting for more than a week 18 DEC 03 09 46 No054 PARIS The machine is in service and ready to print FLUSH THE INK CIRCUIT wy FLUSHING VALID v PUT EMPTY CARTRIDGE AND VALID v The ink cartridge must be replaced by the depressed cartridge FLUSHING PLEASE WAIT v PUT EMPTY CARTRIDGE AND VALID Follow the instructions which appe...

Page 108: ...e head on its servicing support Open the head cover Remove the anti block stopper if fitted Clean the head if there are traces of ink see procedure cleaning the head Press p or connect only to the main power depending on the start up configuration Wait approximately 2 minutes When the machine is ready the colour of the jet indicator light is non flashing yellow 1 2 3 4 ...

Page 109: ...ame procedure as for daily start up Before start up open the recuperation gutter Remove the nozzle protection if fitted 3 3 Start up after a shut down lasting for more than 1 week With the print head in its servicing support replace an ink cartridge Open the head cover Open the gutter Remove the anti clogging pad or the nozzle protection Press p to start the printer ...

Page 110: ...ntenance 4 Routine maintenance procedures 4 1 Cleaning the head Stop the jet and position the head on its servicing support Close the recuperation gutter 1 2 Closed Clean the electrodes and the cannon with cleaning solution 3 ...

Page 111: ...A19620 C 109 Routine maintenance Dry carefully air dryer or drying kit The operation of the drying kit is specified in the ink technical data sheet 4 Open Open the gutter and start up the jet again 5 ...

Page 112: ...using the JET MAINTENANCE function in the MAINT sub menu under the PRODUCTION Menu CAUTION In order to ensure that the printer will start again correctly carry out the three operations one after the other When performing these three functions follow the instructions presented on the screen Position the head on its servicing support Select the function Spray the nozzle with cleaning solution until ...

Page 113: ...ximately 20 seconds INTRODUCE CLEANING SOLUTION 2 Finally validate the function Once the jet is stable stop the stability check and clean the head CHECK JET STABILITY 3 Once this phase is over start up the jet again an inspect the present of the jet in the gutter Remove the head cover and clear the defaults 4 ...

Page 114: ...t up NOTE The cartridge can not be mistaken because of the duct This is on the right for the ink and on the left for the additive Remove the corresponding cartridge holder 1 Cartridge holder A B Removal of the cartridge holder a b Replacement of the cartridge holder 1 1 Open the cartridge holder by tightening the two side tongues 2 1 ...

Page 115: ...e type of ink or additive as the old one code indicated on the label Replace the old cartridge with the new one 3 2 1 Replace the new cartridge and check that the duct is correctly positioned 1 Duct housing 2 Duct 4 1 2 Replace the cartridge holder using point 1 in the reverse order 5 ...

Page 116: ...114 A19620 C Routine maintenance NOTES ...

Page 117: ...sing the Operator Interface 118 3 2 Using the Terminal 119 4 Diagnosis help 120 4 1 Introduction 120 4 2 Example of diagnosis 120 4 3 When the printer is started up 121 4 4 When printer is in service 122 4 5 Summary table of faults and alarms 125 5 Adjustments 126 5 1 Jet in the gutter adjustment 126 5 2 Break off point adjustment 128 ...

Page 118: ... series of checks to narrow the cause down to the defective item involved without any part having to be removed This guide list all the possible faults and indicates the action required for resuming normal operation The only equipment required can be found in the servicing suitcase The adjustment of this section do not involve the removal of any part The S7 range Customer catalog provides the part...

Page 119: ...e Recuperation tap closed Dirty electrodes Leakage of ink NOTE On a twin jet head the left hand jet is the number 1 jet looking at the front of the head Cartridge holder and Cartridges Leak Damaged cartridge Usage date exceeded shown on label of cartridge Cassettes Cassette not connected properly Wrong type of cassette External accessories not connected properly industrial interface Power supply m...

Page 120: ...The y indicator light is on STATUS OF PRINTER PARAMETER Pref 2 77b Pr 2 77b Pbuffer 0 11b T 24 v Pref Pressure set point for printer installation Pr Actual pressure in the ink circuit Pbuffer Negative pressure at gutter Speed j1 Software version display Speed j1 20 03 m s Speed j2 19 90 m s u PRINTER 1 1 G SOFT VERSION A12 u Software version display ...

Page 121: ... Tamp P Shows the negative pressure value at the gutter T C Shows the printer operating temperature Jet speed 1 Shows the speed of the jet with a twin jet machine the speed parameter shown is for jet no 2 Display acknowledgement of Faults and Alarms When Faults or Alarms occur they are displayed in clear text in a dialog box The figure at the top right indicates the number of faults A recommendati...

Page 122: ...the operator has to undertake is to carry out the preliminary checks For each of the problems above example 1 the operator must then Apply the first remedy 1a in the above example If the problem persists the second remedy must be applied 1b in the above example Once the problem has been rectified clear the fault from memory using the x key on the Operator Interface Problems Actions and remedies 1 ...

Page 123: ...and cable 3 Red alarm fault indicator lights on 3a Perform self diagnosis check by pressing x on the Operator Interface If a number greater than 01 appears at the top of the screen check out the other faults with the arrow keys 4 Data memory 4a Stop the printer and start up again 4b Check the cassette connections 4c Call IMAJE Technical Services 5 Incorrect data 5a Turn off the printer and start a...

Page 124: ...hnical Services 7 Cover fault 84 7a Close the head cover or ensure it is properly closed 7b Check to ensure the detector magnet is inside the cover 7c Call IMAJE Technical Services 8 EHT Fault 86 87 8a Clean and dry the head electrodes carefully 8b Ensure that the conditions of the environment humidity temperature comply with the specifications given in the technical data sheet for the ink If they...

Page 125: ...igh for the contents of the message 13 Concentration alarm 70 Fault 83 13a Check the additive cartridge 13b Clean the head electrodes with the recuperation tap closed Allow the printer to clear this fault automatically 13c If the alarm persists fault 83 is indicated Flush out the printer fully 13d Check the printer parameters and contact IMAJE Technical Assistance 14 Ink module fault 71 to 77 14a ...

Page 126: ...onnections 19 Poor print quality Example 1 Example 2 Example 3 Example 4 19a Clean the print head including cover and ensure that there is nothing obstructing the path of the jet 19b Check that the head holders are stable no vibrations 19c Check the distance between the head and the object examples 1 and 2 19d Check that the jets are centred in the recuperation gutters examples 3 and 4 19e The hea...

Page 127: ... eeprom 40 A Conveyor speed 44 A Corrupted data in extension cassette library 45 A Function not available 48 F Algo not available 49 F Character generator 50 52 A F Ink level 51 53 A F Additive level 54 F Cartridge full on draining 60 A Ink Elv u 0 61 A Additive Elv u 1 62 F Buffer Elv u 2 63 F Accumulator Elv u 3 64 A Condensor Elv u 4 70 A Concentration high 71 F Pressure sensor unit 72 F Stalli...

Page 128: ...ING THE JET IN THE GUTTER The operation includes three related settings cannon rotation upper cam rotation lower cam rotation In general this is performed gradually stopping the jet from time to time to clean the electrodes if necessary 5 Remove the wire protection plate from the resonator wires and disconnect them 6 Unfasten the cannon holder screws see Figure 1 Figure 1 1 Wires to be disconnecte...

Page 129: ...op the jets Clean the head and reconnect the resonator wires Replace the protective plate Close the head cover 13 Start up the jets 14 Check the break point Set it if necessary see Break off point adjustment 15 Cancel any faults Perform continuous printing tests Check the cleanliness of the electrodes and the gutter after 10 minutes printing 1 2 Do not apply excessive force to the cams Turn the sc...

Page 130: ...gures 1 and 2 Initialize the operation by turning the potentiometer fully to the left The jet is continuous Turn it gently to the right until the jet break point appears in the form shown in 4 on Figure 2 Only the shape of the drops after the break point indicate the right adjustment see Figure 3 Figure 3 Figure 1 1 Potentiometer slot 2 Magnifying glass CHECKS AND TESTS 4 Close the head covers Cle...

Page 131: ...es 30 1 1 Definitions 30 1 2 Units 30 1 3 Labelling 31 2 Consumables and the application 32 3 Consumables and the printer 32 3 1 Ink usage specification 32 3 2 Consumption 32 4 Consumables and safety 33 5 Consumables guarantee and responsibility 34 ...

Page 132: ... may be delivered in a ready to use form or in the form of several components to be mixed Additive Used to maintain the viscosity thickness of the ink Its composition corresponds to the needs of the ink during operation Cleaning solution Used for printer maintenance head cleaning etc Its composition is compatible with the ink and additive used Anti clogging liquid Used only for specific inks Its c...

Page 133: ...e product itself article reference manufacturing batch number to be quoted if you need to contact our Technical Support use before date limit date up to which the original quality of the product is guaranteed Inform the user about the nature of the special risks related to the substances contained in the ink ex flammability eye irritation etc ...

Page 134: ... It is essential to possess this document available from our sale branches on request This sheet informs the user of the operating parameters viscosity jet speed etc and the specific printing characteristics printing speed head to object distance etc depending on the printer configuration nozzle size number of nozzles etc and the chosen ink 3 2 Consumption You should be aware that the ink consumpt...

Page 135: ...ration nomenclature through the HCS Hazard Communication Standard On these sheets you will find all data concerning identification of the preparation and the manufacture the composition and information on the components identification of the hazards first aid fire fighting measures measures to be taken in the event of accidental spillage handling and storage control of exposure individual protecti...

Page 136: ...cially designed to operate with Imaje printers and give the best results in terms of ease of use and consumption The use of consumables other than those proposed by Imaje invalidates the equipment guarantee and any complaints concerning a deterioration of performance leading to production stoppages ...

Page 137: ...A19620 C 135 TECHNICAL SPECIFICATIONS 8 ...

Page 138: ... of head and to type of printer Functions available see features on following page Operating mode possible Operating characteristics Power sources Ink Operating limits Operating temperature Humidity Installation details Working position of the printer Maximum height offset between head and control module Compliance with standards Standard accessories ...

Page 139: ...ocking system Printer status self diagnosis Automatic drain and flush sequences 100 120 V 200 240 V AC automatic selection Frequency 50 or 60 Hz 40 VA Quick medium or slow drying ink Average consumption Small capacity 24 million characters cartridge G head and 54 6 million characters cartridge M head Large capacity 45 7 million characters cartridge G head and 104 million characters cartridge M hea...

Page 140: ...aled to protect against water splashes and dust Withstands being dropped from a height of 1 m Printer connections 4 pin connector on control module Fonts Latin industrial 5 7 9 11 16 24 48 points Configurated language option New York Chimney Arabic etc CurvePrint 7 1x8 2x8 11 16 dots Date and time printing Hour minute second Day month year day of the year day of the week final year digit up to 3 s...

Page 141: ...S422 Non doubled printing A message cannot be printed twice in succession required for franking parcels for example Parallel interface Message selection by parallel interface or message incrementation Input Output Message number incrementation The BIB input on high level selects the next message in the library The BIB input or low level selects the preceding message in the library Programmable out...

Page 142: ...140 A19620 C Technical specifications NOTES ...

Page 143: ...PUT OUTPUT CONNECTIONS 7 Contents 1 Industrial Interface cassettes 142 1 1 Connection 142 1 2 Inputs 145 1 3 Outputs 147 1 4 Message selection 149 2 Extension Cassette 150 2 1 Serial link 150 2 2 Extended library 150 ...

Page 144: ... the inputs and outputs of the single model plus the following features inputs INH INVMES RAZCP A RAZCP B INCCP A INCCP B INCMES BIB D0 to D7 outputs SYNC ETAT 1 1 Connection Switch off the printer and disconnect the cassette from the body Remove the top cover after removing the four screws as shown below CAUTION The Industrial Interface cassette must never be connected or disconnected when the po...

Page 145: ...INH INVMES Message direction reversal INVMES RAZCP A Reset to initial counter value RAZCP A RAZCP B Reset to initial counter value RAZCP B INCCP A INCCP A Increment of a counter parameter with this input INCCP B INCCP B Increment of a counter parameter with this input INCMES Message increment INCMES ...

Page 146: ...IB Message increment or decrement direction BIB D0 à D7 Parallel interface data COM OUTPUTS SYNC Message synchronisation SYNC ALC F Alarm F Closed O Open C Common ALC O ALC C ALD F Fault F Closed O Open C Common ALD O ALD C ETAT Counter status output ETAT POWER SUPPLY 0VA 0VA 0VA 0VA 0VA 24 V 24 V Max current 300 mA ...

Page 147: ...ion cell Purpose The object detector is connected to the TOP and TOP terminals of the Industrial Interface cassette When it is activated by an object passing in front of it the detector sends a signal to the printer to start printing In order to avoid interference the TOP input is filtered at 200 µs 1 2 3 INH item detector inhibition Purpose The INH and INH terminals on the Industrial Interface ca...

Page 148: ...nputs must have the same frequency and be in phase quadrature 1 2 5 INVMES Message direction reversal The direction in which a message is printed can be reversed by means of the INVMES and INVMES terminals forward and reverse printing mode 1 2 6 RAZCPA RAZCPB counter initialization The counter must be configured for being reset to its initial value via the RAZCPA or RAZCPB input A pulse on the inp...

Page 149: ...ntial free contacts The contact activates the alarm systems or electrical assemblies directly with the mains supply The electrical contacts are protected by RIFA type R C cells 0 1 µF 250 V 47 Ω The operational mode of the alarm output depends on the choice made in the PRINTER PREPARATION menu INITIALIZATION sub menu PRINTER function MISCELLANEOUS stage see under PRINTER PREPARATION Chapter in USE...

Page 150: ...ynchronization output uses the output characteristics of a high speed photocoupler with an open collector photo transistor Operating characteristics Maximum output current Is 16 mA Maximum operational voltage 24 V 1 3 4 ETAT print status This output can only be used if it is configured in the printer 1 In the PRINTER PREPARATION menu INITIALIZATION sub menu PRINTER function MISCELLANEOUS step COUN...

Page 151: ...lse on the INCMES input changes the number of the active message for printing The TOP input starts printing NOTE The printer must be configured for this message selection mode 1 4 2 Parallel interface The D0 D1 D2 D3 D4 D5 D6 D7 terminals are used for selecting the message number to select for printing The INCMES signal initiates printing of the message selected The SYNC output is active while the...

Page 152: ... The Extension cassette makes it possible for you to control the printer from a computer or PC using a RS232 V24 serial link that may also work as current loop or RS422 serial link 2 2 Extended library When an Extension cassette is used the library contains up to 880 messages ...

Page 153: ...ion index changes with every modifications The modified pages are mentioned in the following table This one indicates all updating since the first edition Date of edition Document revision index Software index Modified pages 10 1999 05 2001 09 2002 A B C A10 A11 A12 First edition 18 23 25 37 38 39 47 48 54 55 All Photograph and drawings are not binding Photo GINKO X Imaje S A Siège social 9 rue Ga...

Page 154: ...152 A19620 C 09 2002 ...

Reviews: