


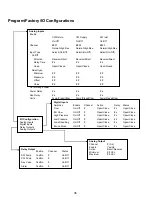

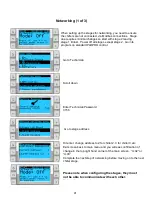
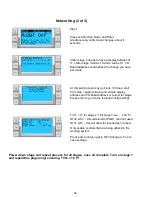


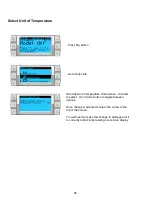


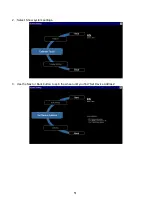


47
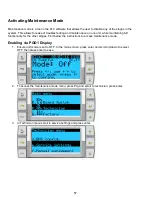
HMI Setup
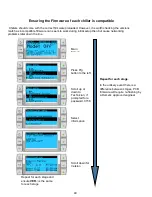
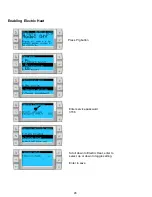
Uploading program
To setup the correct program onto the touchscreen follow the steps.
1. Locate USB port located on the back side of the screen.
2. Insert USB memory
3. On the touch screen hold your finger on the screen until a pop window is displayed.
4. Select update
5. Another pop-up will appear and check the box that says Auto select best match and press next
6. Once the screen is updated there will be a reboot. Once completed the screen will display the
main screen. Remove USB.
Summary of Contents for VARC 48
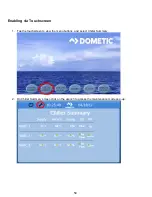
Page 20: ...18 Appendix I Touchscreen Navigation MAIN PAGE Figure 15 CHILLER ENABLE Figure 16...
Page 21: ...19 CHILLER SETPOINTS Figure 17...
Page 22: ...20 Figure 18 CHILLER STAGE Figure 19...
Page 24: ...22 TRENDS Figure 21 Figure 22...
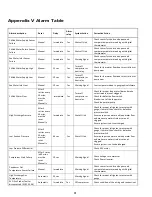
Page 25: ...23 ACTIVE ALARMS Figure 23 ALARM HISTORY Figure 24...
Page 26: ...24 ALARM HELP Figure 25 Figure 26...
Page 27: ...25 REMOTE SUPPORT Figure 27 REMOTE ENABLE Figure 28...
Page 28: ...26 REMOTE CONFIGURATION Figure 29...
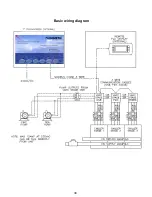
Page 41: ...39 Basic wiring diagram...
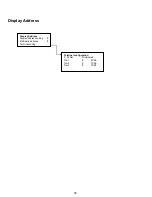
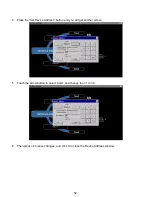
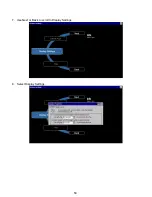
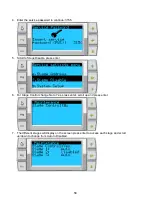
Page 55: ...53 7 Use Next or Back to scroll to Display Settings 8 Select Display Settings...
Page 69: ...67 VARC Standard Wiring Diagram Figure...
Page 70: ...68 NOTES...
Page 71: ...69 NOTES...


