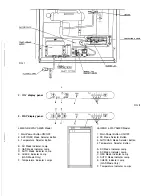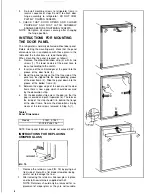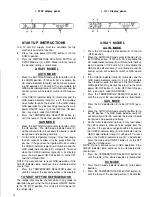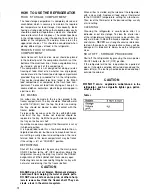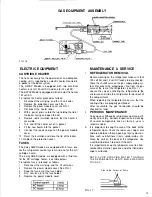
2 - WAY display panel. 3 - WAY display panel.
DESCRIPTION OF OPERATING
MODES
THERMOSTAT
The thermostat on the refrigerator controls both the gas
and electric operation, thereby eliminating the necessity
of resetting each time a different energy source is
employed.
After the initial start-up, the thermostat
should
be moved
from “COLDEST’ to the desired temperature setting,
usually about mid setting.
AUTO MODE
When operating in the AUTO mode, the AUTO mods in-
dicator lamp (D) will illuminate. The control system will
automatically select between AC and GAS operation
with AC having priority over GAS. Either the AC indicator
lamp (B) or the G
A
S indicator lamp (C) will illuminate
depending on the energy source selected by the control
system. If the control system is operating with AC ener-
gy and it then becomes unavailable , the system will
automatically switch to GAS. As soon as AC becomes
available again the control will switch back to AC regard-
less of the status of GAS operation.
GAS MODE
When operating in the GAS mode the AUTO mode in-
dicator lamp (D) will be off and the GAS mode indicator
lamp (C) will be illuminated. This mode provides LP gas
operation only. The control system will activate the igni-
tion system and will attempt to light the burner for a
period of approximately45 seconds. If unsuccessful, the
CHECK indicator lamp (E) will illuminate and the GAS
mode indicator lamp (C) will turn off.
To restart GAS operation, press the main power ON/OFF
button (1) to the-OFF and then ON position. The control
system will attempt a new 45 second ignition sequence.
If the refrigerator has not been used for a long time or
the LP tanks have just been refilled, air may be trapped
in the supply lines. To purge the air from the lines may
require resetting the main power ON/OFF button (1)
three or four times.
If
repeated attempts fail to start the
LP gas operation, check to make sure that the LP gas
supply tanks are not empty and all manual shutoff val-
ves in the lines are open. If the problem is still not cor-
rected, contact a service center for assistance.
If the control is switched to AC or DC operation while the
CHECK indicator lamp is on, it will function properly, but
the CHECK indicator lamp will not go off until the main
power ON/OFF button is pressed to the OFF then ON
position.
A
D
DC.MODE (3-way models only)
When operating in the DC mode the DC mode indicator
lamp (A) will be illuminated. All other mode lamps will be
off. The DC mode overrides all other operating modes.
If one of the other operating modes is desired, the DC
selector button (2) must be in the UP (OFF) position.
BATTERY PROTECTION SYSTEM
The control system is equipped with a battery protection
system. A steady illuminated DC mode lamp (A) indi-
cates that sufficient voltage is present at the terminal
block connections to operate the refrigerator normally.
If the input voltage is below approximately 12.8 volts DC
or should it drop below 12.8 volts DC during operation,
the DC mode lamp (A) will flash ON and OFF to signal a
low battery condition. In this condition the control will
continue to operate in DC mode for a maximum 10
minutes.
If the input voltage has not returned above 12.8 volts DC
within this time, the control will terminate DC operation.
A second battery protection system will terminate DC
operation immediately if the input voltage drops below
10.6 volts.
The DC mode lamp will continue to flash as long as the
input voltage remains
below
12.8 volts. The input battery
voltage must rise above 12.8 volts for 25 minutes before
DC operation can resume.
As soon as the input voltage rises above the required
12.8 volts, the DC mode indicator lamp will stop flashing,
however, the control system will remain in the 25 minute
delay mode. This delay is to allow sufficient time for the
vehicle charging system to recharge the battery.
LIMP MODE OF OPERATION
This control system contains a feature where it will con-
tinue to operate the cooling system in the event of a
failure of a major operating component. Two different
modes of operation can occour in this category.
If for some reason the display
module
becomes non
functional, the control system will revert to full automatic
operation selecting the best energy source available with
AC,DC (3-way only) and GAS priority. The temperature
of the refrigerator will be maintained at the MID position
within normal temperature tolerances. The power
module will continually attempt to re-establish operation
of the display module.
The second limp mode of operation will execute when a
failure of the temperature sensing device or associated
electronic circuitry occurs. If this should occour, the con-
trol system will operate on the energy source selected
via the control panel. The cooling unit will run con-
tinuously on the selected energy source. The refrigerator
will continue to operate in this mode indefinitely or until
a new sensor is installed and the system is reset.
Summary of Contents for Silhouette S1521
Page 14: ......

