12
HOW TO USE THE REFRIGERATOR
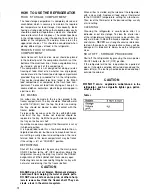
FOOD STORAGE COMPARTMENT
The food storage compartment is completely closed and
unventilated, which is necessary to maintain the required
low temperature for food storage. Consequently, foods
having a strong odor or those that absorb odors easily
should be covered. Vegetables, salads etc. should be
covered to retain their crispness. The coldest positions
in the refrigerator are under the cooling fins and at the
bottom of the refrigerator. The warmer areas are on the
upper door shelves. This should be considered when
placing different types of food in the refrigerator.
FROZEN FOOD STORAGE
COMPARTMENT
Quick frozen soft fruits and ice cream should be placed
in the coldest part of the compartment which is at the
bottom of the aluminum liner. Frozen vegetables, may
be stored in any part of the compartment.
This compartment is not designed for deep or quick
freezing of food. Meat or fish, whether raw or prepared,
can be stored in the frozen food storage compartment
provided they are pre-cooled first in the refrigerator.
They can be stored about three times longer in the
frozen
food compartment as compared to the fresh food com-
partment. To prevent food from drying out, keep it in
covered dishes, containers, plastic bags or wrapped in
aluminium foil.
ICE MAKING
Ice cubes can be made in the ice tray placed in the
freezer compartment. The tray should be filled with water
to within 1/4" (5mm) from the top. For faster ice making,
the tray should be placed in direct contact with the
freezer bottom.
To release the ice cubes, seize the tray with both hands
and twist the tray. Cubes not required should be
replaced in the tray. Refill the tray with water and replace
the tray on the freezer shelf.
Ice will be made more rapidly if the thermostat is set at
its highest position.
It is a good idea to do this a few hours before the an-
ticipated need for ice, but be sure to move back to nor-
mal setting, usually about mid setting when the ice is
formed. Food in the lower compartment may be frozen
if the setting is left on “COLDEST’ position.
DEFROSTlNG
Shut off the refrigerator by pressing the main power
ON/OFF button to the UP (OFF) position. Empty the
refrigerator, leaving the drip tray
under the
finned
evaporator, and the cabinet and
freezer doors open.
Defrosting time can be reduced
by
filling
the ice tray with
hot water and placing it on the freezer bottom.
CAUTION
DO NOT
use a hot air blower. Permanent damage
could result from warping the metal or plastic parts.
DO NOT
use a knife or an ice pick, or other sharp
t
ools to remove frost
from the freezer shelf. They can
create a leak in the ammonia system.
When all frost is melted, dry the interior of the refrigerator
with a clean cloth. Replace all food and set thermostat
to the COLDEST temperature setting for a few hours.
Then reset the thermostat to the’desired setting, usually
at mid setting.
CLEANING
Cleaning the refrigerator is usually done after it is
defrosted or put into storage. To clean the interior liner
of the refrigeratoruse lukewarm weak soda solution. Use
only warm water
to clean the
finned evaporator, ice trays
and shelves.
NEVER
use strong chemicals or abrasives
to clean these parts as the protective surfaces will be
damaged. It is important to always keep the refrigerator
clean.
SHUT OFF - STORAGE PROCEDURE
Shut off the refrigerator by pressing the main power
ON/OFF button to the UP (OFF) position.
If the refrigerator will not be in operation for a period of
weeks, it should be emptied, defrosted, cleaned and the
doors left ajar. The ice tray should also be dried and kept
outside the cabinet
CAUTION
DO NOT
store
refrigerator, such
ether or the like.
Table
4
explosive substances
in the
as cigarette lighter gas, petrol,
Summary of Contents for Silhouette S1521
Page 14: ......

