12
1.7
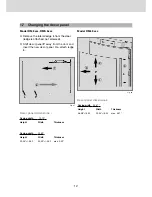
Changing the decor panel
Remove the lateral ledge
L
from the door
(ledge is attached, not screwed).
Shift decor panel
P
away from the door and
insert the new decor panel. Re-attach ledge
L
.
Fig. 37
L
P
Model RM 8xxx, RMS 8xxx
Decor panel dimensions :
Casing width
19.1
3
"
Height
Width
Thickness
29.25
"
+/-0.02
20.00
"
+/-0.02
max. 0.09
"
Casing width
20.59
"
Height
Width
Thickness
2
1
Fig. 38
L
P
Model RML 8xxx
4
1
2
3
Decor panel dimensions :
46.08
"
+/-0.02
20.04
"
+/-0.02
max. 0.07
"
Casing width
20.67
"
Height
Width
Thickness
Summary of Contents for RML 8551
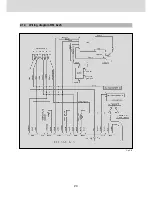
Page 18: ...18 Fig E35 2 0 Tables and wiring diagrams 2 1 Wiring diagrams 2 1 1 Wiring diagram RM 8xx0...
Page 19: ...19 Fig E36 2 1 2 Wiring diagram RM 8xx1 THE SIGN OF COMFORT...
Page 20: ...20 Fig E37 2 1 3 Wiring diagram RM 8xx5...
Page 21: ...21 Fig E38 2 1 4 Wiring diagram RM 8xx5 with electrical doorlock optional THE SIGN OF COMFORT...
Page 23: ...23 THE SIGN OF COMFORT...
Page 24: ......
Page 47: ...23 THE SIGN OF COMFORT...
Page 48: ......

