


INTERNET SERVICE
Configuring ‘My Stuff’
Registering an account on Reciva’s website
1. Open the website, http://www.reciva.com, from your internet browser.
2. Click on the ‘My Account’ link and follw the on-screen instructions to register an account. Please note, during the
registration process, a validation code will be sent to you via email. Please enter this code when prompted to do so.
3. After logging into your account, you will be able to edit your information for ‘My Stations’,’My streams’, ’My Detail’ and
“My Radios” from the ‘My Account’ section.
4. You can now add your Internet Radio to your account on the website by accessing the ‘My radios’ link. From the ‘My
Radios’ section, you will need to enter in your radio’s eight-digit serial number, which can be found from the
‘Configure> Version’ menu on the radio, and you will also need to enter in your radio’s registration code-which can be
found from the ‘Configure> Register’ menu on the radio.
Configuring ‘My stations’
1. It’s possible to search for radio stations that are available in Reciva’s stations’ database from Reciva’s Website.
When ever stations are searched for on the website, then will be displayed in a list of search results together with a
link to ‘Add to my stations’.
2. Clicking on the ‘Add to my stations’ link, will add the station to your account’s ‘My stations’ list. This list can be edited by
clicking on ‘My stations’ under the ‘My account’ section on the website.
3. Once you have internet station available in you ‘My stations’ list, you may play these stations from your Internet Radio.
These stations will be available on your radio from the menu item:’ Stations>My Stuff> My stations’. Please note , the
stations will only be available to your radio once your radio has downloaded a new stations’ list. To cause the radio to
download a new stations’ list immediately, please remove and reconnect the power to your radio.
Configuring ‘My Streams’
1. once logged into your Reciva website account, you can add your own internet radio streams to the ‘My streams’
section, which is listed under the ‘ My account’ section
2. Clicking on’ My streams’ sill prompt you to enter the station’s name and its media stream URL. The media stream
URL should be a link to a website’s actual audio stream. If you have any doubt about locating the media stream URL
from a webpage, then please refer to the FAQs section on Reciva’s website, http://www.reciva.com
3. Once you have Internet radio streams available in you ‘My streams’ list, you may play these stations from your
internet radio. These station will be available on your radio from the menu item:’ Stations >My stuff> My streams’.
Please note, the streams will only be available to your radio once your radio has downloaded a new station’ list. To
cause the radio to download a new stations’ list immediately, please remove and reconnect the power to your radio.
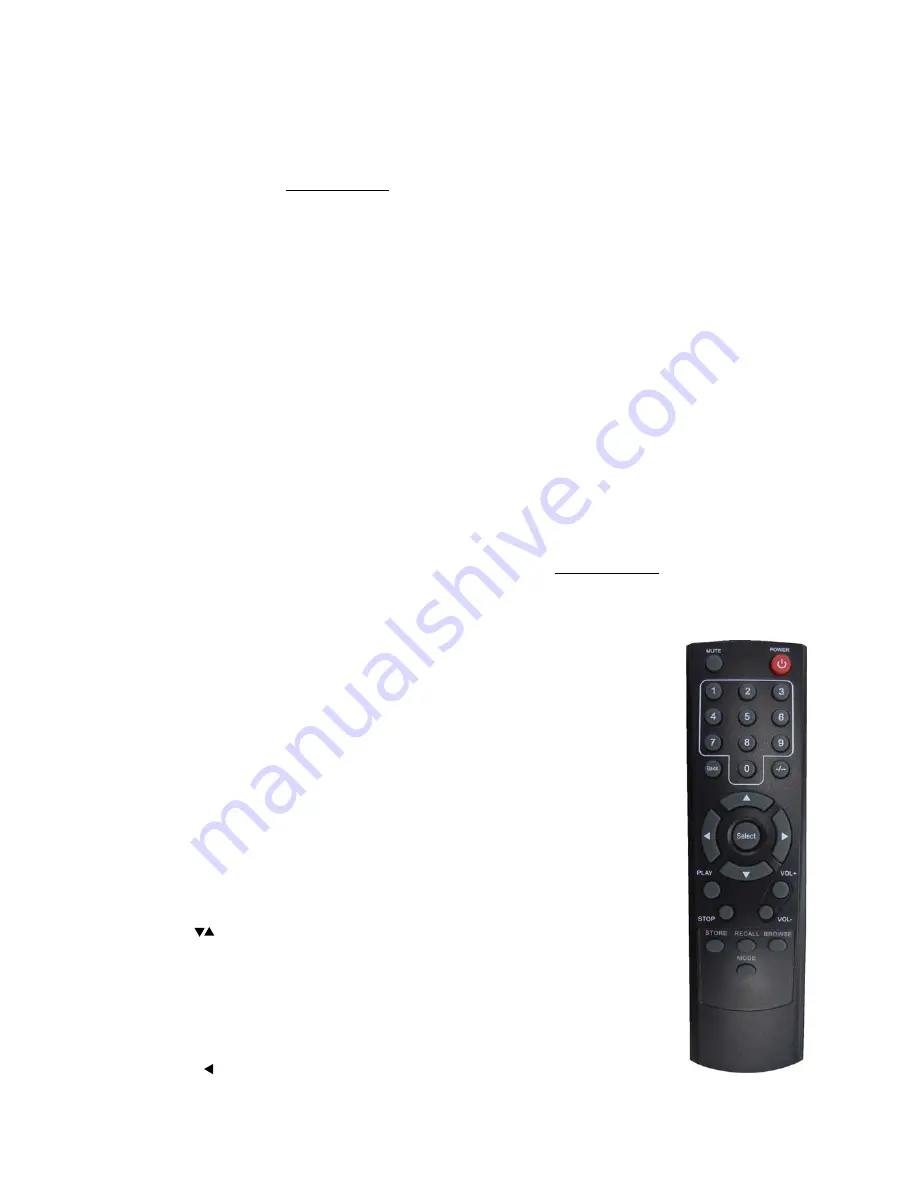
Remoter controller:
1. Power: <Press to switch the internet radio ON/OFF>
2. Mute: < Press to mute the voice of Earphone only>
3. Reply: <Reserved for future services>
4. 0---9: <Numeric buttons for Store and Recall functions>
5. Store: <Use to store 99 radio stations>
6. Recall: <Use to Play up the pre-setting stations>
7. --/- :
<Select the numeric bits>
8. Select: <Press to select a displayed option>. Under FM mode, long press this button to
Start auto scanning mode of the FM stations
9. Back: <Press to go back to the previous display>
10. + VOL -: <Use to adjust the volume>
11. UP\DOWN
:
Use to manual scan down for FM stations, and use to change the option
to show on the display>
12. Browse: <Press to view the name of the track currently playing and then turn the TUNE to
see the list of tracks waiting in the play queue>
13. Play/Pause: <Press to play/pause playback>
14. Stop: <Press to stop playback, with a track name displayed, press and hold to delete the
track>
15.
: <Press to start playback at the previous track>