background image

USER INSTALLATION

USER INSTALLATION

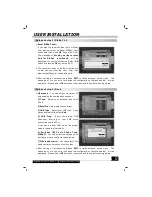
Antenna Setup-1) DiSEqC 1.2

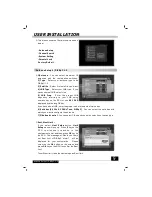
This men u cons ists of 5 maj or sub -menu s as

bel ow.

-Antenna Setup
-Channel Search
-System Setting
-Parental Lock

-Factory Default

Antenna Setup-1) DiSEqC 1.2

1)Antenna

2) Type

3) Satellite
4) LNB Type

5) LNB Freq.

KEY PAD

: You ca n sele ct ma ximum 16

ant ennas with the combin ation switc hes.

: Sele ct you r ant enna t ype to be

DiS EqC1 .2.

: S elect f irst sa tellite you w ant.

: Selec t your LNB t ype. If you

hav e univ ersal LNB, s elect Univ.

: En ter t he pr oper LNB

fre quenc y ref e rring to y our L NB u sing

num eric key on the RCU o r use

dis played by pr essing OK ke y.

If y ou hav e a du al LNB , ente r the p roper value in the b oth of value box.

: You can selec t the switch es wit h

wh ich you want to con figure the an tenna .

: You can se lect C /Ku ba nd con trol by selec tion of switc h type.

6) Switches (0/12 Volt, 22KHz Tone, DiSEqC)

7) C/Ku band c ontrol

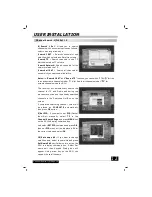
East, West Limit :

Limit Setup

Limit

Setup

E

OK

OK

OK

If you s elect

but ton,

menu wi ll pop up. Press

key on the

R C U

c o n t i n u o u s l y r e a c h e s

t o

t h e

eas ternm ost po int and then press

ke y on

the RCU. The m essa ge of Would you li ke to
set East limit of DiS EqC motor ?

wil l be

dis played for your confirm ation .

Pl ease

cursor on the

button on the s creen and

pre ss

key o n the R CU to confir m the East

lim it.

To set We st lim it, take the sa me st eps as East l imit.

9

Summary of Contents for DG7000

Page 1: ......

Page 2: ...ing to Antenna TV Connecting to TV using RCAsupport Connecting to TV using RF support Connecting to TV using S VIDEO P6 P6 P7 P7 Antenna setup 1 DiSEqC 1 2 Antenna setup 2 Fixed Channel search 1 DiSEq...

Page 3: ...EG 2 DVB compliant Provide friendly and easy to use menu system Various channel editing function Favorite moving locking renaming deleting and sorting User programmable various Satellite Transponder i...

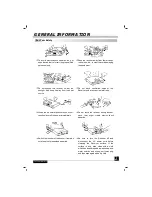
Page 4: ...er it remains outofserviceforan extended period Do not touch the receiver during thunder since that might create electric shock hazards Do not block ventilation holes of the Receiver sothat aircancirc...

Page 5: ...ions receiver All function can be carried out using the buttons on the RCU and some of the function can also be carried out using the buttons on the front panel The is easy to use always at your comma...

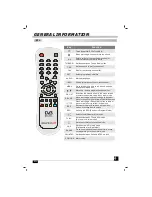
Page 6: ...e channel list Shows information of the current channel Switches between PAL and NTSC modes Switches to teletext or subtitle mode Switches to UHF turning mode No function in this model Moves up down a...

Page 7: ...In live mode a channel increase the volume In live mode a channel decrease the volume Rear Panel POWER ON OFF CONNECT TO 12V TO AN EXTERNAL 0 12V S ITCH W CONNECT VIDEO TO TV USING RCA JACK CONNECT T...

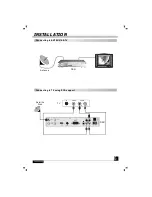
Page 8: ...INSTALLATION INSTALLATION Connecting 6 Connecting to ANTENNA TV DSR Antenna Connecting to TV using RCA support IN VIDEO TV Satellite Dish L R AUDIO DSR...

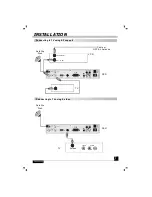
Page 9: ...NSTALLATION Connecting 7 Connecting to TV using RF support Connecting to TV using S video TV DSR VCR Cable or OFF Air Antenna IN F OM ANT R OUT TO ANT IN Satellite Dish DSR Satellite Dish TV S video L...

Page 10: ...Receiver Information During the installation the key confirms a selection and key shows Down List Box if the column has mark You can also use the numeric keys on the RCU to enter numeric value Use the...

Page 11: ...use displayed by pressing OK key If you have a dual LNB enter the proper value in the both of value box You can select the switches with which you want to configure the antenna You can select C Ku ba...

Page 12: ...ata EXIT OK Antenna Setup 1 DiSEqC 1 2 Antenna Setup 1 DiSEqC 1 2 Antenna Setup 2 Fixed 1 Antenna 2 Type 3 Satellite 4 LNB Type Univ 5 LNB Freq 6 Switches 0 12 Volt 22KHz Tone DiSEqC 7 C Ku band contr...

Page 13: ...ogrammed data such as Transponder Frequency Symbol Rate Polarization and 22 KHz please press key Red color key on the RCU And then you can move into those columns to change the value 3 Position E W OK...

Page 14: ...completed searching channel cursor will be placed on automatically then press button COMPLETE OK 9 Set PID PID T P Channel Search Page MENU SET PID OK PID OK If you want to set Packet Ide ntifie r ma...

Page 15: ...em once if you adjust one satellite location 14 Search Option FTA Only Not searched TP only Sort by Scramble The receiver allows you to search channels with convenient options as below If you select S...

Page 16: ...pe antenna 1 OSD Language 2 Audio Language 3 Set local time 4 Summer time ON Select your desired language Select your desired audio language to be in the top priority under the condition that this lan...

Page 17: ...er you turn on the receiver 11 UHF Standard Select UHF type System Setting Parental Lock System Setting Parental Lock 12 UHF Channel Select your desired UHF channel for satellite mode Note The receive...

Page 18: ...r new password 4 Confirm your new password entering new password again 5 Exit this menu 6 Select any menu and press on the RCU ON OK 7 Then Enter Password Box will be displayed 8 Unless enter correct...

Page 19: ...eared CH PR PR OK OK EXIT To select a channel go up and down of this channel list and place cursor on a desired channel Then press key to watch the selected channel If you press key on the RCU channel...

Page 20: ...channels you will receive program information for a few second While watching channel you can see the current chan nel i nform ation anyt ime pressing key on the RCU Channel information will be displa...

Page 21: ...t If you want to have a favorite group lists which were made in the channel manager please press key on the RCU You can access next favorite group when you press key one more The method of grouping of...

Page 22: ...Yellow key 4 Lock mode Blue key MENU 1 Rename Favorite group 2 Rename 3 Sort Graphic PIG mode 1 9 size of the normal and you can see channel information under the PIG screen When you move cursor from...

Page 23: ...and Favorite 3 How to make favorite group 1 In the favorite mode press key on the RCU then the commend box will be displayed on the screen 2 Select in the commend box 3 You can edit the name by using...

Page 24: ...rform this function you should set up the Parental Lock in advance Lock Lock OK Note Rename Channel In Main Page press key on the RCU and then select on the command menu This command allow you to rena...

Page 25: ...back If you decided to delete press key and then Message box will be displayed Press to delete Delete X OK EXIT OK In Main Page press MENU key on the RCU and select on the command menu This menu has i...

Page 26: ...l be displayed in the right side The time will be displayed relating to the program schedule Select one channel and placing the mark on the time of Program name which detail information you want to kn...

Page 27: ...mer with various ways This function is one of the strong point of the receiver To activate the and or select and enter your desired time The receiver display the time which is given by satellite so th...

Page 28: ...to direct your antenna toward a satellite Antenna Direction Help If you entered correct value of your position place your cursor on Compute and press key T h en t h e r e c eiv e r s h o w t h e e x...

Page 29: ...ANEL DISPLAY FRONT PANEL DISPLAY 27 FRONT PANEL DISPLAY UP LOAD PROCEDURE DOWN LOAD PROCEDURE ERROR IN DATA TRANSMITTING TV MODE VCR MODE SYSTEM BOOTING FLASH ROM ERROR SYSTEM WAITING TIME STAND BY IN...

Page 30: ...LNB input Satellite dish is too small Change to a larger dish LNB noise factor too high Change to an LNB with lower noise factor The LNB is faulty Change the LNB The picture is not showed on the scree...

Page 31: ......

Page 32: ......

Reviews: