Tutorial
Suppose you wanted to create your own HyperModel™ that incorporated the
sweet tones of a vintage Tweed using an American 2x12 cabinet, and the ripping
distortion of a Rectified Amp with a British 4x12 cabinet. Let’s also suppose that
we want to be able to toggle between an acoustic guitar simulation and this
new HyperModel™ with a preset that gives your single coil pickup a humbucker
sound, uses no Compression, has a Noise Gate that opens quickly, a subtle
Chorus effect, no Delay, and a little bit of a Hall reverb.The following steps
guide you through the process for creating just such a preset in the GNX2.
Select a Preset
The first step to create a preset is to select your starting point.You can start
with any preset, but for this example let’s start with Preset 40. Use the
Footswitches or the Data Wheel to select Preset 40.
Create a HyperModel™
For this example, we are going to use a vintage Tweed amp with an American
2x12 Cabinet, and warp it with a Recitified Amp using a British 4x12 cabinet.
Select Preset 40, and the GNX2 is ready to select the Amp Models (indicated by
the Status button’s yellow LED).
Select the Green Channel Amp and
Cabinet
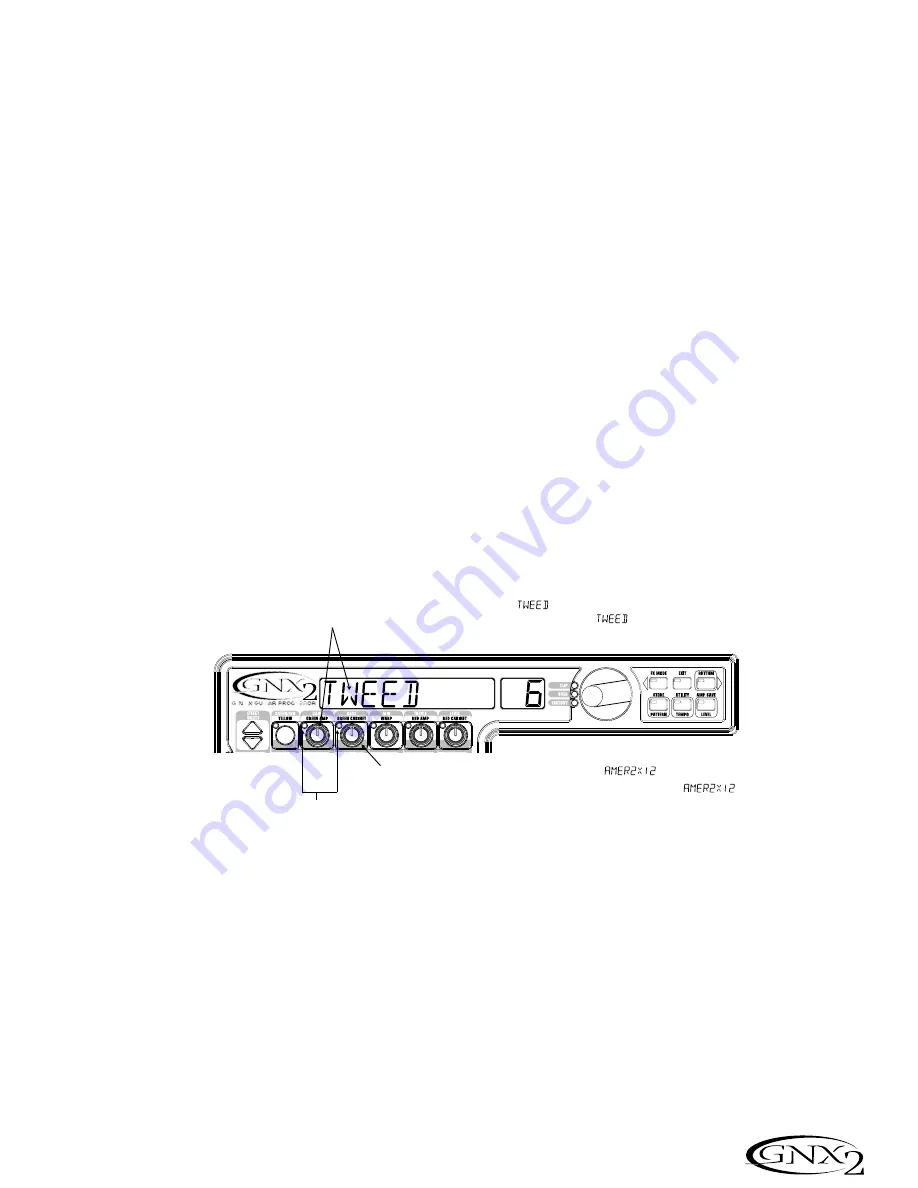
The LEDs next to the Number 1 and Number 2 knobs are green indicat-
ing they will select the Amp and Cabinet types for the Green Channel. To
assign the vintage Tweed amp to the Green Channel, rotate the Number 1
knob until the display reads
TWEED
(Tweed). Then rotate the Number 2
knob until the display reads
AMer2X12
(American 2x12).
Select the Red Channel Amp and Cabinet
The LEDs next to the Number 4 and Number 5 knobs are red indicating
they will select the Amp and Cabinet types for the Red Channel.To assign
the Rectified amp to the Red Channel, rotate the Number
4
knob until
the display reads
rectfied
(Rectified).Then rotate the Number
5
knob until the display reads
BRit4X12
(British 4x12).
Tutorial
Supongamos que quiere crear su propio HyperModel™ incorporando los
suaves y dulces sonidos de un Tweed tradicional con un recinto American 2x12,
y la fuerte distorsión de un amplificador Rectified con un recinto British 4x12.
Asumiremos también que quiere poder cambiar entre una simulación de guitar-
ra acústica y este nuevo HyperModel™ en un Preset que le de a su pastilla sen-
cilla un sonido de humbucker, no va a usar compresión, tiene una puerta de rui-
dos que se abre rápidamente, un efecto de chorus sutil, sin retardo y con un
toque de reverb de tipo salón. Los pasos siguientes le van a guiar a través del
proceso de creación de este tipo de preset en el GNX2.
Escoja un Preset
El primer paso para la creación de un Preset es elegir su punto de partida. Puede
empezar a partir de cualquier Preset, pero para este ejemplo empezaremos con el
Preset 40. Use los pedales de disparo o la rueda Data para elegir el Preset 40.
Cree un HyperModel™
Para este ejemplo, vamos a usar un amplificador Tweed tradicional con un recinto
acústico American 2x12, y lo vamos a enlazar con un amplificador Rectified usan-
do un recinto British 4x12. Elija el Preset 40 y el GNX2 ya estará listo para elegir
los modelos de amplificador (indicados por el piloto amarillo en el botón Status).
Elija el amplificador y recinto del canal
verde
Los pilotos que están al lado de los mandos número 1 y 2 están encendi-
dos en verde para indicar que estos dos mandos elegirán los tipos de
amplificador y recinto para el canal verde. Para asignar el Tweed tradicional
al canal verde, gire el mando 1 hasta que en la pantalla vea
TWEED
(Tweed). Gire después el mando 2 hasta que en la pantalla aparezca
AMer2X12
(American 2x12).
Elija el amplificador y recinto para el canal
rojo
Los pilotos luminosos que están al lado de los mandos número 4 y 5 se
iluminan en rojo para indicar que estos dos mandos eligen ahora los tipos
de amplificador y recinto para el canal rojo. Para asignar el amplificador
Rectified para el canal rojo, gire el mando
4
hasta que en pantalla aparezca
rectfied
(Rectified). Gire después el mando
5
hasta que pueda ver
BRit4X12
(British 4x12) en la pantalla.
29
Tutorial / Tutorial
Rotate Number 1 Knob Until Display Reads
Gire el mando número 1 hasta que en la pantalla aparezca
Rotate Number 2 Knob Until Display Reads
Green Channel Amp/Cabinet
Selection Indicated by Green LEDs
Gire el mando número 2 hasta que en la pantalla aparezca
Selección de amplificador/recinto de
canal verde indicada por pilotos en verde


