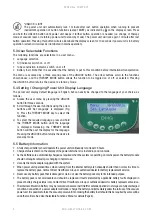
2. Press RUN/STOP button to invoke and display STAND-BY mode (the power unit will beep and therapy mode,
operating pressure and battery charge status will be displayed).
3. The power unit will default to continuous therapy mode at 80mmHg. To switch between continuous and
intermittent therapy modes, press and hold the THERAPY MODE button until power unit beeps to confirm change
of mode. Adjust vacuum level if required using the UP and DOWN arrow buttons.
4. Press RUN/STOP button again to initialise and run the power unit.
NB. Vacuum level and therapy mode can be adjusted when in stand-by mode and for up to 1 minute after power
unit is running. Power unit will automatically lock 1 minute after last button operation when running to prevent
inadvertent operation of button functions (except MUTE), as indicated by on the display screen. Press and hold
the UNLOCK button until power unit beeps if further button operation is needed. Display screen is only illuminated
for a short period after button operation in battery mode.
5. Once the power unit is running, observe the wound site. The dressing should contract noticeably, becoming firm
to the touch. If the dressing fails to contract, the dressing has not been completely sealed. Reinforce the dressing
seal and/or adjust the drain and initiate suction again.
WARNING: Particularly when used outside of a medical institution, get immediate medical assistance from
those responsible for the prescription and setting of the NPWT system should any of the following occur:-
obvious bleeding or pain; the wound site or exudate presents unexpected changes in its condition, colour or odour;
the wound dressing becomes detached or ineffective; the tubing becomes blocked.
6. To change or remove dressing, unlock power unit (press and hold UNLOCK until power unit beeps), then press and
hold the RUN/STOP button until power unit beeps three times to return to stand-by mode. Clamp Wound Care Set
tubing and remove by turning anticlockwise and lifting out of tubing port on canister. Dispose of used Wound Care
Set according to local clinical waste policy. If required, apply new Wound Care Set and continue NPWT.
7. Canisters should be replaced as required or weekly. To change canister, make sure power unit is in stand-by mode
(if still running, press and hold the UNLOCK button, followed by the RUN/STOP button). Clamp Wound Care Set
tubing and remove by turning anticlockwise and lifting out of tubing port (this can be reconnected to new canister
and unclamped if wound dressing is not being changed). Remove sealing plug from its location on canister and use
to cap tubing port to seal in contents. Rotate locking knob 1/4 turn anticlockwise and remove canister. Dispose of
used canister according to local clinical waste policy. If continuing NPWT, attach new canister and connect Wound
Care Set tubing as previously described.
8. To stop the power unit, press and hold the UNLOCK button until power unit beeps and clears from display screen.
Then press and hold the RUN/STOP button until power unit beeps three times to return to stand-by mode (if using
the power adapter, disconnect it from the power unit and unplug from the power source). The power unit will then
power off automatically after one minute of inactivity or may be forced off by pressing the MUTE button.
9. Place the user manual in a safe place for future use.
5. Operation Guidelines
5.1 User Information
The
VENTURI
COMPACT power unit will automatically lock 1 minute after last button operation when running to
prevent inadvertent operation of button functions (except MUTE), as indicated by on the display screen. Press and
hold the UNLOCK button until power unit beeps if further button operation is needed (i.e. change of therapy mode or
vacuum level, or returning power unit to stand-by mode). The power unit will lock again 1 minute after last button
operation.
Please note that when running, the
VENTURI
COMPACT power unit must be unlocked before it can be returned to
stand-by mode, i.e. the power unit cannot be put into stand-by mode when the is displayed on the screen.
During operation, the power unit should be placed upright on a horizontal surface with the display uppermost. The
VENTURI COMPACT power unit can be attached to an IV pole using the optional bracket. The
VENTURI
COMPACT
power unit is suitable for ambulatory use at the advice of a Physician. To allow patient full mobility during therapy, the
D H G - H E A LT H C A R E . C O M
6
V E N T U R I
®
C O M PA C T

