


7
2. ENROLLING FIRST (MASTER) FINGERPRINT
Fingerprint reader comes without any fingerprint in its memory. The first 3 fingerprints are
accepted as master. Administrative activities like enrolling or deleting fingerprint can be done
by master fingerprints only.
To enroll first fingerprint:
- Touch to “wake up” and than “button #2". First “OK” and than “LR” code will be displayed.
- Touch to “button #1". “L0" code will be displayed.
- Put the finger to the reader. “L1" code will be displayed.
- Put the same finger again. First “L2" and than “OK” code will be displayed.
NOTE:
System reads the finger 2 times during enrollment. If 2 reads don’t match, “EE” code will be
displayed and reader turns back to “L0" step. In this case, enrolling need to be repeated.
3. ADMINISTRATIVE ACTIONS / SETTINGS
3.1. ENTERING TO ADMINISTRATION MENU
To enter administration menu:
- Touch “wake up” and than “button #2". “AD” code will be displayed.
- Put one of the master fingers to the reader. First “OK” and than
administrator menu’s first item “LR” will be displayed. The other menu items are as follows:
3.2. ENROLLING FINGERPRINT (LR)
- Enter to administration menu.
- Touch to “button #1" when “LR” is on display. ”L0" will be shown.
- Put the finger to the reader. “L1" code will be displayed.
- Put the same finger again. First “L2" and than “OK” code will be displayed.
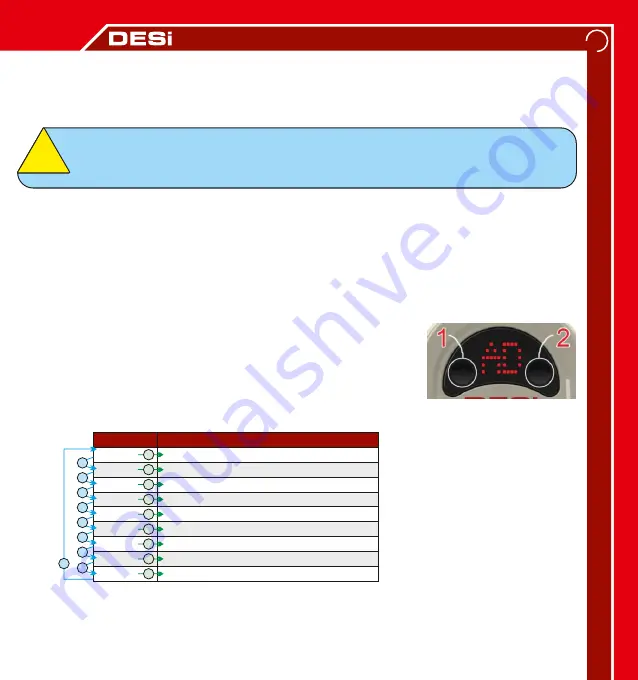
LR
DL
CL
TC
MW
UC
BU
RF
Display
Enrolling new fingerprint
Deleting fingerprint
Deleting all fingerprints
Adjusting number of turns
Adjusting direction of locking/unlocking
Reporting total # of enrolled fingers
Adjusting buzzer sound
Night mode availability
Function
Administration Menu -
Touching to “button #2"
shifts to next menu item
and
touching to “button #1"
selects shown menu item.
2
2
2
2
2
2
2
2
1
1
1
1
1
1
1
1
MA
Adjusting semi-automatic working
1
2
!
Master fingerprints need to be chosen carefully.
Don’t enroll a child’s finger or
a
ny
finger which is deformed
(or can be d
eformed
easily
)
as
a
master finger.


