background image

18

11

STANDBY

M UTE

1

2

3

4

5

6

7

8

9

0

10

+

SLOW

NE XT

N/P

DISP

PLAY/PAUSE

STOP

F F

F R

PR EV

GOTO

RE PEAT

A- B

PROGR AM

S ETUP

TFT MODE

ZOOM

A NGLE

ME NU

T IT LE

SUBTITLE

AUDIO

VOL

ENTER

AV IN/OUT

VOL

PL AY/
PA USE

10+

EN TE R

NAVIGATION
BU TTONS

PROGRAM

JPEG CD

Press PR OGRA M button to select one o f the
eff ects w hen ch angin g from one p icture to
an other:

10 .Slide show effect s

1

Wipe To p

2

Wipe Bo ttom

3

Wipe Le ft

4

Wipe Right

5

Diagona l Wipe Left Top

6

Diagona l Wipe Right Top

7

Diagona l Wipe Left B ottom

8

Diagona l Wipe Right Bottom

9

Extend From Centre H

10 Extend From Centre V
11 Compre ss To Center H
12 Compre ss To Center V
13 Window H
14 Window V
15 Wipe Fr om Edge To Centre
16 Move In Form Top
17 None

Enjo ying Video C D wit h
playback contro l

Enjo ying Video C D wit h
playback contro l

1 . When playing VCD 2.0 w ith PB C, the playe r
w ill sho w the VCD ve rsion and PBC sta tus on
th e scre en.

2. After a fe w sec onds, a men u will a ppear on
the screen .

VCD 2.0
PBC ON

1 WHAT WILL I DO
2 HEA R ME CRY
3 WITH OUT YOU

3. Press n umer ic buttons to select corres pon-
din g track , if the track numb er is u nder 10 ,
cho ose o ne of t he num eric b uttons 0 ~ 9. If the
tra ck num ber is excee d 10, press 1 0+ bu tton
firs tly, the n pres s num eric b uttons 0 ~ 9.
4. Press N EXT o r PRE V button to p lay th e next
or p revious trac k.

W hen P BC is O FF, th ere w ill be n o men u

pag e on t he scr een, y ou can selec t any track to
pla y by us ing nu meric butto ns. Wh en PB C is O N,ther e will b e a me nu pa ge on the sc reen,
and you c an sel ect an y track on the menu to pla y, how ever,w hen t he selected t rack is being
pla yed, y ou can not ch ange the pla y orde r any more e xcept press ing the MENU butto n to re turn
to t he me nu pag e aga in and select anoth er trac k to pl ay.

NO TE:

NE XT

PR EV

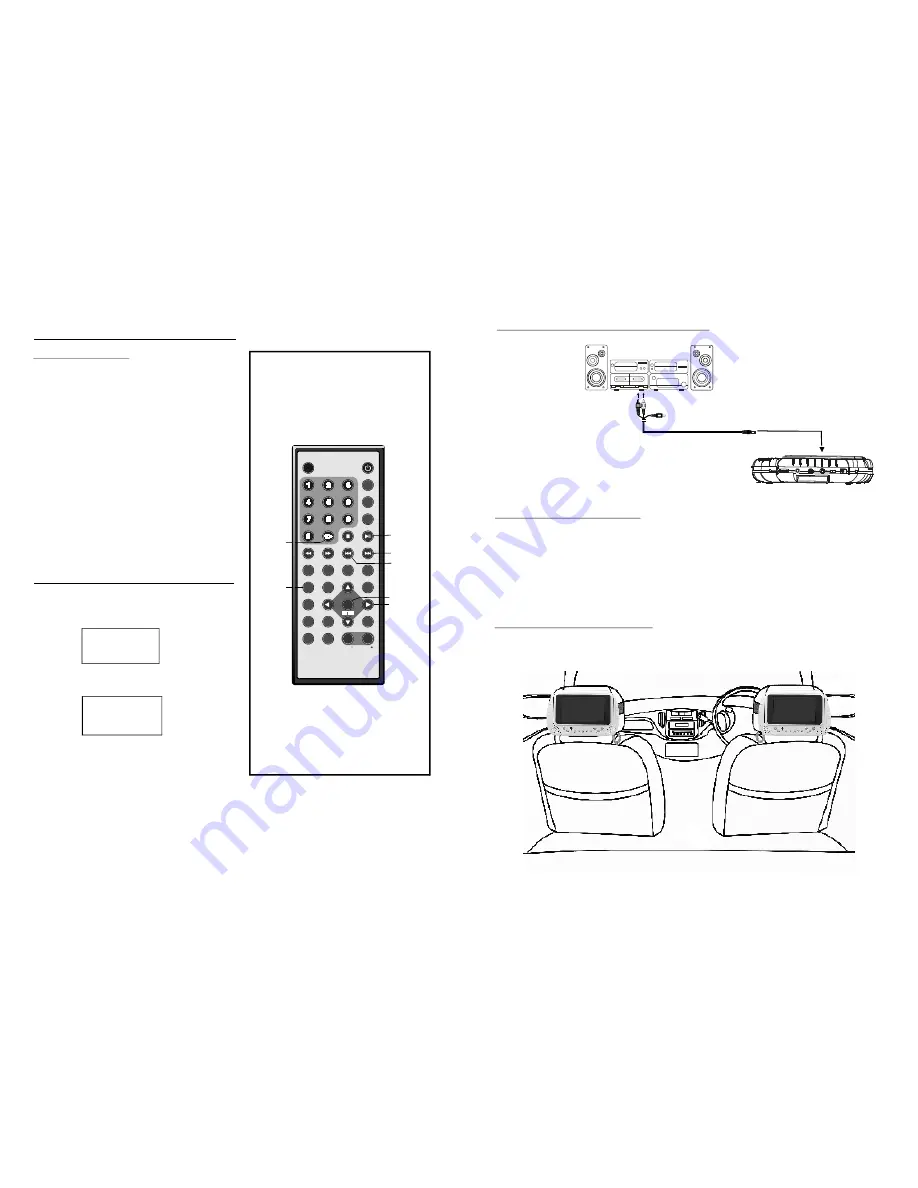
Connecting to audio equipment

Connect Headphones

1. Con

2. Adju

nect the Headphones.

st the Volume to the level that you want.

Ad ju st t he v olum e to min imiz e the vol ume .
Con nec t the hea dph ones to p hon e jac

.

k s

To audi o input /outpu t conn ectors (red, white)

Aud io equ ipmen t

Vide o/aud io cabl e

Installation of Monitors

Use su pplied moun ting st raps in stallin g the monito rs ont o the s eat ba ck in a car.

Tightly wrap the m ountin g strap arou nd the headrest.

Summary of Contents for MTW-727 TWIN

Page 1: ...BEFORE USING THIS PRODUCT READ UNDERSTAND AND FOLLOW THESE INSTRUCTIONS Save this booklet for future reference PORTABLE DVD PLAYER WITH 7 LCD MONITOR V I D E O Instruction Manual MODEL NO MTW 727 TWIN...

Page 2: ...symbol on the product the instructions for use or the packing will inform about the methods for disposal The materials are recyclable as mentioned in this marking By recycling material recycling or o...

Page 3: ...t during lightning storms or when unused for long periods of time Do not expose the product to dripping or splashing water Do not place objects filled with liquid e g vases on the product Do not place...

Page 4: ...UDIO or SUBTITLE button Try selecting it from the DVD menu if one is available Symptom Video CD Remedy This function works only for Video CDs with playback control No menu play No operations can be pe...

Page 5: ...ignal system Discs played AC 100 240V 50 60Hz 18W NTSC PAL 12 cm single sided single layer 12 cm single sided dual layer 12 cm double sided single layer 8 cm single sided single layer 8 cm single side...

Page 6: ...ns and settings can be performed by operating the remote control while monitoring screen The audio soundtrack can be heard in up to 8 languages The number of audio sound languages depends on the softw...

Page 7: ...NTER button to confirm after doing that enter the password and press OK button on the screen then The Password Setup Page then the Password has been changed NOTE 4 2 PARENTAL The original password is...

Page 8: ...play the disc forward at speeds x2 x4 x8 x16 x32 Press this button to enlarge picture size max to 4 or to shrink picture size min to 1 4 Press this button to play the disc at speeds 1 2 1 4 1 8 1 16...

Page 9: ...ion button to switch to another main setup items Common procedure for initial settings Initial settings Basic connection Ensure all the cables are disconnected from the main unit before connecting to...

Page 10: ...e subtitle languages are recorded 1 Press SUBTITLE button during play the screen will display the current language 2 Press SUBTITLE button again to change language or turn off CHANGING SUBTITLE LANGUA...

Page 11: ...0 and the level of Sharpness can be adjusted 0 3 The S Press TFT MODE button again to exit the TFT MODE Menu Page NOTE caling can be adjusted between 16 9 and 4 3 two modes TFT MODE STANDBY MUTE 1 2 3...

Page 12: ...TT 02 03 CH 07 28 0 01 34 Chapter Elapsed TT 02 03 CH 07 2 8 0 0 1 53 Displa y Off T T Title No CH Cha pter Nu mber Program TT 03 CH 1 TT CH 6 TT CH 2 TT CH 7 TT CH 3 TT CH 8 TT CH 4 TT CH 9 TT CH 5...

Page 13: ...R ME CRY 3 WITHOUT YOU 3 Press numeric buttons to select correspon ding track if the track number is under 10 choose one of the numeric buttons 0 9 If the track number is exceed 10 press 10 button fir...

Page 14: ...43 PIC Resolution 512 X 640 9 Zoom Shrink pictures Press ZOOM button to enter the zoom mode Press FF button to enlarge picture to 100 125 150 and 200 Press FR button to shrink pictures to 50 75 and 10...

Page 15: ...has been selected as menu language 1 Switch on the POWER to the ON position at the right side of the player 2 Push the disc cover up to open it to turn on the player 1 Make sure that all the connectio...

Page 16: ...s opened or the STOP button is pressed again the RESUME function will be cleared Skipping ahead Skipping back Press NEXT button during play A chapter DVD or a track Video CD CD is skipped each time th...

Reviews: