background image

2

NOTE ON USE / HINWEISE ZUM GEBRAUCH
OBSERVATIONS RELATIVES A L’UTILISATION / NOTE SULL’USO
NOTAS SOBRE EL USO / ALVORENS TE GEBRUIKEN / OBSERVERA

• Avoid high temperatures.

Allow for sufficient heat dispersion
when installed on a rack.

• Vermeiden Sie hohe Temperaturen.

Beachten Sie, daß eine ausreichend
Luftzirkulation gewährleistet wird, wenn
das Gerät auf ein Regal gestellt wird.

• Eviter des températures élevées 

Tenir compte d’une dispersion de
chaleur suffisante lors de l’installation
sur une étagère.

• Evitate di esporre l’unità a temperature

alte.
Assicuratevi che ci sia un’adeguata
dispersione del calore quando installate
l’unità in un mobile per componenti
audio.

• Evite altas temperaturas

Permite la suficiente dispersión del calor
cuando está instalado en la consola.

• Vermijd hoge temperaturen.

Zorg voor een degelijk hitteafvoer indien
het apparaat op een rek wordt geplaatst. 

• Undvik höga temperaturer.

Se till att det finns möjlighet till god
värmeavledning vid montering i ett rack.

• Handle the power cord carefully.

Hold the plug when unplugging the
cord.

• Gehen Sie vorsichtig mit dem Netzkabel

um.
Halten Sie das Kabel am Stecker, wenn
Sie den Stecker herausziehen.

• Manipuler le cordon d’alimentation avec

précaution.
Tenir la prise lors du débranchement du
cordon.

• Manneggiate il filo di alimentazione con

cura.
Agite per la spina quando scollegate il
cavo dalla presa.

• Maneje el cordón de energía con

cuidado.
Sostenga el enchufe cuando
desconecte el cordón de energía.

• Hanteer het netsnoer voorzichtig.

Houd het snoer bij de stekker vast
wanneer deze moet worden aan- of
losgekoppeld.

• Hantera nätkabeln varsamt.

Håll i kabeln när den kopplas från el-
uttaget.

• Keep the set free from moisture, water,

and dust. 

• Halten Sie das Gerät von Feuchtigkeit,

Wasser und Staub fern.

• Protéger l’appareil contre l’humidité,

l’eau et lapoussière.

• Tenete l’unità lonta na dall’umidità,

dall’acqua e dalla polvere.

• Mantenga el equipo libre de humedad,

agua y polvo.

• Laat geen vochtigheid, water of stof in

het apparaat binnendringen.

• Utsätt inte apparaten för fukt, vatten

och damm.

• Unplug the power cord when not using

the set for long periods of time.

• Wenn das Gerät eine längere Zeit nicht

verwendet werden soll, trennen Sie das
Netzkabel vom Netzstecker.

• Débrancher le cordon d’alimentation

lorsque l’appareil n’est pas utilisé
pendant de longues périodes.

• Disinnestate il filo di alimentazione

quando avete l’intenzione di non usare il
filo di alimentazione per un lungo
periodo di tempo.

• Desconecte el cordón de energía

cuando no utilice el equipo por mucho
tiempo.

• Neem altijd het netsnoer uit het

stopkontakt wanneer het apparaat
gedurende een lange periode niet wordt
gebruikt.

• Koppla ur nätkabeln om apparaten inte

kommer att användas i lång tid.

• Do not obstruct the ventilation holes.
• Die Belüftungsöffnungen dürfen nicht

verdeckt werden.

• Ne pas obstruer les trous d’aération.
• Non coprite i fori di ventilazione.
• No obstruya los orificios de ventilación.
• De ventilatieopeningen mogen niet

worden beblokkeerd.

• Täpp inte till ventilationsöppningarna.

* (For sets with ventilation holes)

• Do not let foreign objects in the set.
• Keine fremden Gegenstände in das

Gerät kommen lassen.

• Ne pas laisser des objets étrangers dans

l’appareil.

• E’ importante che nessun oggetto è

inserito all’interno dell’unità.

• No deje objetos extraños dentro del

equipo.

• Laat geen vreemde voorwerpen in dit

apparaat vallen.

• Se till att främmande föremål inte

tränger in i apparaten.

• Do not let insecticides, benzene, and

thinner come in contact with the set.

• Lassen Sie das Gerät nicht mit

Insektiziden, Benzin oder
Verdünnungsmitteln in Berührung
kommen.

• Ne pas mettre en contact des

insecticides, du benzène et un diluant
avec l’appareil.

• Assicuratevvi che l’unità non venga in

contatto con insetticidi, benzolo o
solventi.

• No permita el contacto de insecticidas,

gasolina y diluyentes con el equipo.

• Laat geen insektenverdelgende

middelen, benzine of verfverdunner met
dit apparaat in kontakt komen.

• Se till att inte insektsmedel på

spraybruk, bensen och thinner kommer i
kontakt med apparatens hölje.

• Never disassemble or modify the set in

any way.

• Versuchen Sie niemals das Gerät

auseinander zu nehmen oder auf
jegliche Art zu verändern.

• Ne jamais démonter ou modifier

l’appareil d’une manière ou d’une autre.

• Non smontate mai, nè modificate l’unità

in nessun modo.

• Nunca desarme o modifique el equipo

de ninguna manera.

• Nooit dit apparaat demonteren of op

andere wijze modifiëren.

• Ta inte isär apparaten och försök inte

bygga om den. 

ENGLISH

DEUTSCH

FRANCAIS

ITALIANO

ESPAÑOL

NEDERLANDS

SVENSKA

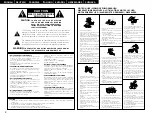
The lightning flash with arrowhead symbol, within an equilateral
triangle, is intended to alert the user to the presence of uninsulated
“dangerous voltage” within the product’s enclosure that may be of
sufficient magnitude to constitute a risk of electric shock to persons.

The exclamation point within an equilateral triangle is intended to alert
the user to the presence of important operating and maintenance
(servicing) instructions in the literature accompanying the appliance.

WARNING:

TO REDUCE THE RISK OF FIRE OR ELECTRIC SHOCK, DO NOT
EXPOSE THIS APPLIANCE TO RAIN OR MOISTURE.

CAUTION

RISK OF ELECTRIC SHOCK

DO NOT OPEN

CAUTION:

TO REDUCE THE RISK OF ELECTRIC
SHOCK, DO NOT REMOVE COVER (OR
BACK). NO USER-SERVICEABLE PARTS
INSIDE. REFER SERVICING TO QUALIFIED
SERVICE PERSONNEL.

DECLARATION OF CONFORMITY

We declare under our sole responsibility that this
product, to which this declaration relates, is in
conformity with the following standards:
EN60065, EN55013, EN55020, EN61000-3-2 and
EN61000-3-3.
Following the provisions of 73/23/EEC, 89/336/EEC and
93/68/EEC Directive.

ÜBEREINSTIMMUNGSERKLÄRUNG

Wir erklären unter unserer Verantwortung, daß dieses
Produkt, auf das sich diese Erklärung bezieht, den
folgenden Standards entspricht:
EN60065, EN55013, EN55020, EN61000-3-2 und
EN61000-3-3.
Entspricht den Verordnungen der Direktive 73/23/EEC,
89/336/EEC und 93/68/EEC. 

DECLARATION DE CONFORMITE

Nous déclarons sous notre seule responsabilité que
l’appareil, auquel se réfère cette déclaration, est
conforme aux standards suivants:
EN60065, EN55013, EN55020, EN61000-3-2 et
EN61000-3-3.
D’après les dispositions de la Directive 73/23/EEC,
89/336/EEC et 93/68/EEC. 

DICHIARAZIONE DI CONFORMITÀ

Dichiariamo con piena responsabilità che questo
prodotto, al quale la nostra dichiarazione si riferisce, è
conforme alle seguenti normative:

EN60065, EN55013, EN55020, EN61000-3-2 e
EN61000-3-3.
In conformità con le condizioni delle direttive 73/23/EEC,
89/336/EEC e 93/68/EEC.
QUESTO PRODOTTO E’ CONFORME
AL D.M. 28/08/95 N. 548

DECLARACIÓN DE CONFORMIDAD

Declaramos bajo nuestra exclusiva responsabilidad que
este producto al que hace referencia esta declaración,
está conforme con los siguientes estándares:
EN60065, EN55013, EN55020, EN61000-3-2 y
EN61000-3-3.
Siguiendo las provisiones de las Directivas 73/23/EEC,
89/336/EEC y 93/68/EEC. 

EENVORMIGHEIDSVERKLARING

Wij verklaren uitsluitend op onze verantwoordelijkheid
dat dit produkt, waarop deze verklaring betrekking
heeft, in overeenstemming is met de volgende normen:
EN60065, EN55013, EN55020, EN61000-3-2 en
EN61000-3-3.
Volgens de bepalingen van de Richtlijnen 73/23/EEC,
89/336/EEC en 93/68/EEC. 

ÖVERENSSTÄMMELSESINTYG

Härmed intygas helt på eget ansvar att denna produkt,
vilken detta intyg avser, uppfyller följande standarder:
EN60065, EN55013, EN55020, EN61000-3-2 och
EN61000-3-3.
Enligt stadgarna i direktiv 73/23/EEC, 89/336/EEC och
93/68/EEC.

CAUTION

The ventilation should not be impeded by covering the ventilation openings with items, such as newspapers, table-cloths,
curtains, etc.

No naked flame sources, such as lighted candles, should be placed on the apparatus.

Please be care the environmental aspects of battery disposal.

The apparatus shall not be exposed to dripping or splashing for use.

No objects filled with liquids, such as vases, shall be placed on the apparatus.

Summary of Contents for DHT-483XP

Page 1: ...ITALIANO PAGINA 02 84 PAGINA 110 192 PARA LECTORES DE ESPA OL PAGINA 2 111 PAGINA 137 192 VOOR NEDERLANDSTALIGE LEZERS PAGINA 2 138 PAGINA 164 192 FOR SVENSKA L SARE SIDA 2 165 SIDA 192 AV SURROUND RE...

Page 2: ...yentes con el equipo Laat geen insektenverdelgende middelen benzine of verfverdunner met dit apparaat in kontakt komen Se till att inte insektsmedel p spraybruk bensen och thinner kommer i kontakt med...

Page 3: ...ispersal leave at least 10 cm of space between the top back and sides of this unit and the wall or other components Switching the input function when input jacks are not connected A clicking noise may...

Page 4: ...D button 24 5 EXT IN button 16 17 6 SIGNAL indicators 16 7 INPUT mode indicators 16 8 Remote control sensor REMOTE SENSOR 9 9 Power operation indicator ON STANDBY 0 INPUT SELECTOR knob 16 18 19 24 26...

Page 5: ...is used independently without turning the power of this unit on If this happens turn on the power of this unit Connecting the audio components 1 Decoders with 6 channel analog outputs etc Connecting...

Page 6: ...VDP can also be connected to the VCR terminals AUDIO VIDEO Connecting a video decks Connecting a TV DBS tuner TV DBS Connect the TV s or DBS tuner s video output jack VIDEO OUTPUT to the yellow TV DB...

Page 7: ...VIDEO OUT S VIDEO OUT IN S VIDEO VIDEO IN VIDEO OUT VIDEO IN VIDEO OUT VIDEO OUT B B DVD player VDP etc Connecting a monitor TV Monitor TV Connecting a TV DBS tuner Connect the TV s or DBS tuner s S...

Page 8: ...effect Connection jack for subwoofer with built in amplifier super woofer etc To achieve Dolby Digital AC 3 playback effect use a unit that can sufficiently reproduce frequencies of under 80 Hz Conne...

Page 9: ...control unit Inserting the batteries 30 10 SETTING UP THE SYSTEM Once all connections with other AV components have been completed as described in CONNECTIONS see pages 5 to 8 make the various settin...

Page 10: ...l Initial ENGLISH Use the left and right buttons to select your subwoofer setting 4 Press the ENTER or down button to enter the settings and switch to the SUBWOOFER MODE setting 4 S WOOFER YES YES NO...

Page 11: ...nd select the playback mode providing the stronger low frequency range sound Input the distances from the listening position to the speakers and set the surround delay time Preparations Measure the di...

Page 12: ...ng Initial 14 EXT IN SW 15 00 05 10 15 Set the method of playback of the analog input signal connected to the Ext In terminal Setting the Ext In SW Level Use the left and right buttons to select the E...

Page 13: ...stering the manufacturer of the component as shown on the List of Preset Codes pages 192 194 Operation is not possible for some models Set mode switch 1 to AUDIO or VIDEO 3 2 1 4 Preset memory 1 Set t...

Page 14: ...H F G Cursor up down left and right ENTER Enter setting 2 Video disc player VDP system buttons POWER Power on standby ON SOURCE 6 7 Manual search forward and reverse 2 Stop 1 Play 8 9 Auto search cue...

Page 15: ...t OFF The power turns off and power indicator is off In this position the power cannot be turned on and off from the remote control unit Main unit Remote control unit Main unit Punch Through is a func...

Page 16: ...ing input to the external decoder input jacks are played without passing through the surround circuitry NOTE Note that noise will be output when CDs or LDs recorded in DTS format are played in the PCM...

Page 17: ...using the VIDEO SELECT button Switch the program source to the component connected to the video input jacks 4 Combining the currently playing sound with the desired image 1 1 Remote control unit 5 Che...

Page 18: ...e TEST TONE button Remote control unit Test tones are output from the different speakers Use the channel volume adjust buttons to adjust so that the volume of the test tones is the same for all the sp...

Page 19: ...ograms encoded in Dolby Surround The Music mode is recommended as the standard mode for autosound music systems no video and is optional for A V systems The Emulation mode offers the same robust surro...

Page 20: ...ntrol unit right button left button Surround parameters w CINEMA EQ Cinema Equalizer The Cinema EQ function gently decreases the level of the extreme high frequencies compensating for overly bright so...

Page 21: ...hen playing sources recorded in monaural the sound will be one sided if signals are only input to one channel left or right so input signals to both channels If you have a source component with only o...

Page 22: ...surround mode while adjusting the surround parameters channel volume or tone control press the SURROUND MODE button then operate the selector Main unit 1 3 2 1 2 Press the SURROUND PARAMETER button P...

Page 23: ...s C C C C E E C C C C C C C Only for 2 ch contents E E E C CINEMA E E E E E E E E E MODE E E E C OFF E E E E E E E E E PANORAMA E E E C 3 E E E E E E E E E DIMENSION E E E C 0 E E E E E E E E E CENTER...

Page 24: ...Remote control unit 3 1 4 2 Main unit Remote control unit Main unit Remote control unit Main unit Remote control unit Preset stations 3 2 1 4 3 2 Preparations Use the Auto tuning or Manual tuning oper...

Page 25: ...splay Press the PRESET UP or DOWN button to automatically begin the RDS search operation When a broadcast station is found that station s name appears on the display To continue searching repeat step...

Page 26: ...ons as they were immediately before the power is switched off The unit is also equipped with a back up memory This function provides approximately one week of memory storage when the main unit s power...

Page 27: ...of home surround systems No recorded channels elements No playback channels Playback channels max Audio processing High frequency playback limit of surround channel Dolby Digital 5 1 ch 5 1 ch L R C...

Page 28: ...the AVR 1603 see page 19 lights before turning up the master volume 3 A DVD player with DTS compatible digital output is required to play DTS DVDs A DTS Digital Output logo is featured on the front pa...

Page 29: ...esponse 5 Hz 10 MHz 1 3 dB S video jacks Input output level and impedance Y brightness signal 1 Vp p 75 ohms C color signal 0 286 Vp p 75 ohms Frequency response 5 Hz 10 MHz 1 3 dB 2 Tuner section FM...

Page 30: ...nas interiores o cables alimentadores de 300 ohmios Le recomendamos emplear antenas exteriores y cables coaxiales de 75 ohmios Para una adecuada disipaci n del calor deje por lo menos 10 cm de espacio...

Page 31: ...NE CONTROL 124 7 Bot n CH VOL 126 8 Control MASTER VOLUME 124 9 Bot n RT 134 0 Bot n PTY 133 1 Indicador de volumen general VOLUME LEVEL 124 2 Pantalla de visualizaci n 3 Botones de selecci n de canal...

Page 32: ...la alimentaci n el ctrica del equipo Conexi n de los componentes de audio 1 8 R INTPUT OUTPUT L R L R L R L R L R L R L L R Descodificadores con salidas anal gicas de 6 canales etc Conexi n de un mag...

Page 33: ...o del televisor o sintonizador DBS AUDIO OUTPUT al conector TV DBS IN usando cables con clavijas de espiga AUDIO VIDEO VIDEO OUT AUDIO OUT AUDIO IN VIDEO IN AUDIO OUT VIDEO OUT VIDEO OUT AUDIO OUT DIG...

Page 34: ...iones de funcionamiento de los otros componentes Nota sobre las tomas de entrada S Los selectores de entrada de las se ales S y las entradas de tomas de patilla funcionan conjuntamente unos con otros...

Page 35: ...ridades correspondan con y con La no correspondencia de las polaridades dar como resultado un sonido central d bil una orientaci n poco clara de los diversos instrumentos y una sensaci n de desmejoram...

Page 36: ...de audio v deo tal como se describe en CONEXIONES v anse las p ginas 113 a 116 prosiga con los diversos ajustes descritos m s adelante en la pantalla de visualizaci n Estos ajustes son necesarios para...

Page 37: ...i n AUDIO en la unidad de mando a distancia NOTA Cuando se selecciona Small peque o para los altavoces frontales Large grande no puede ser seleccionado para el altavoz central NOTA Cuando se seleccion...

Page 38: ...modo de reproducci n NORM el margen de se ales de frecuencias graves de los canales ajustados a LARGE s lo se emiten por tales canales En este modo de reproducci n se tiende a una menor interferencia...

Page 39: ...xima vez que entre la misma se al el modo de sonido envolvente memorizado se selecciona autom ticamente y se reproduce la se al Observe que el ajuste del modo de sonido envolvente tambi n se almacena...

Page 40: ...arse para controlar componentes de otras marcas sin necesidad de usar la funci n de memorizaci n para ello se debe registrar la marca del componente como se muestra en la Lista de c digos de preajuste...

Page 41: ...e reproductor de disco de video VDP POWER Alimentaci n ON SOURCE activada en espera 6 7 B squeda manual hacia adelante y hacia atr s 2 Parada 1 Reproducci n 8 9 B squeda autom tica al comienzo de la p...

Page 42: ...el bot n SPEAKER de la unidad del mando a distancia Preparaci n Verifique que todas las conexiones est n correctas Encienda el equipo Presione el interruptor de funcionamiento de alimentaci n 12 OPER...

Page 43: ...scos l ser Seleccionando los modos AUTO PCM y DTS El modo cambia como se indica m s abajo cada vez que se pulsa el bot n INPUT MODE modo de entrada Notas sobre la reproducci n de una fuente codificada...

Page 44: ...ta que la fuente que se desea se visualice Cancelaci n de transmisi n simult nea Seleccione SOURCE utilizando el bot n VIDEO SELECT Cambie la fuente del programa al componente conectado al los conecto...

Page 45: ...rueba Utilice los botones de ajuste del volumen de los canales para hacer los ajustes precisos de modo que el volumen de los tonos de prueba sea el mismo para todos los altavoces Mando a distancia 3 D...

Page 46: ...do Cinema se utiliza con programas de televisi n en est reo y con todos los programas codificados en Dolby Surround El modo Music es el modo est ndar recomendado para sistemas de m sica autosound no v...

Page 47: ...rminar el modo de par metro de sonido envolvente Mando a distancia Par metros de los altavoces surround de tonos graves w CINEMA EQ Ecualizador Cinema La funci n ecualizador cinema disminuye suavement...

Page 48: ...e muestreo de 96 kHz tales como discos DVD Video que contienen audio de 24 bit 96 kHz Si se reciben estas se ales mientras se efectuan reproducciones en alguno de los modos surround el modo cambia aut...

Page 49: ...Cuando se gira en el sentido contrario al de las agujas del reloj Para seleccionar el modo surround mientras que se est realizando el ajuste de los par metros surround volumen del canal o control del...

Page 50: ...E E E E E E E E E PANORAMA E E E C 3 E E E E E E E E E DIMENSION E E E C 0 E E E E E E E E E CENTER WIDTH E E E C OFF C OFF C OFF E E E E E E E CINEMA EQ LFE C 0dB C 0dB E C 0dB E E E E E E C Se ales...

Page 51: ...justa el modo de sintonizaci n manual las emisiones estereof nicas de FM se reciben en modo monoauricular y el indicador STEREO se apaga Emisoras presintonizadas 3 2 1 4 3 2 Preparaci n Use la funci n...

Page 52: ...ni os Asuntos sociales Religi n Cultura Ciencia Varios M sica pop Cl sicos M sica folk Documentales B squeda RDS Use esta funci n para sintonizar autom ticamente las estaciones de FM que proporcionan...

Page 53: ...salida tal como estaban inmediatamente antes de apagar el equipo Esta unidad est adem s equipada con una memoria de respaldo Esta funci n proporciona almacenamiento de memoria de aproximadamente 1 sem...

Page 54: ...una sala de cine Dolby Surround 1 Dolby Digital Dolby Surround AC 3 Dolby Digital es el formato de se ales digitales multicanal desarrollado por los Laboratorios Dolby El formato Dolby Digital consta...

Page 55: ...si n relativamente baja Debido a ello la cantidad de informaci n es muy grande y cuando se utiliza las reproducci n en DTS en salas de cine se reproduce un CDROM sincronizado con la pel cula Por supue...

Page 56: ...ulsando un bot n distinto Los polos y de las pilas est n colocados en posici n invertida Compruebe la colocaci n del cable de alimentaci n Encienda la alimentaci n con el mando a distancia despu s de...

Page 57: ...087 094 Multitech 007 009 011 087 090 094 NAD 038 NEC 004 005 006 018 026 029 045 061 062 085 Nikko 088 Noblex 087 Optimus 081 088 Optonica 021 Panasonic 024 049 064 066 067 068 069 107 Perdio 009 Pe...

Page 58: ...127 131 132 145 147 Philips 005 015 017 050 051 056 078 087 088 089 131 132 147 Pioneer 124 128 142 Portland 054 Price Club 095 Proscan 040 044 125 Proton 035 051 092 129 Pulsar 042 Quasar 036 037 074...

Page 59: ...JVC 004 005 Kenwood 006 Magnavox 002 Marantz 002 Onkyo 016 018 Optimus 007 008 Panasonic 012 Philips 002 Pioneer 007 008 009 Sony 013 014 015 Technics 012 Victor 004 Wards 007 Yamaha 010 011 Preset co...

Page 60: ...Printed in China 511 3940 104 16 11 YUSHIMA 3 CHOME BUNKYOU KU TOKYO 113 0034 JAPAN Telephone 03 3837 5321...

Reviews: