Back to Contents Page
Hard Drive
Dell™ XPS™ M1210 Service Manual
Removing the Hard Drive
Replacing the Hard Drive
Returning a Hard Drive to Dell
Removing the Hard Drive
1.
Follow the instructions in
Before Working Inside Your Computer
.
2.
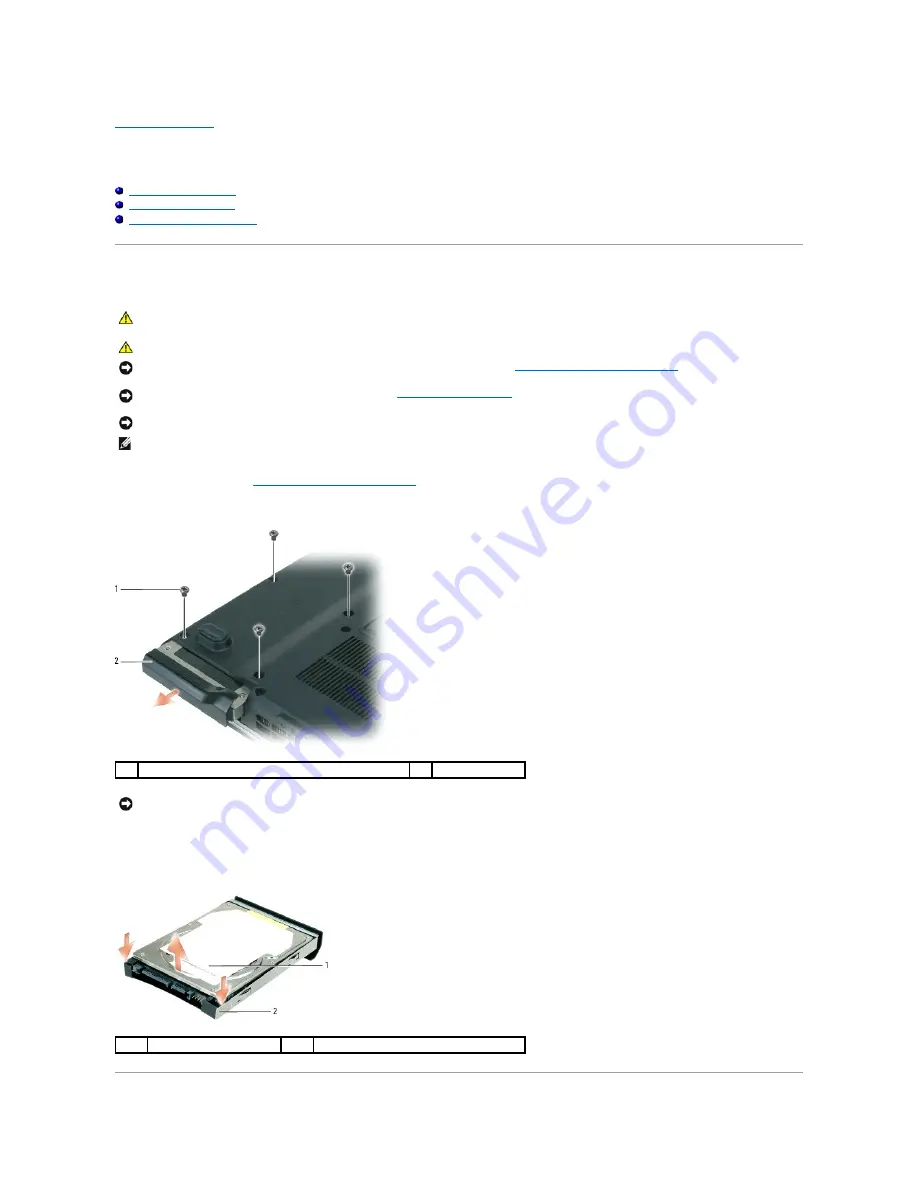
Turn the computer upside down and remove the four M3 x 3-mm screws.
3.
Slide the hard drive out of the computer.
4.
Remove the hard drive from the hard drive carrier by carefully bending the carrier plastics with your fingers.
CAUTION:
If you remove the hard drive from the computer when the drive is hot,
do not touch
the metal housing of the hard drive.
CAUTION:
Before you begin the following procedure, follow the safety instructions in the
Product Information Guide
.
NOTICE:
To help prevent damage to the system board, remove the main battery (see
Before Working Inside Your Computer
) before working inside the
computer.
NOTICE:
To prevent data loss, turn off your computer (see
Turning Off Your Computer
) before removing the hard drive. Do not remove the hard drive
while the computer is on, in standby mode, or in hibernate mode.
NOTICE:
Hard drives are extremely fragile; even a slight bump can damage the drive.
NOTE:
Dell does not guarantee compatibility or provide support for hard drives from sources other than Dell.
1
M3 x 3-mm hard drive screws (4)
2
hard drive
NOTICE:
When the hard drive is not in the computer, store it in protective antistatic packaging. See "Protecting Against Electrostatic Discharge" in your
Product Information Guide
.
1
hard drive
2
hard drive carrier
Summary of Contents for XPS M1210
Page 43: ...Back to Contents Page ...


