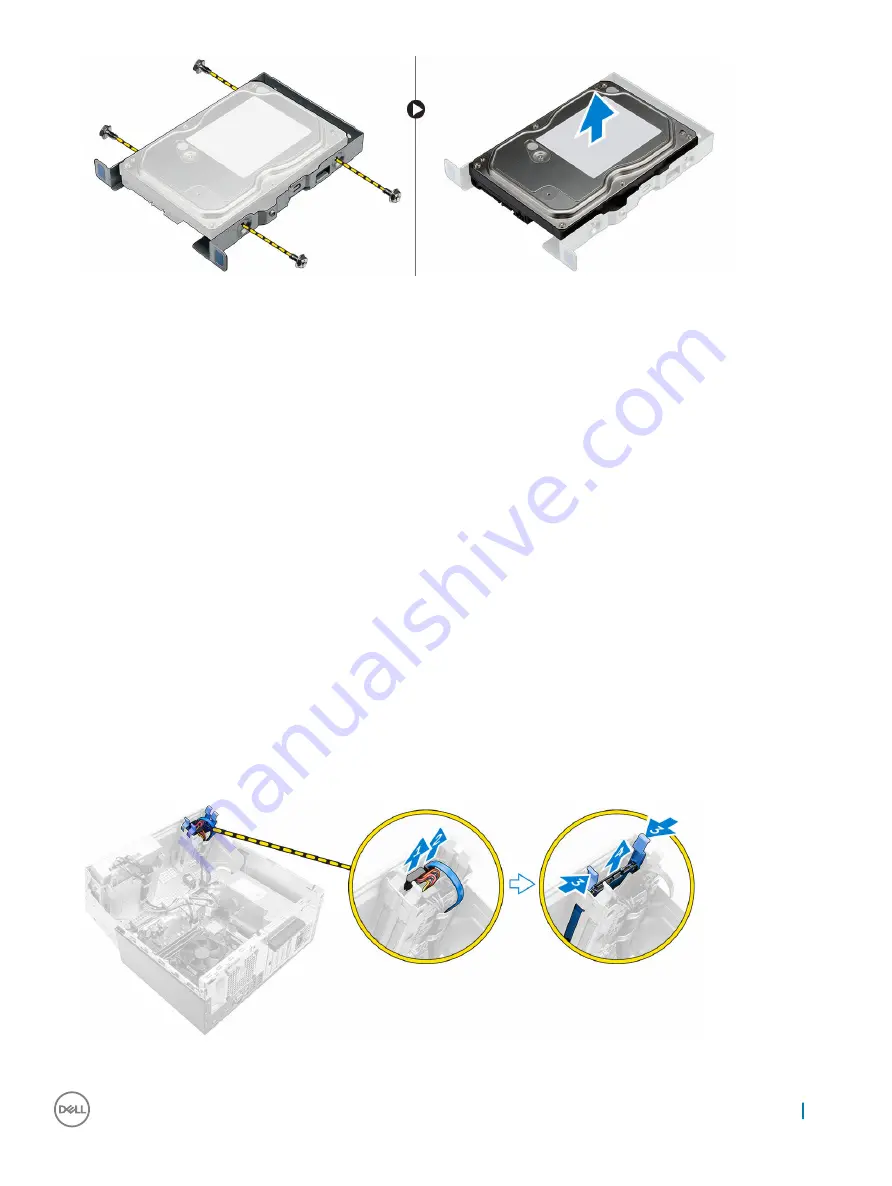
Installing the 3.5 inch hard drive assembly
1
Insert the hard drive into the hard drive bracket.
2
Secure the hard drive to the hard drive bracket by using the screws.
3
Insert the hard drive assembly into the slot on the computer until it clicks into place.
4
Close the front panel door.
5
Install the screw that secures the hard drive assembly to the front panel door.
6
Connect the SATA cable and the power cable to the connectors on the hard drive.
7
Install the:
a
b
8
After working inside your computer
.
Removing the 2.5 inch hard drive assembly
1
Before working inside your computer
2
Remove the:
a
b
3
To remove the hard drive assembly:
a Disconnect the hard drive assembly cables from the connectors on the hard drive [1, 2].
b Open the
c Press the blue tabs on both sides [3] and pull the hard drive assembly out of the chassis [4].
4
To remove the hard drive from the hard drive bracket:
Removing and installing components
11


