2.
Replace the eight screws that secure the display panel brackets to each side of the display panel.
3.
Align the display panel with the display cover and replace the six screws.
4.
Connect the display cables to the ends of the inverter board.
5.
Route the cables back through their routing channels.
6.
Replace the display bezel (see
Replacing the Display Bezel
).
7.
Replace the display assembly (see
Display
).
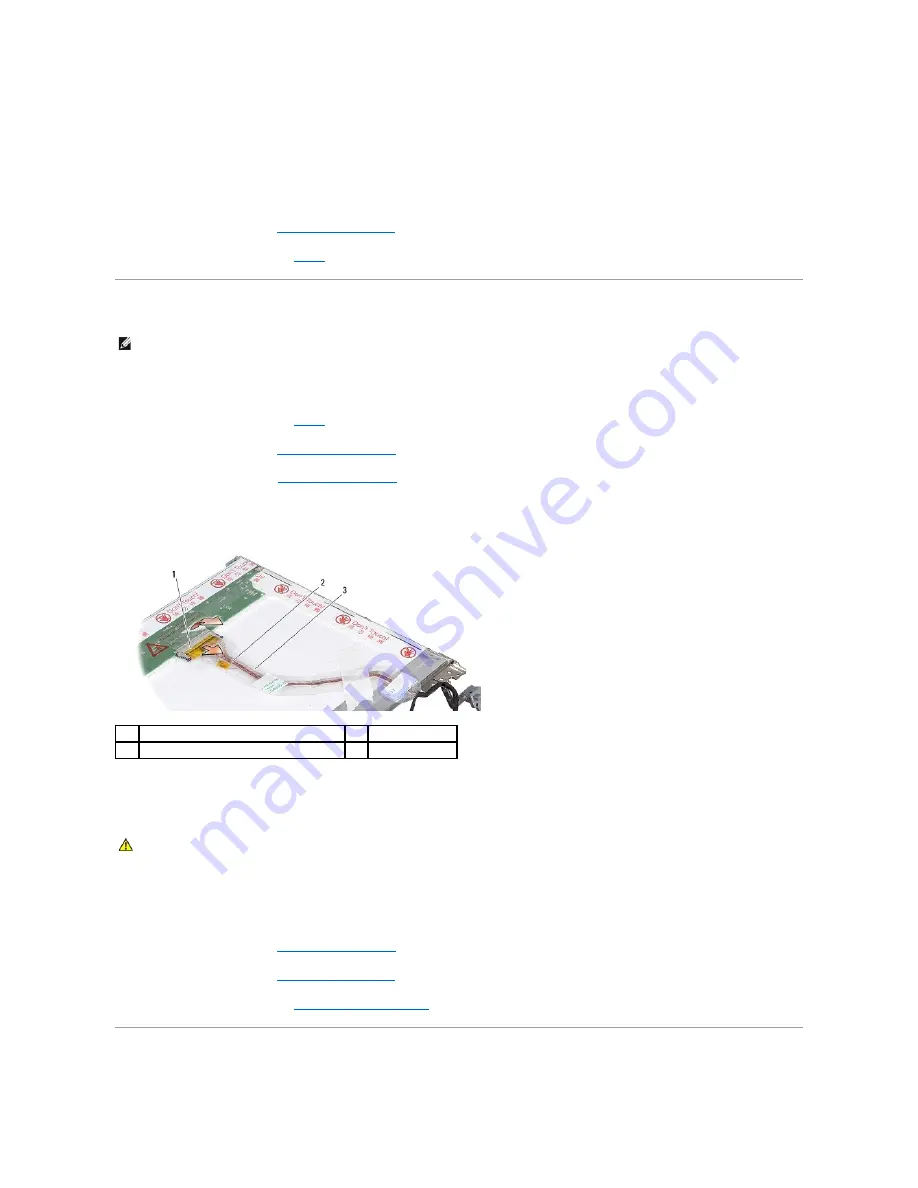
Display Panel Cable
Removing the Display Panel Cable
1.
Remove the display assembly (see
Display
).
2.
Remove the display bezel (see
Removing the Display Bezel
).
3.
Remove the display panel (see
Removing the Display Panel
).
4.
Turn over the display panel and remove the conductive tape on the display board.
5.
Disconnect the flex cable from the display board.
Replacing the Display Panel Cable
1.
Connect the flex cable to the connector on the inverter board.
2.
Connect the flex cable to the connector on the back of the display panel and adhere the tape back into position.
3.
Replace the display panel (see
Replacing the Display Panel
).
4.
Replace the display bezel (see
Replacing the Display Bezel
).
5.
Replace the display assembly (see
Replacing the Display Assembly
).
Display Inverter
NOTE:
The Display Panel cables and connectors may differ depending on the Display Panel you ordered.
1
display board connector
2
flex cable
3
conductive tape
CAUTION:
Before working inside your computer, read the safety information that shipped with your computer. For additional safety best
practices information, see the Regulatory Compliance Homepage at www.dell.com/regulatory_compliance.
Summary of Contents for PowerEdge 860
Page 4: ...Back to Contents Page ...


