


support.dell.com
Installing System Board Options
8-3
To install an expansion card, perform the following steps.
%
!""#$
1.
Turn off the system, including any attached peripherals, and disconnect the sys-
tem from the electrical outlet.
2.
Prepare the expansion card for installation, and open the computer doors accord-
ing to the instructions in “Opening the Computer Doors” in Chapter 7.
&'( )**(+,*#
*
See the documentation that came with the expansion card for information on
configuring the card, making internal connections, or otherwise customizing the
card for your system.
3.
Remove the expansion-card cage as instructed in “Removing the Expansion-Card
Cage” in Chapter 7.
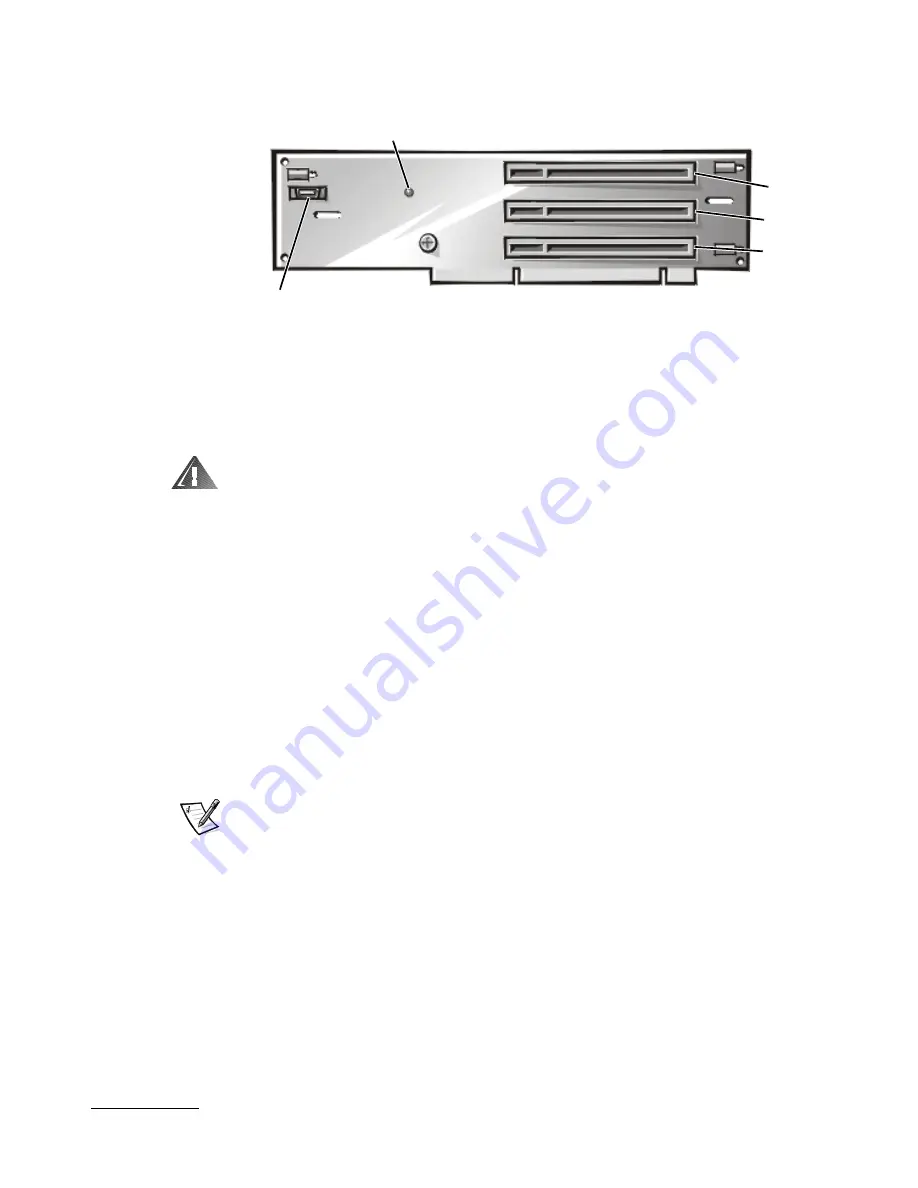
NOTE: Verify that the power LED on the riser board (see Figure 8-2) is off before
removing the card cage.
4.
Open the expansion-card latch (see Figure 8-3) and remove the filler bracket from
the expansion slot.
PCI2
PCI1
power LED
DRAC 2 connector (SVR_MGT)
PCI3
Summary of Contents for PowerEdge 2450
Page 1: ... ...
Page 8: ...xxii ...
Page 10: ...1 2 Dell PowerEdge 2450 Systems Installation and Troubleshooting Guide ...
Page 36: ...4 4 Dell PowerEdge 2450 Systems Installation and Troubleshooting Guide ...
Page 42: ...5 6 Dell PowerEdge 2450 Systems Installation and Troubleshooting Guide ...
Page 50: ...6 8 Dell PowerEdge 2450 Systems Installation and Troubleshooting Guide ...
Page 108: ...10 8 Dell PowerEdge 2450 Systems Installation and Troubleshooting Guide ...
Page 128: ...11 20 Dell PowerEdge 2450 Systems Installation and Troubleshooting Guide ...
Page 136: ...A 8 Dell PowerEdge 2450 Systems Installation and Troubleshooting Guide ...
Page 146: ...xiv ...
Page 150: ...xvi ...
Page 158: ...x ...
Page 160: ...vi ...
Page 166: ...xxii ...


