support.dell.com
Checking Inside the Computer
7-5
4.
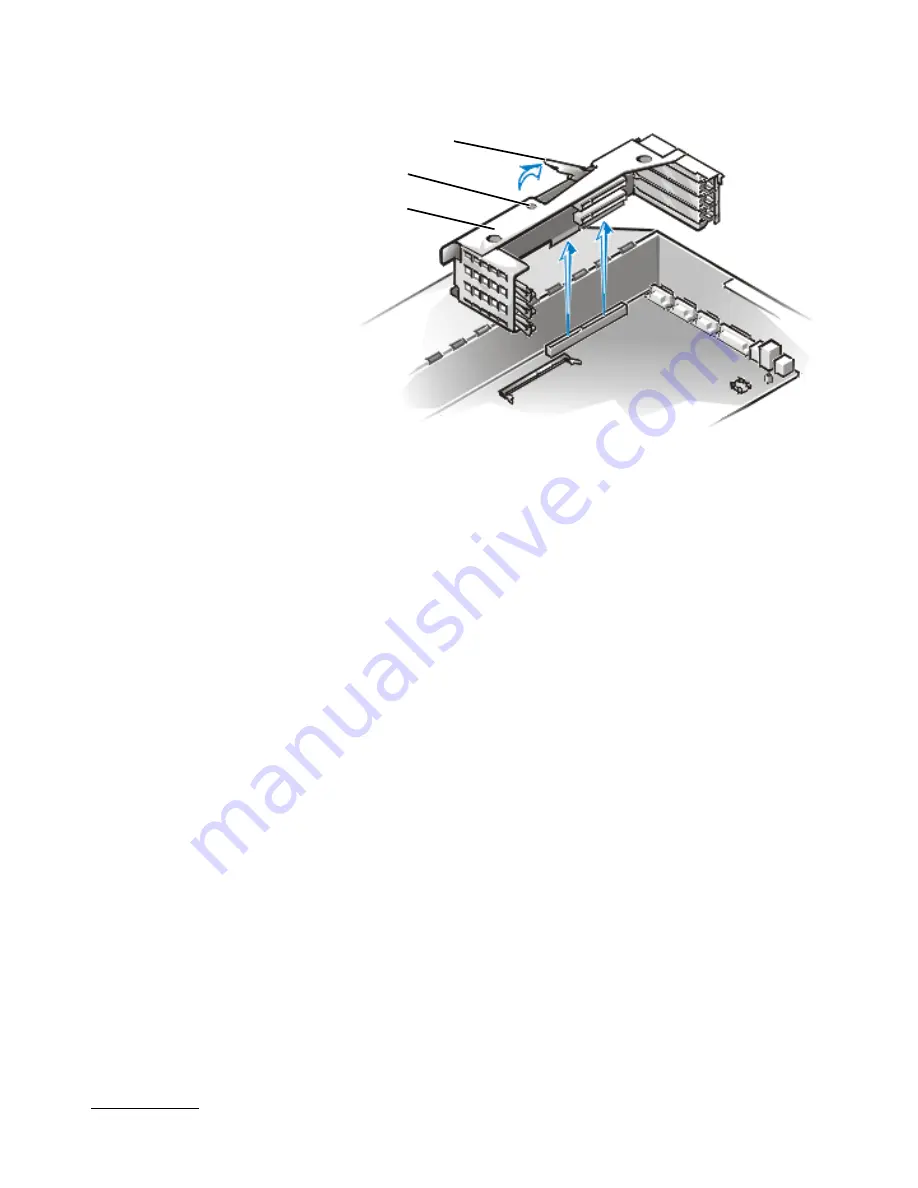
Locate the expansion-card cage securing lever (see Figure 7-3). Rotate the lever
upward until it stops in an upright position.
5.
Lift the expansion-card cage up and away from the chassis.
To replace the expansion-card cage, perform the following steps:
1.
With the securing lever in the upright position, lower the expansion-card cage
into place until it is aligned.
2.
Rotate the securing lever downward until it is flush with the top of the chassis.
Make sure the riser board is fully seated in the RISER connector on the system
board.
3.
Reconnect any cables you removed in step 3 of the previous procedure, “Remov-
ing the Expansion-Card Cage.”
"
In Figure 7-4, the computer doors are opened to provide an interior view. Refer to this
illustration to locate interior features and components discussed later in this guide.
securing lever
expansion-card cage
power LED
Summary of Contents for PowerEdge 2450
Page 1: ... ...
Page 8: ...xxii ...
Page 10: ...1 2 Dell PowerEdge 2450 Systems Installation and Troubleshooting Guide ...
Page 36: ...4 4 Dell PowerEdge 2450 Systems Installation and Troubleshooting Guide ...
Page 42: ...5 6 Dell PowerEdge 2450 Systems Installation and Troubleshooting Guide ...
Page 50: ...6 8 Dell PowerEdge 2450 Systems Installation and Troubleshooting Guide ...
Page 108: ...10 8 Dell PowerEdge 2450 Systems Installation and Troubleshooting Guide ...
Page 128: ...11 20 Dell PowerEdge 2450 Systems Installation and Troubleshooting Guide ...
Page 136: ...A 8 Dell PowerEdge 2450 Systems Installation and Troubleshooting Guide ...
Page 146: ...xiv ...
Page 150: ...xvi ...
Page 158: ...x ...
Page 160: ...vi ...
Page 166: ...xxii ...


