background image

Using Multimedia: Dell Latitude ATG D620 User's Guide


NOTE: 

When the speakers are muted, you do not hear the CD or DVD 

playing. 

1.  Click 

Start

→ 

All Programs

→ 

Accessories

→ 

Entertainment

→ 

Volume Control

.  


2.  Click and drag the bar in the 

Volume Control

 column and slide it up or down to increase or 

decrease the volume.  


For more information on volume control options, click 

Help

 in the 

Volume Control

 window.

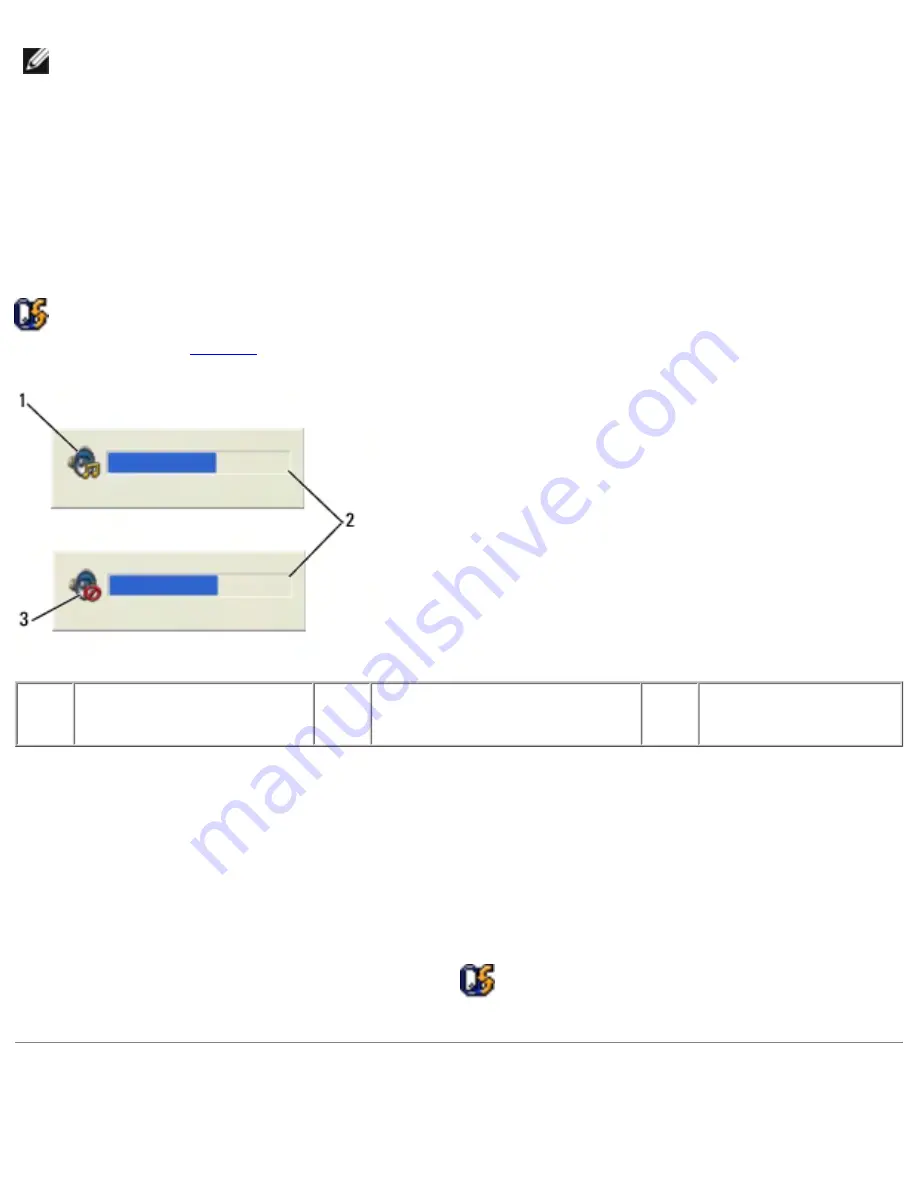
The Volume Meter displays the current volume level, including mute, on your computer. Either click the 

 icon in the taskbar and select or deselect 

Disable On Screen Volume Meter

, or press the volume 

control buttons (see 

page 26

) to enable or disable the Volume Meter on the screen.


1

volume icon

2

Volume Meter

3

mute icon

When the meter is enabled, adjust the volume with the volume control buttons or by pressing the 

following keys:


Press <Fn> <PageUp> to increase volume.  


Press <Fn> <PageDn> to decrease volume. 


Press <Fn> <End> to mute volume. 


For more information about QuickSet, right-click the 

 icon in the taskbar and click 

Help

.

Adjusting the Picture 

file:///H|/My%20Documents/Cellular/User%20Guides/Notebooks/D620%20ATG/media.htm (3 of 4)4/13/2007 4:36:36 PM

Summary of Contents for Latitude ATG D620

Page 1: ...hat helps you make better use of your computer NOTICE A NOTICE indicates either potential damage to hardware or loss of data and tells you how to avoid the problem CAUTION A CAUTION indicates a potential for property damage personal injury or death Abbreviations and Acronyms For a complete list of abbreviations and acronyms see the Glossary If you purchased a Dell n Series computer any references ...

Page 2: ... used by Dell under license TouchStrip is a trademark of UPEK Inc EMC is a registered trademark of EMC Corporation ENERGY STAR is a registered trademark of the U S Environmental Protection Agency As an ENERGY STAR partner Dell Inc has determined that this product meets the ENERGY STAR guidelines for energy efficiency Other trademarks and trade names may be used in this document to refer to either ...

Page 3: ...s and Utilities CD also known as ResourceCD NOTE The Drivers and Utilities CD may be optional and may not ship with your computer Documentation and drivers are already installed on your computer You can use the CD to reinstall drivers see Reinstalling Drivers and Utilities or to run the Dell Diagnostics see Dell Diagnostics Readme files may be included on your CD to provide last minute updates abo...

Page 4: ...only Safety instructions Regulatory information Ergonomics information End User License Agreement Dell Product Information Guide How to remove and replace parts Specifications How to configure system settings How to troubleshoot and solve problems Dell Latitude User s Guide Microsoft Windows XP Help and Support Center 1 Click the Start button and click Help and Support 2 Click Dell User and System...

Page 5: ...oting hints and tips articles from technicians and online courses frequently asked questions Community Online discussion with other Dell customers Upgrades Upgrade information for components such as memory the hard drive and the operating system Customer Care Contact information service call and order status warranty and repair information Service and support Service call status and support histor...

Page 6: ...ownload Notebook System Software 1 Go to support dell com select your region or business segment and enter your Service Tag 2 Select Drivers Downloads and click Go 3 Click your operating system and search for the keyword Notebook System Software NOTE The support dell com user interface may vary depending on your selections Software upgrades and troubleshooting hints Frequently asked questions hot ...

Page 7: ...t click the icon in the Microsoft Windows taskbar For more information on Dell QuickSet see Dell QuickSet Features How to reinstall my operating system Operating System CD NOTE The Operating System CD may be optional and may not ship with your computer The operating system is already installed on your computer To reinstall your operating system use the optional Operating System CD see Reinstalling...

Page 8: ...Finding Information Dell Latitude ATG D620 User s Guide Back to Contents Page file H My 20Documents Cellular User 20Guides Notebooks D620 20ATG findinfo htm 6 of 6 4 13 2007 4 36 29 PM ...

Page 9: ...may not be fully charged use the AC adapter to connect your new computer to an electrical outlet the first time you use the computer For best results operate the computer with the AC adapter until the battery is fully charged To view battery charge status click the Start button Settings Control Panel Power Options Power Meter tab Battery operating time varies depending on operating conditions You ...

Page 10: ...om other computers with your computer CAUTION Do not dispose of batteries with household waste When your battery no longer holds a charge call your local waste disposal or environmental agency for advice on disposing of a lithium ion battery See Battery Disposal in the Product Information Guide CAUTION Misuse of the battery may increase the risk of fire or chemical burn Do not puncture incinerate ...

Page 11: ...n on the charge gauge on the battery you can check Battery charge check by pressing and releasing the status button Battery health check by pressing and holding the status button 1 battery 2 status button for battery charge status 3 charge gauge for battery health The battery operating time is largely determined by the number of times it is charged After hundreds of charge and discharge cycles bat...

Page 12: ...bout the battery operating time Low Battery Warning NOTICE To avoid losing or corrupting data save your work immediately after a low battery warning Then connect the computer to an electrical outlet or install a second battery in the media bay If the battery runs completely out of power hibernate mode begins automatically The battery status light on the hinge cover at the lower right corner of the...

Page 13: ...hen the computer exits standby mode it returns to the same operating state it was in before entering standby mode NOTICE If your computer loses AC and battery power while in standby mode it may lose data To enter standby mode Click the Start button click Turn off computer and then click Stand by or Depending on how you set the power management options on the Advanced tab in the Power Options Prope...

Page 14: ...e the display Press Fn Esc or Press Fn F1 if you have used the QuickSet program to set this keyboard shortcut see Dell QuickSet Features NOTE Some PC Cards or ExpressCards may not operate correctly after the computer exits hibernate mode Remove and reinsert the card see Card Types or simply restart reboot your computer To exit hibernate mode press the power button The computer may take a short tim...

Page 15: ...ical outlet the computer checks the battery charge and temperature If necessary the AC adapter then charges the battery and maintains the battery charge If the battery is hot from being used in your computer or being in a hot environment the battery may not charge when you connect the computer to an electrical outlet The battery is too hot to start charging if the light flashes alternately green a...

Page 16: ...ernate mode see Hibernate Mode 3 Turn the computer upside down with the front of the computer facing away from you 4 Slide the battery bay latch release on the right side of the battery until it engages and locks 5 Slide and hold the battery bay latch release on the left side of the battery grasp the battery by the battery tab and slide the battery horizontally toward the front of the computer 6 L...

Page 17: ...computer for an extended period of time A battery discharges during prolonged storage After a long storage period recharge the battery fully before you use it see Charging the Battery Back to Contents Page file H My 20Documents Cellular User 20Guides Notebooks D620 20ATG battery htm 9 of 9 4 13 2007 4 36 30 PM ...

Page 18: ...Back to Contents Page About Your Computer Dell Latitude ATG D620 User s Guide Front View Left Side View Right Side View Back View Bottom View Front View file H My 20Documents Cellular User 20Guides Notebooks D620 20ATG about htm 1 of 14 4 13 2007 4 36 33 PM ...

Page 19: ...display For more information about your display see Using the Display power button Press the power button to turn on the computer or exit a power management mode see Power Management Modes NOTICE To avoid losing data turn off your computer by performing a Microsoft Windows operating system shutdown rather than by pressing the power button If the computer stops responding press and hold the power b...

Page 20: ...or disable Bluetooth wireless technology move the wireless switch to the on position see wireless switch for more information NOTE Bluetooth wireless technology is an optional feature on your computer so the icon turns on only if you ordered Bluetooth wireless technology with your computer For more information see the documentation that came with your Bluetooth wireless technology If the computer ...

Page 21: ...en you slide your finger over the reader it uses your unique fingerprint to authenticate your user identity For information on how to activate and use the security management software that controls the fingerprint reader see Security Management Software speaker To adjust the volume of the integrated speaker press the volume control buttons mute button or volume control keyboard shortcuts see Key C...

Page 22: ...d automatically increases or decreases the display backlighting to compensate for low light and high light environments Press the Fn and left arrow key to enable or disable the sensor see Using the Ambient Light Sensor mute button Press this button to turn off the volume keyboard illumination lights Press Fn and the right arrow key to toggle on and off these lights for illumination of the keyboard...

Page 23: ...ects into or allow dust to accumulate in the air vents Do not store your Dell computer in a low airflow environment such as a closed briefcase while it is running Restricting the airflow can damage the computer or cause a fire NOTE The computer turns on the fan when the computer gets hot Fan noise is normal and does not indicate a problem with the fan or the computer security cable slot Lets you a...

Page 24: ...smart card slot with blank Supports one smart card Smart cards provide a variety of functions including security features and data storage The blank prevents foreign matter from entering the interior of the computer when a smart card is not installed in the smart card slot For more information and instructions on removing the blank see Using Smart Cards wireless switch When enabled through Dell Qu...

Page 25: ...ork found Flashing yellow Error Off No signal found PC Card ExpressCard slot Supports one PC Card such as a modem or network adapter or an ExpressCard with a PCMIA adapter The computer ships with a blank installed in the slot to prevent foreign matter from entering the computer interior when a card is not installed see Card Types hard drive Stores software and data Right Side View 1 optical drive ...

Page 26: ... any device installed in the media bay USB connectors Connect USB devices such as a mouse keyboard or printer USB port cover The USB port cover prevents foreign matter from entering the computer interior when a USB device is not attached to either connector Back View 1 network connector RJ 45 2 modem connector RJ 11 3 USB connectors 2 file H My 20Documents Cellular User 20Guides Notebooks D620 20A...

Page 27: ...r do not plug a telephone line into the network connector Connects the computer to a network The two lights next to the connector indicate status and activity for wired network connections For information on using the network adapter see the device user s guide supplied with your computer modem connector RJ 11 If you ordered the optional internal modem connect the telephone line to the modem conne...

Page 28: ...uch as a monitor AC adapter connector Connects an AC adapter to the computer 1 AC adapter 2 port cover The AC adapter converts AC power to the DC power required by the computer You can connect the AC adapter with your computer turned either on or off file H My 20Documents Cellular User 20Guides Notebooks D620 20ATG about htm 11 of 14 4 13 2007 4 36 33 PM ...

Page 29: ... that might occur when the computer is used in environments away from the safety of a desk top To access the ports on the back of the computer rotate the cover downward To remove the cover entirely close the display turn the computer upside down and lift the cover away from the computer To replace the cover perform the removal procedure in reverse air vents The computer uses an internal fan to cre...

Page 30: ...e battery When a battery is installed you can use the computer without connecting the computer to an electrical outlet see Using a Battery battery bay latch releases Release the battery see Replacing the Battery for instructions docking device connector Lets you attach your computer to a docking device See the Dell documentation that came with your docking device for more information air vents The...

Page 31: ... Do not block push objects into or allow dust to accumulate in the air vents Do not store your computer in a low airflow environment such as a closed briefcase while it is running Restricting the airflow can damage the computer or cause a fire hard drive Stores software and data Back to Contents Page file H My 20Documents Cellular User 20Guides Notebooks D620 20ATG about htm 14 of 14 4 13 2007 4 3...

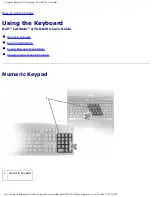
Page 32: ...sing the Keyboard Dell Latitude ATG D620 User s Guide Numeric Keypad Key Combinations Touch Pad and Track Stick Changing the Track Stick Cap Numeric Keypad 1 numeric keypad file H My 20Documents Cellular User 20Guides Notebooks D620 20ATG keyboard htm 1 of 6 4 13 2007 4 36 34 PM ...

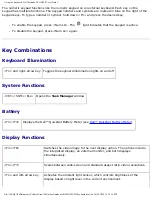
Page 33: ...key Toggles the keyboard illumination lights on and off System Functions Ctrl Shift Esc Opens the Task Manager window Battery Fn F3 Displays the Dell QuickSet Battery Meter see Dell QuickSet Battery Meter Display Functions Fn F8 Switches the video image to the next display option The options include the integrated display an external monitor and both displays simultaneously Fn F7 Scales between wi...

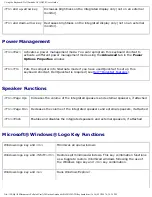
Page 34: ...QuickSet is required see Dell QuickSet Features Speaker Functions Fn Page Up Increases the volume of the integrated speakers and external speakers if attached Fn Page Dn Decreases the volume of the integrated speakers and external speakers if attached Fn End Enables and disables the integrated speakers and external speakers if attached Microsoft Windows Logo Key Functions Windows logo key and m Mi...

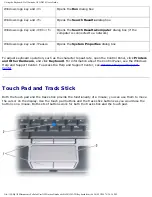
Page 35: ... click Printers and Other Hardware and click Keyboard For information about the Control Panel see the Windows Help and Support Center To access the Help and Support Center see Windows Help and Support Center Touch Pad and Track Stick Both the touch pad and the track stick provide the functionality of a mouse you can use them to move the cursor on the display Use the touch pad buttons and the track...

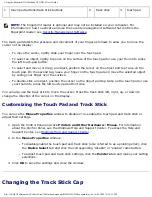
Page 36: ... the object and tap twice on the touch pad or use your thumb to press the left touch pad button twice You can also use the track stick to move the cursor Press the track stick left right up or down to change the direction of the cursor on the display Customizing the Touch Pad and Track Stick You can use the Mouse Properties window to disable or re enable the touch pad and track stick or adjust the...

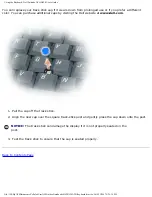
Page 37: ...t www dell com 1 Pull the cap off the track stick 2 Align the new cap over the square track stick post and gently press the cap down onto the post NOTICE The track stick can damage the display if it is not properly seated on the post 3 Test the track stick to ensure that the cap is seated properly Back to Contents Page file H My 20Documents Cellular User 20Guides Notebooks D620 20ATG keyboard htm ...

Page 38: ...u attach to your portable computer or docking device If your computer is connected to an external monitor and you try to change the brightness level the Brightness Meter may appear but the brightness level on the external device does not change You can press the following keys to adjust display brightness Press Fn and the up arrow key to increase brightness on the integrated display only not on an...

Page 39: ...ings Control Panel 2 Under Pick a category click Appearance and Themes 3 Under Pick a task click the area you want to change or under or pick a Control Panel icon click Display 4 In the Display Properties window click the Settings tab 5 Try different settings for Color quality and Screen resolution NOTE As the resolution increases icons and text appear smaller on the screen If the video resolution...

Page 40: ...more information see your operating system documentation 6 Click the monitor 2 icon click the Extend my Windows desktop onto this monitor check box and then click Apply 7 Change Screen resolution to the appropriate sizes for both displays and click Apply 8 If prompted to restart the computer click Apply the new color setting without restarting and click OK 9 If prompted click OK to resize your des...

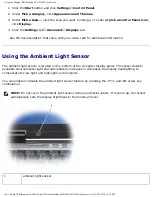
Page 41: ...ient light sensor is located on the bottom of the computer display panel The sensor detects available environmental light and automatically increases or decreases the display backlighting to compensate for low light and high light environments You can enable or disable the ambient light sensor feature by pressing the Fn and left arrow key combination NOTE Do not cover the ambient light sensor with...

Page 42: ...ust maximum and minimum brightness settings that are activated when you enable the ambient light sensor feature For more information about QuickSet right click the icon in the taskbar and click Help NOTE Rebooting the computer returns the ambient light sensor to the last setting of enabled or disabled NOTE The ambient light sensor adjusts the display backlighting on your portable computer only It ...

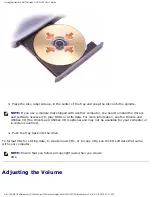
Page 43: ...icture Playing CDs or DVDs NOTICE Do not press down on the CD or DVD tray when you open or close it Keep the tray closed when you are not using the drive NOTICE Do not move the computer while playing CDs or DVDs 1 Press the eject button on the front of the drive 2 Pull out the tray file H My 20Documents Cellular User 20Guides Notebooks D620 20ATG media htm 1 of 4 4 13 2007 4 36 36 PM ...

Page 44: ... information see the Drivers and Utilities CD the Drivers and Utilities CD is optional and may not be available for your computer or in certain countries 4 Push the tray back into the drive To format CDs for storing data to create music CDs or to copy CDs see the CD software that came with your computer NOTE Ensure that you follow all copyright laws when you create CDs Adjusting the Volume file H ...

Page 45: ...ur computer Either click the icon in the taskbar and select or deselect Disable On Screen Volume Meter or press the volume control buttons see page 26 to enable or disable the Volume Meter on the screen 1 volume icon 2 Volume Meter 3 mute icon When the meter is enabled adjust the volume with the volume control buttons or by pressing the following keys Press Fn PageUp to increase volume Press Fn Pa...

Page 46: ...ou are using Windows XP Classic View If you are using Windows XP Classic View skip to step 3 2 Under Pick a task click Change the screen resolution 3 In the Display Properties window click the Settings tab 4 Under Screen resolution click and drag the bar in Screen resolution to change the setting to 1024 by 768 pixels 5 Click the drop down menu under Color quality and then click Medium 16 bit 6 Cl...

Page 47: ...ice The PC Card slot has one connector that supports a single Type I or Type II card The PC Card slot supports CardBus technology and extended PC Cards Type of card refers to its thickness not its functionality ExpressCards See Specifications for information on supported ExpressCards NOTE An ExpressCard is not a bootable device ExpressCards leverage PC Card technology to provide a fast and conveni...

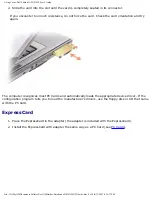
Page 48: ...he system board Always remove an extended PC Card before you pack the computer in its carrying case Installing a PC Card or ExpressCard You can install a PC Card or ExpressCard in the computer while the computer is running The computer automatically detects the card PC Cards and ExpressCards are generally marked with a symbol such as a triangle or an arrow to indicate which end to insert into the ...

Page 49: ... Cards and automatically loads the appropriate device driver If the configuration program tells you to load the manufacturer s drivers use the floppy disk or CD that came with the PC Card ExpressCard 1 Place the ExpressCard in the adapter the adapter is included with the ExpressCard 2 Install the ExpressCard with adapter the same way as a PC Card see PC Cards file H My 20Documents Cellular User 20...

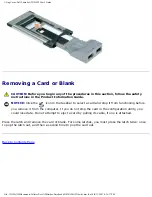
Page 50: ...ning before you remove it from the computer If you do not stop the card in the configuration utility you could lose data Do not attempt to eject a card by pulling its cable if one is attached Press the latch and remove the card or blank For some latches you must press the latch twice once to pop the latch out and then a second time to pop the card out Back to Contents Page file H My 20Documents Ce...

Page 51: ...l Physically Connecting to a Network or Broadband Modem Before you connect your computer to a network the computer must have a network adapter installed and a network cable connected to it To connect a network cable 1 Connect the network cable to the network adapter connector on the back of your computer NOTE Insert the cable connector until it clicks into place and then gently pull the cable to e...

Page 52: ...2 2 Complete the checklist 3 Return to the Network Setup Wizard and follow the instructions on the screen Wireless Local Area Network WLAN A WLAN is a series of interconnected computers that communicate with each other over the air waves rather than through a network cable connected to each computer In a WLAN a radio communications device called an access point or wireless router connects network ...

Page 53: ...Wireless Network Connection does not appear under LAN or High Speed Internet you may not have a wireless network card If Wireless Network Connection appears you have a wireless network card 2 To view detailed information about the wireless network card right click Wireless Network Connection 3 Click Properties The Wireless Network Connection Properties window appears The wireless network card s na...

Page 54: ...g your broadband modem before you continue with the network setup 7 Disconnect the AC adapter cable from your wireless router to ensure that there is no power connected to the router 8 Insert a network cable into the network RJ 45 connector on the unpowered broadband modem 9 Connect the other end of the network cable into the Internet network RJ 45 connector on the unpowered wireless router 10 Ens...

Page 55: ...AN for more information about how to prepare for connecting your computer to a WLAN Your wireless network card requires specific software and drivers for connecting to a network The software is already installed NOTE If the software is removed or corrupted follow the instructions in the user documentation for your wireless network card Verify the type of wireless network card installed in your com...

Page 56: ...ich your computer is not configured is detected in the area a pop up appears near the network icon in the notification area in the lower right corner of the Windows desktop Follow the instructions provided in any utility prompts that appear on your screen Once you have configured your computer for the wireless network that you selected another pop up notifies you that your computer is connected to...

Page 57: ...rvice is available Your computer can maintain the Mobile Broadband network connection regardless of its physical location as long as the computer remains in the service area of your cellular service provider What You Need to Establish a Mobile Broadband Network Connection NOTE Depending on your computer you can use either a Mobile Broadband ExpressCard or Mini Card but not both to establish a Mobi...

Page 58: ...an view the type of Mobile Broadband card installed in your computer as well as other hardware components NOTE The Mobile Broadband card is listed under Modems Connecting to a Mobile Broadband Network NOTE These instructions only apply to Mobile Broadband ExpressCards or Mini Cards They do not apply to internal cards with wireless technology NOTE Before you connect to the Internet you must activat...

Page 59: ...less switch on your computer You can turn your computer s wireless devices on and off with the wireless switch on the left side of the computer see Left Side View If the switch is in the on position move the switch to the off position to disable the switch and the Mobile Broadband card If the switch is in the off position move the switch to the on position to enable the switch and the Dell Mobile ...

Page 60: ...the momentary position for a few seconds The Wi Fi Catcher Network Locator functions regardless of whether your computer is turned on or off in hibernate mode or in standby mode as long as the switch is configured through QuickSet or the BIOS system setup program to control WLAN connections Because the Wi Fi Catcher Network Locator is disabled and not configured for use when your computer is shipp...

Page 61: ...Control Panel Note that enabling the Internet Connection Firewall does not reduce the need for virus checking software For more information see the Help and Support Center for the Microsoft Windows XP operating system To access the Help and Support Center see Windows Help and Support Center Back to Contents Page file H My 20Documents Cellular User 20Guides Notebooks D620 20ATG wireless htm 11 of 1...

Page 62: ...n Security Cable Lock NOTE Your computer does not ship with a security cable lock A security cable lock is a commercially available antitheft device To use the lock attach it to the security cable slot on your Dell computer For more information see the instructions included with the device NOTICE Before you buy an antitheft device ensure that it works with the security cable slot on your computer ...

Page 63: ...old contact pad The combination of the small size and integrated circuits make smart cards valuable tools for security data storage and special programs Using smart cards can improve system security by combining something a user has the smart card with something only the user should know a PIN to provide more secure user authentication than passwords alone Installing a Smart Card You can install a...

Page 64: ...ing upward and pointing toward the smart card slot 1 gold contact pad 2 smart card top 3 Slide the smart card into the smart card slot until the card is completely seated in its connector The smart card will protrude approximately 1 2 inch from the slot The smart card slot is located below the PC Card slot If you encounter too much resistance do not force the card Check the card orientation and tr...

Page 65: ...s types and features of passwords available on your computer Type of Password Features Primary Protects the computer from unauthorized access Administrator Gives system administrators or service technicians access to computers for repair or reconfiguration Allows you to restrict access to system setup in the same way a primary password restricts access to the computer Can be used instead of the pr...

Page 66: ...rd s NOTICE Passwords provide a high level of security for data in your computer or hard drive However they are not foolproof If you require more security obtain and use additional forms of protection such as smart cards data encryption programs or PC Cards with encryption features If you forget any of your passwords contact Dell see Contacting Dell For your protection Dell technical support staff...

Page 67: ... but it does not provide access to the hard drive when a hard drive password is assigned If you forget the primary password and do not have an administrator password assigned or if you have both a primary and an administrator password assigned but forget them both contact your system administrator or Dell see Contacting Dell Using a Hard Drive Password The hard drive password helps protect the dat...

Page 68: ...The TPM feature may not be available in certain regions NOTE The TPM feature supports encryption only if the operating system supports TPM For more information see the TPM software documentation and the help files that came with the software TPM is a hardware based security feature that can be used to create and manage computer generated encryption keys When combined with security software the TPM...

Page 69: ...t features to help you secure your computer Log in management Pre boot authentication using a fingerprint reader smart card or password Encryption Private information management Activating the Security Management Software NOTE The TPM feature may not be available in certain regions NOTE You must first enable the TPM in order for the security management software to have full functionality 1 Enable ...

Page 70: ...ter tracking software and your computer is lost or stolen you must contact the company that provides the tracking service to report the missing computer If Your Computer Is Lost or Stolen Call a law enforcement agency to report the lost or stolen computer Include the Service Tag in your description of the computer Ask that a case number be assigned and write down the number along with the name add...

Page 71: ...or technical assistance and gives your Service Tag the computer is identified automatically as missing or stolen The representative will attempt to get the phone number and address of the caller Dell will then contact the law enforcement agency to which you reported of the missing computer Back to Contents Page file H My 20Documents Cellular User 20Guides Notebooks D620 20ATG security htm 10 of 10...

Page 72: ...hnical Update Service The Dell Technical Update service provides proactive e mail notification of software and hardware updates for your computer The service is free and can be customized for content format and how frequently you receive notifications To enroll for the Dell Technical Update service go to support dell com technicalupdate Dell Diagnostics CAUTION Before you begin any of the procedur...

Page 73: ...e docked undock it See the documentation that came with your docking device for instructions 3 Connect the computer to an electrical outlet 4 Diagnostics can be invoked one of two ways Turn on the computer When the DELL logo appears press F12 immediately Select Diagnostics from the boot menu and press Enter NOTE If you wait too long and the operating system logo appears continue to wait until you ...

Page 74: ... immediately If you wait too long and the Windows logo appears continue to wait until you see the Windows desktop Then shut down your computer and try again NOTE The next steps change the boot sequence for one time only On the next start up the computer boots according to the devices specified in the system setup program 3 When the boot device list appears highlight CD DVD CD RW Drive and press En...

Page 75: ...a message appears with an error code and a description of the problem Write down the error code and problem description and follow the instructions on the screen If you cannot resolve the error condition contact Dell see Contacting Dell NOTE The Service Tag for your computer is located at the top of each test screen If you contact Dell technical support will ask for your Service Tag 3 If you run a...

Page 76: ...xit the Dell Diagnostics and restart the computer close the Main Menu screen Dell Support Utility The Dell Support Utility is installed on your computer and available from the Dell Support icon on the taskbar or from the Start button Use this support utility for self support information software updates and health scans of your computing environment Accessing the Dell Support Utility Access the De...

Page 77: ...Support screen Drive Problems CAUTION Before you begin any of the procedures in this section follow the safety instructions in the Product Information Guide Fill out the Diagnostics Checklist see Diagnostics Checklist as you complete these checks Ensure that Microsoft Windows recognizes the drive Click the Start button and click My Computer If the floppy CD or DVD drive is not listed perform a ful...

Page 78: ...s Try closing all programs before you write to the CD DVD RW Turn off Standby mode in Windows before writing to a CD DVD RW disc See Standby Mode or search for the keyword standby in the Windows Help and Support Center for information on power management modes Change the write speed to a slower rate See the help files for your CD or DVD creation software If you cannot eject the CD CD RW DVD or DVD...

Page 79: ...ormation Guide NOTE Connect the modem to an analog telephone jack only The modem does not operate while it is connected to a digital telephone network Check the Microsoft Outlook Express Security Settings If you cannot open your e mail attachments 1 In Outlook Express click Tools click Options and then click Security 2 Click Do not allow attachments to remove the checkmark Check the telephone line...

Page 80: ...dem is communicating with Windows If all commands receive responses the modem is operating properly Ensure that you are connected to the Internet Ensure that you have subscribed to an Internet provider With the Outlook Express e mail program open click File If Work Offline has a checkmark next to it click the checkmark to remove it and connect to the Internet For help contact your Internet service...

Page 81: ...ve failed initialization Run the hard drive tests in the Dell Diagnostics see Dell Diagnostics Drive not ready The operation requires a hard drive in the bay before it can continue Install a hard drive in the hard drive bay see Hard Drive Error reading PCMCIA card The computer cannot identify the PC Card Reinsert the card or try another PC Card see Using Cards Extended memory size has changed The ...

Page 82: ... another drive Run the Hard Disk Drive tests in the Dell Diagnostics see Dell Diagnostics Insert bootable media The operating system is trying to boot to a nonbootable CD Insert a bootable CD Invalid configuration information please run System Setup Program The system configuration information does not match the hardware configuration The message is most likely to occur after a memory module is in...

Page 83: ...emory write read failure at address read value expecting value A memory module may be faulty or improperly seated Reinstall the memory modules see Memory and if necessary replace them No boot device available The computer cannot find the hard drive If the hard drive is your boot device ensure that the drive is installed properly seated and partitioned as a boot device No boot sector on hard drive ...

Page 84: ... system setup program Then immediately exit the program If the message reappears contact Dell see Contacting Dell Time of day clock stopped The reserve battery that supports the system configuration settings may no longer hold a charge and require replacement If the problem persists contact Dell see Contacting Dell Time of day not set please run the System Setup program The time or date stored in ...

Page 85: ...t it and connect the keyboard directly to the computer Check the external keyboard 1 Shut down the computer wait 1 minute and turn it on again 2 Verify that the numbers capitals and scroll lock lights on the keyboard blink during the boot routine 3 From the Windows desktop click the Start button point to Programs point to Accessories and click Notepad 4 Type some characters on the external keyboar...

Page 86: ...and Software Problems CAUTION Before you begin any of the procedures in this section follow the safety instructions in the Product Information Guide The computer does not start up Ensure that the AC adapter is firmly connected to the computer and to the electrical outlet The computer stops responding NOTICE You might lose data if you are unable to perform an operating system shutdown Turn the comp...

Page 87: ... A solid blue screen appears Turn the computer off If you are unable to get a response by pressing a key on your keyboard or moving your mouse press and hold the power button for at least 8 to 10 seconds until the computer turns off Then restart your computer Other software problems Check the software documentation or contact the software manufacturer for troubleshooting information Ensure that th...

Page 88: ...blems Fill out the Diagnostics Checklist see Diagnostics Checklist as you complete these checks CAUTION Before you begin any of the procedures in this section follow the safety instructions in the Product Information Guide If you receive an insufficient memory message Save and close any open files and exit any open programs you are not using to see if that resolves the problem See the software doc...

Page 89: ...unctioning Wireless Local Area Network WLAN For information about troubleshooting wireless local area networks see Wireless Local Area Network WLAN Mobile Broadband Network WWAN NOTE The Dell Mobile Broadband Card Utility user s guide is located under Microsoft Windows Help and Support To access Help and Support click the Start button and click Help and Support Then under Pick a Help topic click U...

Page 90: ...y did not locate a Mobile Broadband network Ensure that the signal strength is adequate Restart the Dell wireless utility or contact your Mobile Broadband network provider Check your Mobile Broadband Network Service Contact your Mobile Broadband network service provider to verify coverage plan and supported services Activate your Mobile Broadband card Before you connect to the Internet you must ac...

Page 91: ...attery operating time the time the battery can hold a charge decreases over time Depending on how often the battery is used and the conditions under which it is used you may need to purchase a new battery during the life of your computer Check the battery status light If the battery status light flashes orange or is a steady orange the battery charge is low or depleted Connect the computer to an e...

Page 92: ...m system performance you should always use a 90 W adapter Using less powerful AC adapters including the 65 W AC adapter will cause you to receive a WARNING message Docking Power Considerations Due to the extra power consumption when a computer is docked to the Dell D Dock normal computer operation is not possible on battery power alone Ensure that the AC adapter is connected to your computer when ...

Page 93: ...k the Start button and click Settings Control Panel Printers and Other Hardware 2 Click View installed printers or fax printers If the printer is listed right click the printer icon 3 Click Properties and click the Ports tab For a parallel printer connected through a docking station ensure that the Print to the following port s setting is LPT1 Printer Port For a USB printer ensure that the Print t...

Page 94: ...s Fill out the Diagnostics Checklist see Diagnostics Checklist as you complete these checks CAUTION Before you begin any of the procedures in this section follow the safety instructions in the Product Information Guide No sound from integrated speakers Adjust the Windows volume control Double click the speaker icon in the lower right corner of your screen Ensure that the volume is turned up and th...

Page 95: ...nstalling Drivers and Utilities Run the Dell Diagnostics See Dell Diagnostics NOTE The volume control in some MP3 players overrides the Windows volume setting If you have been listening to MP3 songs ensure that you did not turn the player volume down or off No sound from headphones Check the headphone cable connection Ensure that the headphone cable is securely inserted into the headphone connecto...

Page 96: ...pointer movement and the operation of the touch pad or mouse buttons run the Mouse test in the Pointing Devices test group in the Dell Diagnostics see Dell Diagnostics Reinstall the touch pad driver See Reinstalling Drivers and Utilities Video and Display Problems Fill out the Diagnostics Checklist see Dell Diagnostics as you complete these checks CAUTION Before you begin any of the procedures in ...

Page 97: ...r monitor If your external speaker system includes a subwoofer ensure that the subwoofer is at least 60 cm 2 ft away from the computer or external monitor Eliminate possible interference Turn off nearby fans fluorescent lights halogen lamps or other appliances Rotate the computer to face a different direction Eliminate sunlight glare which can cause poor picture quality Adjust the Windows display ...

Page 98: ...uter 2 Turn on the computer and the monitor and adjust the monitor brightness and contrast controls If the external monitor works the computer display or video controller may be defective Contact Dell see Contacting Dell Back to Contents Page file H My 20Documents Cellular User 20Guides Notebooks D620 20ATG trouble htm 27 of 27 4 13 2007 4 36 42 PM ...

Page 99: ... can use system setup as follows To set or change user selectable features for example your computer password To verify information about the computer s current configuration such as the amount of system memory After you set up the computer run system setup to familiarize yourself with your system configuration information and optional settings You may want to write down the information for future...

Page 100: ... of each option is the setting or value for that option You can change settings that appear as white type on the screen Options or values that you cannot change because they are default values detected by the computer appear less bright The upper right corner of the screen displays help information for the currently highlighted option the lower right corner displays information about the computer ...

Page 101: ...r dimmed without a triangle To reorder a device in the list highlight the device and then press u or d not case sensitive to move the highlighted device up or down Boot sequence changes take effect as soon as you save the changes and exit system setup Performing a One Time Boot You can set a one time only boot sequence without entering system setup You can also use this procedure to boot the Dell ...

Page 102: ... the serial connector 2 Press the down arrow key to select the Infrared Data Port setting and press the right arrow key to change the setting to a COM port 3 Press Esc and then click Yes to save the changes and exit the system setup program If you are prompted to restart your computer click Yes 4 Follow the instructions on the screen 5 After the infrared sensor has been enabled click Yes to restar...

Page 103: ...device and any other programs that use the device Each device has its own set of specialized commands that only its driver recognizes Dell ships your computer to you with required drivers already installed no further installation or configuration is needed NOTICE The Drivers and Utilities CD may contain drivers for operating systems that are not on your computer Ensure that you are installing soft...

Page 104: ... CD provide approved drivers for Dell computers If you install drivers obtained from other sources your computer might not work correctly Using Windows XP Device Driver Rollback If a problem occurs on your computer after you install or update a driver use Windows XP Device Driver Rollback to replace the driver with the previously installed version 1 Click the Start button and click Settings Contro...

Page 105: ...ware to detect drivers and utilities used by your computer 5 After the CD completes the hardware scan you can also detect other drivers and utilities Under Search Criteria select the appropriate categories from the System Model Operating System and Topic drop down menus A link or links appear s for the specific drivers and utilities used by your computer 6 Click the link of a specific driver or ut...

Page 106: ...9 When the name of the appropriate driver appears click Next 10 Click Finish and restart your computer Resolving Software and Hardware Incompatibilities If a device is either not detected during the operating system setup or is detected but incorrectly configured you can use the Hardware Troubleshooter to resolve the incompatibility 1 Click the Start button and click Help and Support 2 Type hardwa...

Page 107: ...t button point to All Programs Accessories System Tools and then click System Restore 2 Ensure that Restore my computer to an earlier time is selected and click Next 3 Click a calendar date to which you want to restore your computer The Select a Restore Point screen provides a calendar that allows you to see and select restore points All calendar dates with available restore points appear in boldf...

Page 108: ...rd disk space available System Restore is automatically disabled To see if System Restore is enabled 1 Click the Start button and click Settings Control Panel 2 Click Performance and Maintenance 3 Click System 4 Click the System Restore tab 5 Ensure that Turn off System Restore is unchecked Reinstalling Microsoft Windows XP NOTICE You must use Windows XP Service Pack 1 SP1 or later when you reinst...

Page 109: ...you must also reinstall the device drivers virus protection program and other software NOTICE The Operating System CD provides options for reinstalling Windows XP The options can overwrite files and possibly affect programs installed on your hard drive Therefore do not reinstall Windows XP unless a Dell technical support representative instructs you to do so NOTICE To prevent conflicts with Window...

Page 110: ...puter NOTICE Do not press any key when the following message appears Press any key to boot from the CD 6 When the Regional and Language Options screen appears select the settings for your location and click Next 7 Enter your name and organization optional in the Personalize Your Software screen and click Next 8 At the Computer Name and Administrator Password window enter a name for your computer o...

Page 111: ...he Who will use this computer screen appears you can enter up to five users 17 Click Next 18 Click Finish to complete the setup and remove the CD 19 Reinstall the appropriate drivers with the Drivers and Utilities CD 20 Reinstall your virus protection software 21 Reinstall your programs NOTE To reinstall and activate your Microsoft Office or Microsoft Works Suite programs you need the Product Key ...

Page 112: ...less otherwise noted each procedure assumes that the following conditions exist You have performed the steps in Turning Off Your Computer and Before Working Inside Your Computer You have read the safety information in your Dell Product Information Guide A component can be replaced or if purchased separately installed by performing the removal procedure in reverse order Recommended Tools The proced...

Page 113: ...d by its edges or by its metal mounting bracket Hold a component such as a processor by its edges not by its pins NOTICE Only a certified service technician should perform repairs on your computer Damage due to servicing that is not authorized by Dell is not covered by your warranty NOTICE When you disconnect a cable pull on its connector or on its pull tab not on the cable itself Some cables have...

Page 114: ...rom the PC Card slot see Removing a Card or Blank Hinge Cover CAUTION Before you begin any of the procedures in this section follow the safety instructions in the Product Information Guide NOTICE To avoid electrostatic discharge ground yourself by using a wrist grounding strap or by periodically touching an unpainted metal surface such as a connector on the back of the computer NOTICE The hinge co...

Page 115: ...to right until the cover snaps into place Keyboard CAUTION Before performing the following procedures follow the safety instructions in your Product Information Guide NOTICE To avoid electrostatic discharge ground yourself by using a wrist grounding strap or by periodically touching an unpainted metal surface such as the back panel on the computer 1 Follow the instructions in Before You Begin 2 Tu...

Page 116: ...you do not pull on the keyboard cable 5 Easing the edges of the keyboard out of the small detents on the sides rotate the keyboard up 90 degrees and lay it on the palm rest to gain access to the keyboard connector 6 If the keyboard cable is held in place by a locking arm next to the keyboard connector carefully spread the retaining bracket away from the connector so that you can pivot the locking ...

Page 117: ...discharge ground yourself by using a wrist grounding strap or by periodically touching a connector on the back panel of the computer NOTICE To avoid damaging the system board you must remove the main battery before you begin working inside the computer If you ordered an internal card with Bluetooth wireless technology with your computer it is already installed To remove the card 1 Follow the proce...

Page 118: ...Disconnect the card from the cable and remove the card from the computer Coin Cell Battery CAUTION Before performing the following procedures follow the safety instructions in your Product Information Guide NOTICE To avoid electrostatic discharge ground yourself by using a wrist grounding strap or by periodically touching a connector on the back panel of the computer NOTICE To avoid damaging the s...

Page 119: ...lastic arm slightly up grasp the battery and pull it out of the battery compartment Memory You can increase your computer memory by installing memory modules on the system board See Specifications for information on the memory supported by your computer Install only memory modules that are intended for your computer CAUTION Before you begin any of the procedures in this section follow the safety i...

Page 120: ...unction at optimal performance NOTE Memory modules purchased from Dell are covered under your computer warranty Your computer has two user accessible SODIMM sockets one accessed from beneath the keyboard DIMM A and the other accessed from the bottom of the computer DIMM B To add or replace a memory module in the DIMM A connector 1 Follow the procedures in Before You Begin 2 Remove the hinge cover ...

Page 121: ... 2 memory module 5 Ground yourself and install the new memory module NOTE If the memory module is not installed properly the computer may not boot properly No error message indicates this failure a Align the notch in the module connector with the tab in the connector slot b Slide the module firmly into the slot at a 45 degree angle and rotate the module down until it clicks into place If you do no...

Page 122: ...nector labeled DIMM A before you install a module in the connector labeled DIMM B Insert memory modules at a 45 degree angle to avoid damaging the connector 1 Follow the procedures in Before You Begin 2 Turn the computer bottom side up loosen the captive screw in the memory module cover and then remove the cover file H My 20Documents Cellular User 20Guides Notebooks D620 20ATG parts htm 11 of 23 4...

Page 123: ... 1 securing clips 2 per connector 2 memory module NOTICE Insert memory modules at a 45 degree angle to avoid damaging the connector 4 Ground yourself and install the new memory module NOTE If the memory module is not installed properly the computer may not boot properly No error message indicates this failure a Align the notch in the module edge connector with the tab in the connector slot b Slide...

Page 124: ... memory and automatically updates the system configuration information To confirm the amount of memory installed in the computer click Start Help and Support and then click Computer Information 8 Replace the memory module cover Wireless Cards If you ordered a wireless card with your computer the card is already installed CAUTION Before you begin any of the procedures in this section follow the saf...

Page 125: ...oard see Keyboard 1 WLAN card 2 antenna cables 2 NOTICE To prevent damage to the connector do not use tools to spread the securing clips 4 If a WLAN card is not already installed go to step 5 If you are replacing a WLAN card remove the existing card a Disconnect the antenna cables from the card file H My 20Documents Cellular User 20Guides Notebooks D620 20ATG parts htm 14 of 23 4 13 2007 4 36 47 P...

Page 126: ...rd at a 45 degree angle out of its connector NOTICE The connectors are keyed to ensure correct insertion If you feel resistance check the connectors and realign the card NOTE Do not insert a Mobile Broadband network WWAN card into the WLAN card connector 1 WLAN card 2 metal securing tabs 2 NOTICE To avoid damaging the WLAN card never place cables on top of or under the card file H My 20Documents C...

Page 127: ...he way to make space for the WLAN card b Insert the WLAN card into the connector at a 45 degree angle and press the card into the metal securing tabs until you feel a click 1 WLAN card 2 antenna cable connectors NOTE For more specific information about which cable to connect to which connector see the documentation that came with your WLAN card c Connect the antenna cables to the WLAN card ensurin...

Page 128: ...nd network card with your computer the card is already installed CAUTION Before you begin any of the procedures in this section follow the safety instructions in the Product Information Guide 1 Follow the procedures in Before You Begin 2 Remove the hinge cover see Hinge Cover 3 Remove the keyboard see Keyboard file H My 20Documents Cellular User 20Guides Notebooks D620 20ATG parts htm 17 of 23 4 1...

Page 129: ...ard remove the existing card a Disconnect the antenna cables from the card NOTE The Mobile Broadband card may have two or three antenna connectors depending on the type of card you have 1 Mobile Broadband card 2 metal securing tabs 2 b Release the card by pushing the metal securing tabs away from the card until the card pops up slightly c Slide the card at a 45 degree angle out of its connector fi...

Page 130: ...card NOTICE To avoid damaging the Mobile Broadband card never place cables on top of or under the card and ensure that you route the cables properly b Insert the card into the connector at a 45 degree angle and press the card into the metal securing tabs until you feel a click 1 Mobile Broadband card 2 antenna cables 2 NOTE For more specific information about which cable to connect to which connec...

Page 131: ... Product Information Guide 1 Follow the procedures in Before You Begin 2 Remove the battery see Replacing the Battery 1 SIM card 2 metal brackets 2 NOTICE Do not touch the SIM card connectors to protect the card from electrostatic discharge ESD To prevent ESD hold the card in your hand before you insert or remove the card 3 With the cut off corner on the card facing away from the card slot insert ...

Page 132: ...oss turn off your computer before removing the hard drive Do not remove the hard drive while the computer is on in standby mode or in hibernate mode NOTICE Hard drives are extremely fragile even a slight bump can damage the drive NOTE Dell does not guarantee compatibility or provide support for hard drives from sources other than Dell To replace the hard drive in the hard drive bay 1 Follow the pr...

Page 133: ...tem CD to install the operating system for your computer see Reinstalling Microsoft Windows XP 8 Use the Drivers and Utilities CD to install the drivers and utilities for your computer see Reinstalling Drivers and Utilities Media Bay NOTE If the device security screw is not present you can remove and install devices while the computer is running and connected to a docking device docked Removing Me...

Page 134: ...lease 1 optical drive 2 device latch release 4 Pull the device out of the media bay To install a device push the new device into the bay until it clicks into place Back to Contents Page file H My 20Documents Cellular User 20Guides Notebooks D620 20ATG parts htm 23 of 23 4 13 2007 4 36 47 PM ...

Page 135: ...ork connectivity Power management Display System information Depending on what you want to do in Dell QuickSet you can start it by either clicking double clicking or right clicking the QuickSet icon in the Microsoft Windows taskbar The taskbar is located in the lower right corner of your screen For more information about QuickSet right click the QuickSet icon and select Help Back to Contents Page ...

Page 136: ...and phone number in this file Contact your credit card company and ask if it offers coded identification tags Packing the Computer Remove any external devices attached to the computer and store them in a safe place Remove any cables attached to installed PC Cards and remove any extended PC Cards see Removing a Card or Blank To make the computer as light as possible replace any devices installed in...

Page 137: ... data NOTICE Do not check the computer as baggage Consider disabling wireless activity on your computer to maximize battery operating time To disable wireless activity use the wireless switch see wireless switch Consider changing your power management options see Configuring Power Management Settings to maximize battery operating time If you are traveling internationally carry proof of ownership o...

Page 138: ... charged battery available in case you are asked to turn on the computer Prior to entering the airplane verify that using a computer is permitted Some airlines forbid the use of electronic devices during flight All airlines forbid the use of electronic devices during takeoff and landing Back to Contents Page file H My 20Documents Cellular User 20Guides Notebooks D620 20ATG travel htm 3 of 3 4 13 2...

Page 139: ...t dell com for help with installation and troubleshooting procedures 5 If the preceding steps have not resolved the problem contact Dell see Contacting Dell NOTE Call support from a telephone near or at the computer so that a support representative can assist you with any necessary procedures NOTE Dell s Express Service Code system may not be available in all countries When prompted by Dell s auto...

Page 140: ... American countries www dell ca Canada only You can access Dell Support through the following websites and e mail addresses Dell Support websites support dell com support jp dell com Japan only support euro dell com Europe only Dell Support e mail addresses mobile_support us dell com support us dell com la techsupport dell com Latin America and Caribbean countries only apsupport dell com Asian Pac...

Page 141: ...can call the automated order status service A recording prompts you for the information needed to locate and report on your order For the telephone number to call see the contact numbers for your region Dell Technical Update Service Dell initiates proactive e mail notification of software and hardware updates for your computer Support Service Dell s support service is available 24 hours a day 7 da...

Page 142: ...n 3 Include a copy of the Diagnostics Checklist indicating the tests you have run and any error messages reported by the Dell Diagnostics 4 Include any accessories that belong with the item s being returned power cables software floppy disks guides and so on if the return is for credit 5 Pack the equipment to be returned in the original or equivalent packing materials You are responsible for payin...

Page 143: ...Ensure that the computer documentation is available CAUTION Before working inside your computer follow the safety instructions in your Product Information Guide Diagnostics Checklist Name Date Address Phone number Service Tag bar code on the back of the computer Express Service Code Return Material Authorization Number if provided by Dell support technician Operating system and version Devices Exp...

Page 144: ... numbers are for use within the country for which they are listed NOTE In certain countries support specific to Dell XPS computers is available at a separate telephone number listed for participating countries If you do not see a telephone number listed that is specific for XPS computers you may contact Dell through the support number listed and your call will be routed appropriately When you need...

Page 145: ...eneral Support 1 800 805 5924 Aomen Technical Support Dell Dimension Dell Inspiron Dell OptiPlex Dell Latitude and Dell Precision 0800 105 Technical Support servers and storage 0800 105 Argentina Buenos Aires International Access Code 00 Country Code 54 City Code 11 Website www dell com ar E mail la techsupport dell com E mail for desktop and portable computers la techsupport dell com E mail for s...

Page 146: ...ll com E mail support ap dell com contactus Technical Support XPS toll free 1300 790 877 General Support 13DELL 133355 Austria Vienna International Access Code 900 Country Code 43 City Code 1 Website support euro dell com E mail tech_support_central_europe dell com Home Small Business Sales 0820 240 530 00 Home Small Business Fax 0820 240 530 49 Home Small Business Customer Care 0820 240 530 14 Pr...

Page 147: ...upport toll free 1 866 874 3038 Barbados Website www dell com bb E mail la techsupport dell com General Support 1 800 534 3142 Belgium Brussels International Access Code 00 Country Code 32 City Code 2 Website support euro dell com Tech Support for XPS 02 481 92 96 Tech Support for all other Dell computers 02 481 92 88 Tech Support Fax 02 481 92 95 Customer Care 02 713 15 65 Corporate Sales 02 481 ...

Page 148: ...ccess Code 00 Country Code 55 City Code 51 Website www dell com br E mail BR TechSupport dell com Customer Care and Tech Support 0800 90 3355 Technical Support Fax 51 2104 5470 Customer Care Fax 51 2104 5480 Sales 0800 722 3498 British Virgin Islands General Support toll free 1 866 278 6820 Brunei Country Code 673 Technical Support Penang Malaysia 604 633 4966 Customer Care Penang Malaysia 604 633...

Page 149: ...andhelds digital jukebox and wireless toll free 1 800 847 4096 Hardware Warranty Phone Support XPS toll free 1 866 398 8977 Hardware Warranty Phone Support Home Home Office toll free 1 800 847 4096 Hardware Warranty Phone Support small med large business government toll free 1 800 387 5757 Hardware Warranty Phone Support printers projectors televisions handhelds digital jukebox and wireless 1 877 ...

Page 150: ...mail Customer Care E mail customer_cn dell com Technical Support Fax 592 818 1350 Technical Support XPS toll free 800 858 0540 Technical Support Dimension and Inspiron toll free 800 858 2969 Technical Support OptiPlex Latitude and Dell Precision toll free 800 858 0950 Technical Support servers and storage toll free 800 858 0960 Technical Support projectors PDAs switches routers and so on toll free...

Page 151: ...0 858 2999 Large Corporate Accounts North Government and Education toll free 800 858 2955 Large Corporate Accounts East toll free 800 858 2020 Large Corporate Accounts East Government and Education toll free 800 858 2669 Large Corporate Accounts Queue Team toll free 800 858 2572 Large Corporate Accounts South toll free 800 858 2355 Large Corporate Accounts West toll free 800 858 2811 Large Corpora...

Page 152: ...l Support 22537 2727 Customer Care 22537 2707 Fax 22537 2714 Technical Fax 22537 2728 Switchboard 22537 2711 Denmark Copenhagen International Access Code 00 Country Code 45 Website support euro dell com Technical Support for XPS 7010 0074 Technical Support for all other Dell computers 7023 0182 Customer Care Relational 7023 0184 Home Small Business Customer Care 3287 5505 Switchboard Relational 32...

Page 153: ...public Website www dell com do E mail la techsupport dell com General Support 1 800 156 1588 Ecuador Website www dell com ec E mail la techsupport dell com General Support calling from Quito toll free 999 119 877 655 3355 General Support calling from Guayaquil toll free 1800 999 119 877 655 3355 El Salvador Website www dell com ec E mail la techsupport dell com General Support 800 6132 file H My 2...

Page 154: ...x 0207 533 530 Sales over 500 employees 0207 533 533 Fax 0207 533 530 France Paris Montpellier International Access Code 00 Website support euro dell com Home and Small Business Technical Support for XPS 0825 387 129 Technical Support for all other Dell computers 0825 387 270 Customer Care 0825 823 833 Switchboard 0825 004 700 Switchboard calls from outside of France 04 99 75 40 00 Sales 0825 004 ...

Page 155: ...onal Access Code 00 Country Code 49 City Code 69 Website support euro dell com E mail tech_support_central_europe dell com Technical Support for XPS 069 9792 7222 Technical Support for all other Dell computers 069 9792 7200 Home Small Business Customer Care 0180 5 224400 Global Segment Customer Care 069 9792 7320 Preferred Accounts Customer Care 069 9792 7320 Large Accounts Customer Care 069 9792 ...

Page 156: ...0800 44 14 00 83 Switchboard 2108129810 Gold Service Switchboard 2108129811 Sales 2108129800 Fax 2108129812 Grenada E mail la techsupport dell com General Support toll free 1 866 540 3355 Guatemala E mail la techsupport dell com General Support 1 800 999 0136 Guyana E mail la techsupport dell com General Support toll free 1 877 270 4609 Website support ap dell com file H My 20Documents Cellular Us...

Page 157: ...cal Support projectors PDAs switches routers and so on 00852 3416 0906 Customer Care 00852 3416 0910 Large Corporate Accounts 00852 3416 0907 Global Customer Programs 00852 3416 0908 Medium Business Division 00852 3416 0912 Home and Small Business Division 00852 2969 3105 India Website support ap dell com E mail india_support_desktop dell com india_support_notebook dell com india_support_Server de...

Page 158: ...t euro dell com E mail dell_direct_support dell com Sales Ireland Sales 01 204 4444 Dell Outlet 1850 200 778 Online Ordering HelpDesk 1850 200 778 Customer Care Home User Customer Care 01 204 4014 Small Business Customer Care 01 204 4014 Corporate Customer Care 1850 200 982 Technical Support Technical Support for XPS computers only 1850 200 722 Technical Support for all other Dell computers 1850 5...

Page 159: ...U K only 0870 907 4000 Italy Milan International Access Code 00 Country Code 39 City Code 02 Website support euro dell com Home and Small Business Technical Support 02 577 826 90 Customer Care 02 696 821 14 Fax 02 696 821 13 Switchboard 02 696 821 12 Corporate Technical Support 02 577 826 90 Customer Care 02 577 825 55 Fax 02 575 035 30 file H My 20Documents Cellular User 20Guides Notebooks D620 2...

Page 160: ...imension and Inspiron 81 44 520 1435 Technical Support Dell Precision OptiPlex and Latitude toll free 0120 198 433 Technical Support outside of Japan Dell Precision OptiPlex and Latitude 81 44 556 3894 Technical Support Dell PowerApp Dell PowerEdge Dell PowerConnect and Dell PowerVault toll free 0120 198 498 Technical Support outside of Japan PowerApp PowerEdge PowerConnect and PowerVault 81 44 55...

Page 161: ...stitutions 044 556 5963 Global Segment Japan 044 556 3469 Individual User 044 556 1760 Switchboard 044 556 4300 Korea Seoul International Access Code 001 Country Code 82 City Code 2 E mail krsupport dell com Support toll free 080 200 3800 Technical Support XPS toll free 080 999 0283 Support Dimension PDA Electronics and Accessories toll free 080 200 3801 Sales toll free 080 200 3600 Fax 2194 6202 ...

Page 162: ...600 or 512 728 3772 Luxembourg International Access Code 00 Country Code 352 Website support euro dell com Support 342 08 08 075 Home Small Business Sales 32 0 2 713 15 96 Corporate Sales 26 25 77 81 Customer Care 32 0 2 481 91 19 Fax 26 25 77 82 Macao Country Code 853 Technical Support toll free 0800 105 Customer Service Xiamen China 34 160 910 Transaction Sales Xiamen China 29 693 115 Website su...

Page 163: ... PowerEdge PowerConnect and PowerVault toll free 1800 881 386 Customer Care toll free 1800 881 306 option 6 Transaction Sales toll free 1 800 888 202 Corporate Sales toll free 1 800 888 213 Mexico International Access Code 00 Country Code 52 E mail la techsupport dell com Customer Technical Support 001 877 384 8979 or 001 877 269 3383 Sales 50 81 8800 or 01 800 888 3355 Customer Service 001 877 38...

Page 164: ...XPS 020 674 45 94 Technical Support for all other Dell computers 020 674 45 00 Technical Support Fax 020 674 47 66 Home Small Business Customer Care 020 674 42 00 Relational Customer Care 020 674 4325 Home Small Business Sales 020 674 55 00 Relational Sales 020 674 50 00 Home Small Business Sales Fax 020 674 47 75 Relational Sales Fax 020 674 47 50 Switchboard 020 674 50 00 Switchboard Fax 020 674...

Page 165: ...ry Code 47 Website support euro dell com Technical Support for XPS 815 35 043 Technical Support for all other Dell products 671 16882 Relational Customer Care 671 17575 Home Small Business Customer Care 23162298 Switchboard 671 16800 Fax Switchboard 671 16865 Panama E mail la techsupport dell com General Support 011 800 507 1264 Peru E mail la techsupport dell com General Support 0800 50 669 Websi...

Page 166: ...tchboard 57 95 999 Portugal International Access Code 00 Country Code 351 Website support euro dell com Technical Support 707200149 Customer Care 800 300 413 Sales 800 300 410 or 800 300 411 or 800 300 412 or 21 422 07 10 Fax 21 424 01 12 Puerto Rico E mail la techsupport dell com General Support 1 877 537 3355 St Kitts and Nevis Website www dell com kn E mail la techsupport dell com file H My 20D...

Page 167: ...rs in this section should be called from within Singapore or Malaysia only Website support ap dell com Technical Support XPS toll free 1800 394 7464 Technical Support Dimension Inspiron and Electronics and Accessories toll free 1 800 394 7430 Technical Support OptiPlex Latitude and Dell Precision toll free 1 800 394 7488 Technical Support PowerApp PowerEdge PowerConnect and PowerVault toll free 1 ...

Page 168: ...7 Fax 02 5441 8328 Tech Fax 02 5441 8328 Switchboard Sales 02 5441 7585 South Africa Johannesburg International Access Code 09 091 Country Code 27 City Code 11 Website support euro dell com E mail dell_za_support dell com Gold Queue 011 709 7713 Technical Support 011 709 7710 Customer Care 011 709 7707 Sales 011 709 7700 Fax 011 706 0495 Switchboard 011 709 7700 file H My 20Documents Cellular User...

Page 169: ... Support 902 100 130 Customer Care 902 118 540 Sales 902 118 541 Switchboard 902 118 541 Fax 902 118 539 Corporate Technical Support 902 100 130 Customer Care 902 115 236 Switchboard 91 722 92 00 Fax 91 722 95 83 Sweden Upplands Vasby International Access Code 00 Website support euro dell com Technical Support for XPS 0771 340 340 Technical Support for all other Dell products 08 590 05 199 file H ...

Page 170: ...Code 22 Website support euro dell com E mail Tech_support_central_Europe dell com Technical Support for XPS 0848 33 88 57 Technical Support Home and Small Business for all other Dell products 0844 811 411 Technical Support Corporate 0844 822 844 Customer Care Home and Small Business 0848 802 202 Customer Care Corporate 0848 821 721 Fax 022 799 01 90 Switchboard 022 799 01 01 Website support ap del...

Page 171: ... Sales toll free 0080 165 1227 Thailand International Access Code 001 Country Code 66 Website support ap dell com Technical Support OptiPlex Latitude and Dell Precision toll free 1800 0060 07 Technical Support PowerApp PowerEdge PowerConnect and PowerVault toll free 1800 0600 09 Customer Care toll free 1800 006 007 option 7 Corporate Sales toll free 1800 006 009 Transaction Sales toll free 1800 00...

Page 172: ... euro dell com uk en ECare form home asp Sales Home and Small Business Sales 0870 907 4000 Corporate Public Sector Sales 01344 860 456 Customer Care Home and Small Business Customer Care 0870 906 0010 Corporate Customer Care 01344 373 185 Preferred Accounts 500 5000 employees 0870 906 0010 Global Accounts Customer Care 01344 373 186 Central Government Customer Care 01344 373 193 Local Government E...

Page 173: ... com uy E mail la techsupport dell com General Support toll free 000 413 598 2521 Automated Order Status Service toll free 1 800 433 9014 AutoTech portable and desktop computers toll free 1 800 247 9362 Hardware and Warranty Support Dell TV Printers and Projectors for Relationship customers toll free 1 877 459 7298 Americas Consumer XPS Support toll free 1 800 232 8544 Consumer Home and Home Offic...

Page 174: ...d Support toll free 1 800 456 3355 Employee Purchase Program EPP Customers toll free 1 800 695 8133 Support for printers projectors PDAs and MP3 players toll free 1 877 459 7298 Public government education and healthcare Customer Service and Support toll free 1 800 456 3355 Employee Purchase Program EPP Customers toll free 1 800 695 8133 Dell Sales toll free 1 800 289 3355 or toll free 1 800 879 3...

Page 175: ...or the Deaf Hard of Hearing or Speech Impaired toll free 1 877 DELLTTY 1 877 335 5889 U S Virgin Islands E mail la techsupport dell com General Support toll free 1 877 702 4360 Venezuela Website www dell com ve E mail la techsupport dell com General Support 0800 100 4752 Back to Contents Page file H My 20Documents Cellular User 20Guides Notebooks D620 20ATG help htm 37 of 37 4 13 2007 4 36 50 PM ...

Page 176: ...er information and diagnose problems My Computer Information Processor Processor types Intel Core 2 Duo processors L1 cache 64 KB internal L2 cache 2 MB or 4 MB on die External bus frequency 667 MHz System Information System chipset Mobile Intel 945GM Express or 945PM Express Data bus width 64 bits DRAM bus width 64 bits Processor address bus width 36 bits PC Card ExpressCard file H My 20Documents...

Page 177: ... bits CardBus 32 bits Smart Card Read write capabilities reads and writes to all ISO 7816 1 2 3 4 microprocessor cards T 0 T 1 Cards supported 3 V and 5 V Program technology supported Java cards Interface speed 9600 115 200 bps EMV level level 1 certified WHQL certification PC SC Compatibility compatible within a PKI environment Insert eject cycles certified for up to 100 000 cycles file H My 20Do...

Page 178: ...emory may differ Maximum memory 4 GB Ports and Connectors Serial 9 pin connector 16550C compatible 16 byte buffer connector Video 15 hole connector Audio microphone miniconnector stereo headphones speakers miniconnector USB four 4 pin USB 2 0 compliant connectors Infrared sensor sensor compatible with IrDA Standard 1 1 Fast IR and IrDA Standard 1 0 Slow IR file H My 20Documents Cellular User 20Gui...

Page 179: ... 92 56K MDC Controller softmodem Interface internal Intel High Definition Audio bus Network adapter 1 Gb Ethernet LAN on system board Wireless WLAN card wireless switch with Dell Wi Fi Catcher technology internal card with Bluetooth wireless technology and Dell Mobile Broadband WWAN card NOTE The availability of the Dell Mobile Broadband card may vary by region file H My 20Documents Cellular User ...

Page 180: ...r PAL in S video and composite modes Color output 16 7 million TV support via a docking station only NTSC or PAL in S video and composite modes Color output 16 7 million Audio Audio type High Definition Audio Soft Audio Audio controller SigmaTel STAC9200 Stereo conversion 24 bit stereo digital to analog 24 bit stereo analog to digital Interfaces file H My 20Documents Cellular User 20Guides Noteboo...

Page 181: ...r 2 W per channel into 4 ohms Volume controls keyboard shortcuts or program menus Display Type active matrix TFT WXGA Active area X Y 303 74 x 189 84 Dimensions Height 207 0 mm 8 1 inches Width 320 0 mm 12 6 inches Depth 10 6 mm 42 inch Diagonal 357 1 mm 14 1 inches Operating angle 0 closed to 180 Viewing angles file H My 20Documents Cellular User 20Guides Notebooks D620 20ATG specs htm 6 of 13 4 ...

Page 182: ...eyboard shortcuts and the ambient light sensor Keyboard Number of keys 87 U S and Canada 88 Europe 91 Japan Key travel approx 2 5 mm 0 098 inch Key spacing 19 05 mm 0 3 mm 0 75 inch 0 012 inch Layout QWERTY AZERTY Kanji Touch Pad X Y position resolution graphics table mode 240 cpi Active area 73 7 x 43 Size file H My 20Documents Cellular User 20Guides Notebooks D620 20ATG specs htm 7 of 13 4 13 20...

Page 183: ... active capacitive pixel sensing technology Power Supply 2 7 V to approx 3 6 V Connector 48 ball BGA Array Size 248 x 2 pixels Track Stick X Y position resolution graphics table mode 250 count sec 100 gf Size protrudes 0 5 mm higher than surrounding keycaps Battery Type 6 cell lithium ion battery 56 WHr file H My 20Documents Cellular User 20Guides Notebooks D620 20ATG specs htm 8 of 13 4 13 2007 4...

Page 184: ... 6 cell lithium ion battery Depth 66 6 mm 2 62 inches Height 19 2 mm 0 76 inch Width 185 22 mm 72 92 inches 9 cell lithium ion battery Depth 93 3 mm 3 67 inches Height 20 59 mm 0 81 inch Width 287 30 mm 11 31 inches Weight 6 cell lithium ion battery 0 33 kg 0 73 lb 9 cell lithium ion battery 0 51 kg 1 12 lb Voltage 14 8 VDC file H My 20Documents Cellular User 20Guides Notebooks D620 20ATG specs ht...

Page 185: ...an be significantly reduced under certain power intensive conditions see Battery Performance Life span approximate 500 discharge charge cycles Temperature range Operating 0 to 35 C 32 to 95 F Storage 40 to 65 C 40 to 149 F AC Adapter Types 65 W and 90 W Input voltage 90 264 VAC both Input current maximum 1 7 A both Input frequency 47 63 Hz both Output current file H My 20Documents Cellular User 20...

Page 186: ...7 8 28 6 mm 1 10 1 12 inches 65 W 33 8 34 6 mm 1 34 1 36 inches 90 W Width 57 9 mm 2 28 inches 65 W 60 9 mm 2 39 inches 90 W Length 137 2 mm 5 40 inches 65 W 153 42 mm 6 04 inches 90 W Weight without cables 0 36 kg 0 79 lb 65 W 0 46 kg 1 01 lb 90 W Temperature range Operating 0 to 35 C 32 to 95 F both Storage 40 to 65 C 40 to 149 F both file H My 20Documents Cellular User 20Guides Notebooks D620 2...

Page 187: ...to 95 F Storage 40 to 65 C 40 to 149 F Relative humidity maximum tested to MIL STD 810F Method 507 4 Humidity Operating 10 to 90 noncondensing Storage 5 to 95 noncondensing Maximum vibration using a random vibration spectrum that simulates user environment tested to MIL STD 810F Method 514 Procedure I Categories 20 and 24 Operating 1 04 GRMS file H My 20Documents Cellular User 20Guides Notebooks D...

Page 188: ... half sine pulse Operating 142 G Storage 163 G Altitude maximum tested to MIL STD 810F Method 500 4 Low Pressure Altitude Procedure I Operating 15 2 to 3048 m 50 to 10 000 ft Storage 15 2 to 10 668 m 50 to 35 000 ft Back to Contents Page file H My 20Documents Cellular User 20Guides Notebooks D620 20ATG specs htm 13 of 13 4 13 2007 4 36 51 PM ...

Page 189: ...hich may contain flammable substances Use a can of compressed air to remove dust from between the keys on the keyboard NOTICE To avoid damaging the computer or display do not spray cleaning solution directly onto the display Only use products specifically designed for cleaning displays and follow the instructions that are included with the product Moisten a soft lint free cloth with either water o...

Page 190: ...e problems such as skipping with the playback quality of your CDs or DVDs try cleaning the discs 1 Hold the disc by its outer edge You can also touch the inside edge of the center hole NOTICE To avoid damaging the surface do not wipe in a circular motion around the disc 2 With a soft lint free cloth gently wipe the bottom of the disc the unlabeled side in a straight line from the center to the out...

Page 191: ...te this equipment These limits are designed to provide reasonable protection against harmful interference in a residential installation However there is no guarantee that interference will not occur in a particular installation If this equipment does cause harmful interference with radio or television reception which can be determined by turning the equipment off and on you are encouraged to try t...

Page 192: ...Regulatory Compliance Environmental Affairs One Dell Way Round Rock TX 78682 USA 512 338 4400 NOTE For further regulatory information see your Product Information Guide Back to Contents Page file H My 20Documents Cellular User 20Guides Notebooks D620 20ATG appendix htm 4 of 4 4 13 2007 4 36 52 PM ...

Page 193: ... be used for video related tasks AGP delivers a smooth true color video image because of the faster interface between the video circuitry and the computer memory AHCI Advanced Host Controller Interface An interface for a SATA hard drive Host Controller which allows the storage driver to enable technologies such as Native Command Queuing NCQ and hot plug ambient light sensor A sensor that detects a...

Page 194: ... damaged or your computer has a virus ensure that you always have a bootable CD or floppy disk available Your Drivers and Utilities or ResourceCD is a bootable CD bootable disk A disk that you can use to start your computer In case your hard drive is damaged or your computer has a virus ensure that you always have a bootable CD or floppy disk available bps bits per second The standard unit for mea...

Page 195: ...able CDs discs You can write to CD RW discs multiple times but you can write to CD R discs only once clock speed The speed given in MHz that indicates how fast computer components that are connected to the system bus operate COA Certificate of Authenticity The Windows alpha numeric code located on a sticker on your computer Also referred to as the Product Key or Product ID Control Panel A Windows ...

Page 196: ...software companies who develop management standards for distributed desktop network enterprise and Internet environments domain A group of computers programs and devices on a network that are administered as a unit with common rules and procedures for use by a specific group of users A user logs on to the domain to gain access to the resources DRAM dynamic random access memory Memory that stores i...

Page 197: ...sion of the IDE interface for hard drives and CD drives EMI electromagnetic interference Electrical interference caused by electromagnetic radiation ENERGY STAR Environmental Protection Agency requirements that decrease the overall consumption of electricity EPP enhanced parallel port A parallel connector design that provides bidirectional data transmission ESD electrostatic discharge A rapid disc...

Page 198: ...ions Commission A U S agency responsible for enforcing communications related regulations that state how much radiation computers and other electronic equipment can emit fingerprint reader A strip sensor that uses your unique fingerprint to authenticate your user identity to help secure your computer folder A term used to describe space on a disk or drive where files are organized and grouped File...

Page 199: ...e mode A power management mode that saves everything in memory to a reserved space on the hard drive and then turns off the computer When you restart the computer the memory information that was saved to the hard drive is automatically restored HTTP hypertext transfer protocol A protocol for exchanging files between computers connected to the Internet Hyper Threading Hyper Threading is an Intel te...

Page 200: ...d Data Association The organization that creates international standards for infrared communications IRQ interrupt request An electronic pathway assigned to a specific device so that the device can communicate with the processor Each device connection must be assigned an IRQ Although two devices can share the same IRQ assignment you cannot operate both devices simultaneously ISP Internet service p...

Page 201: ...torage that equals 1 048 576 bytes 1 MB equals 1024 KB When used to refer to hard drive storage the term is often rounded to 1 000 000 bytes MB sec megabytes per second One million bytes per second This measurement is typically used for data transfer ratings media bay A bay that supports devices such as optical drives a second battery or a Dell TravelLite module memory A temporary data storage are...

Page 202: ...rd or it may contain a PC Card with an adapter on it A network adapter is also referred to as a NIC network interface controller NIC See network adapter notification area The section of the Windows taskbar that contains icons for providing quick access to programs and computer functions such as the clock volume control and print status Also referred to as system tray ns nanosecond A measure of tim...

Page 203: ... transferring data between two devices through the processor as part of the data path pixel A single point on a display screen Pixels are arranged in rows and columns to create an image A video resolution such as 800 x 600 is expressed as the number of pixels across by the number of pixels up and down Plug and Play The ability of the computer to automatically configure devices Plug and Play provid...

Page 204: ...fresh rate the less video flicker can be seen by the human eye resolution The sharpness and clarity of an image produced by a printer or displayed on a monitor The higher the resolution the sharper the image RFI radio frequency interference Interference that is generated at typical radio frequencies in the range of 10 kHz to 100 000 MHz Radio frequencies are at the lower end of the electromagnetic...

Page 205: ...program that is used to install and configure hardware and software The setup exe or install exe program comes with most Windows software packages Setup program differs from system setup shortcut An icon that provides quick access to frequently used programs files folders and drives When you place a shortcut on your Windows desktop and double click the icon you can open its corresponding folder or...

Page 206: ...he computer SXGA super extended graphics array A video standard for video cards and controllers that supports resolutions up to 1280 x 1024 SXGA super extended graphics array plus A video standard for video cards and controllers that supports resolutions up to 1400 x 1050 system board The main circuit board in your computer Also known as the motherboard system setup A utility that serves as an int...

Page 207: ...s in to your computer USB devices can be connected and disconnected while the computer is turned on and they can also be daisy chained together UTP unshielded twisted pair Describes a type of cable used in most telephone networks and some computer networks Pairs of unshielded wires are twisted to protect against electromagnetic interference rather than relying on a metal sheath around each pair of...

Page 208: ...ement of electrical power One W is 1 ampere of current flowing at 1 volt wallpaper The background pattern or picture on the Windows desktop Change your wallpaper through the Windows Control Panel You can also scan in your favorite picture and make it wallpaper WHr watt hour A unit of measure commonly used to indicate the approximate capacity of a battery For example a 66 WHr battery can supply 66 ...

Page 209: ...sed with the Zip format are called Zip files and usually have a filename extension of zip A special kind of zipped file is a self extracting file which has a filename extension of exe You can unzip a self extracting file by double clicking it Zip drive A high capacity floppy drive developed by Iomega Corporation that uses 3 5 inch removable disks called Zip disks Zip disks are slightly larger than...

Reviews: