Steps
1. Unpack the new system board assembly.
CAUTION:
Do not lift the system board by holding a memory module, processor, or other components.
CAUTION:
Take care not to damage the system identification button while placing the system board into the
chassis.
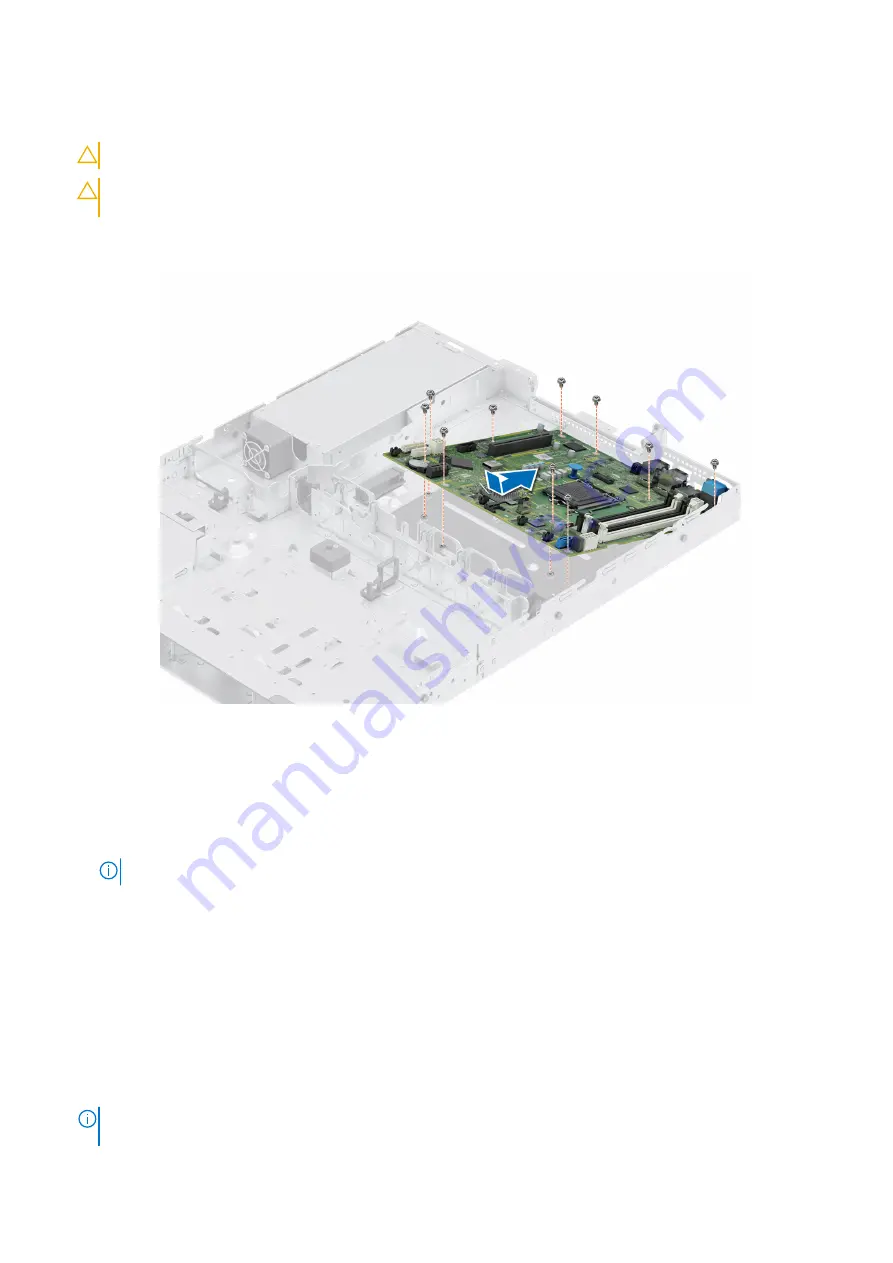
2. Lower the system board at an angle into the system, as shown in the image.
3. Slide the system board towards the rear of the chassis until the connectors are firmly seated in the slots.
Figure 72. Installing the system board
4. Tighten all the screws and ensure the system board is firmly seated.
Next steps
1. Replace the following components:
a.
NOTE:
The TPM Module must be replaced only while installing new system board.
b.
c.
Internal USB key (if installed)
d.
e.
f.
g.
h.
i.
j.
k.
l.
2. Reconnect all cables to the system board.
NOTE:
Ensure that the cables inside the system are routed along the chassis wall and secured using the cable securing
bracket.
74
Installing and removing system components


