3. Remove the
.
4. Remove the
.
5. Remove the
.
6. Remove the
.
7. Remove the
.
8. Remove the
9. Remove the
.
10. Remove the
NOTE:
System board can be removed with heatsink attached.
11. Remove the
.
12. Remove the
.
13. Remove the
About this task
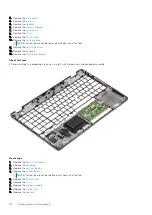
After performing the preceding steps, you are left with the palmrest and keyboard assembly.
Next steps
.
.
.
NOTE:
System board can be replaced with heatsink attached.
.
.
.
114
Disassembly and reassembly
Summary of Contents for 5500 Series
Page 17: ...Major components of your system 1 Base cover 2 Heatsink 3 Major components of your system 17 ...
Page 22: ...3 Lift and remove the base cover away from the computer 22 Disassembly and reassembly ...
Page 51: ...4 Reroute the WLAN antenna cables Disassembly and reassembly 51 ...
Page 67: ...3 Lift and remove the speakers away from the palmrest Disassembly and reassembly 67 ...
Page 94: ...3 Seat the system chassis on the display assembly 94 Disassembly and reassembly ...
Page 99: ...Disassembly and reassembly 99 ...
Page 102: ...102 Disassembly and reassembly ...


