Additional printer setup
After completing any additional printer setup, print a menu settings page to verify that all printer options are installed
correctly. See “Printing a menu settings page” on page 30 for more information. The option names appear on this
page if they are installed correctly. Since you have not made any setting changes yet, if you print the page now it
lists all the
factory default settings
. Once you select and save other settings from the menus, when you print this page,
the user default settings are listed on the page.
Saved settings are called
user default settings
because you, the user, selected the values and saved them as the new
settings.
A user default setting remains in effect until you access the menu again, choose another value, and save it. An asterisk
(*) appears next to each factory default setting, but once a user default setting is in effect, the asterisk appears next
to the user default setting on the display.
Factory default settings can be restored. See “Restoring the factory default settings” on page 136 for more
information.
Selecting a location for the printer
When selecting a location for the printer, leave enough room to open trays, covers, and doors. If you plan to install
any options, leave enough room for them also. It is important to:
•
Make sure airflow in the room meets the latest revision of the ASHRAE 62 standard.
•
Provide a flat, sturdy, and stable surface.
•
Keep the printer:
–
Away from the direct airflow of air conditioners, heaters, or ventilators
–
Free from direct sunlight, humidity extremes, or temperature fluctuations
–
Clean, dry, and free of dust
•
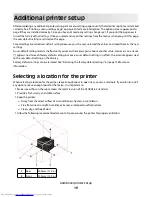
Allow the following recommended amount of space around the printer for proper ventilation:
1
Rear
300 mm (12.0 in.)
2
Front
300 mm (12.0 in.)
Additional printer setup
19


