


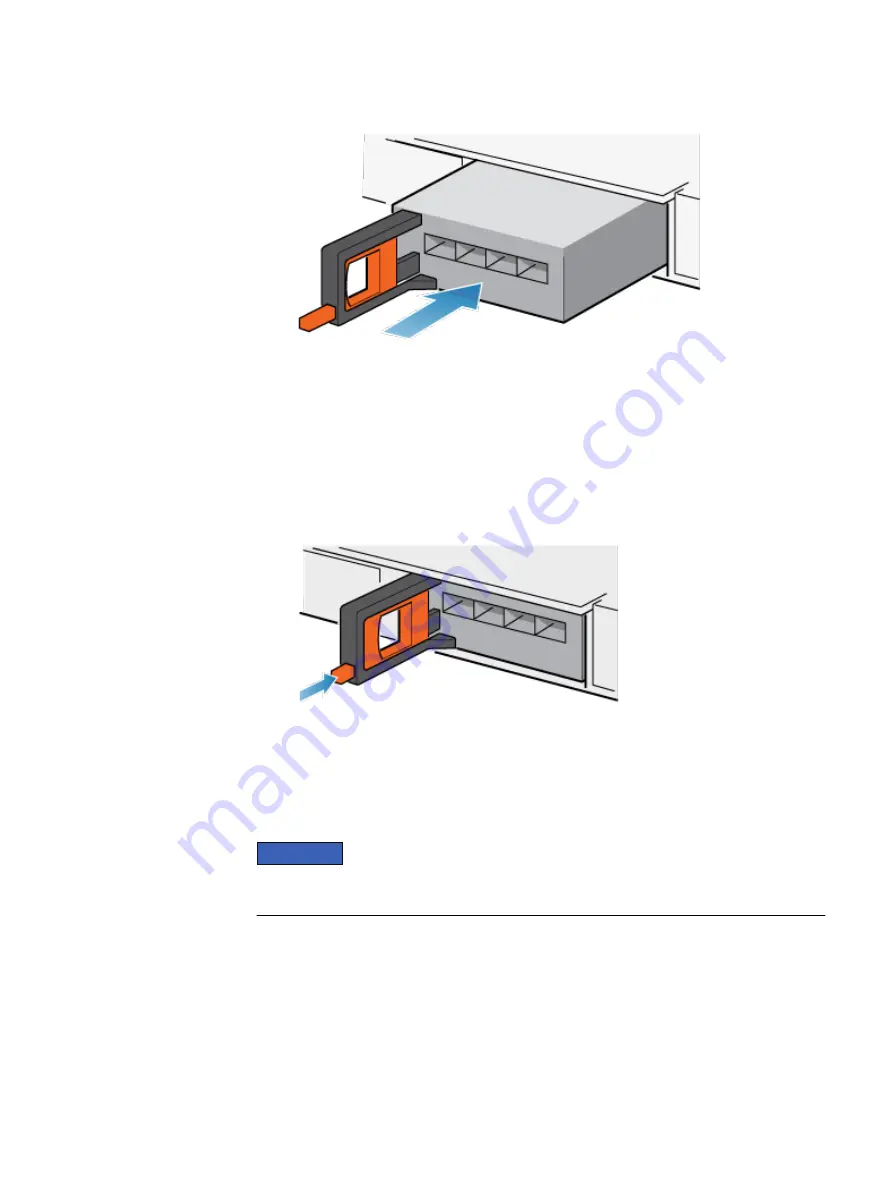
Figure 68 Installing an I/O module
2. When the I/O module appears seated, push and release the small button on the
handle.
l
If the button remains in, the module is fully seated.
l
If the button springs back, gently push the module further into the chassis,
then push it again.
l
If the button still does not rest flush with its handle, remove the module and
repeat steps 1 and 2.
Figure 69 Locking in the I/O module
3. Connect the cables into the assigned I/O module ports.
Verifying that the new I/O ports are recognized
Verify that the new I/O ports are recognized by your system and is not faulted using
the procedure that follows.
NOTICE
Do not attempt to commit the new I/O ports at this time. Wait until directed later in
this procedure for the appropriate point to commit both new I/O ports.
Procedure
1. Open Unisphere
™
and select System View.
2. Select the new I/O ports in the the graphical view:
In the graphical view, the ports should be highlighted yellow.
If the system health monitor shows the ports as faulted, contact your service
provider.
Service Procedures
Verifying that the new I/O ports are recognized
77


