


CAUTION:
To prevent a storage system reset, at least one powered drive must remain installed in the primary chassis
when multiple drives are replaced.
Steps
1. Remove the front bezel.
A solid amber LED is lit on the failed hard drive.
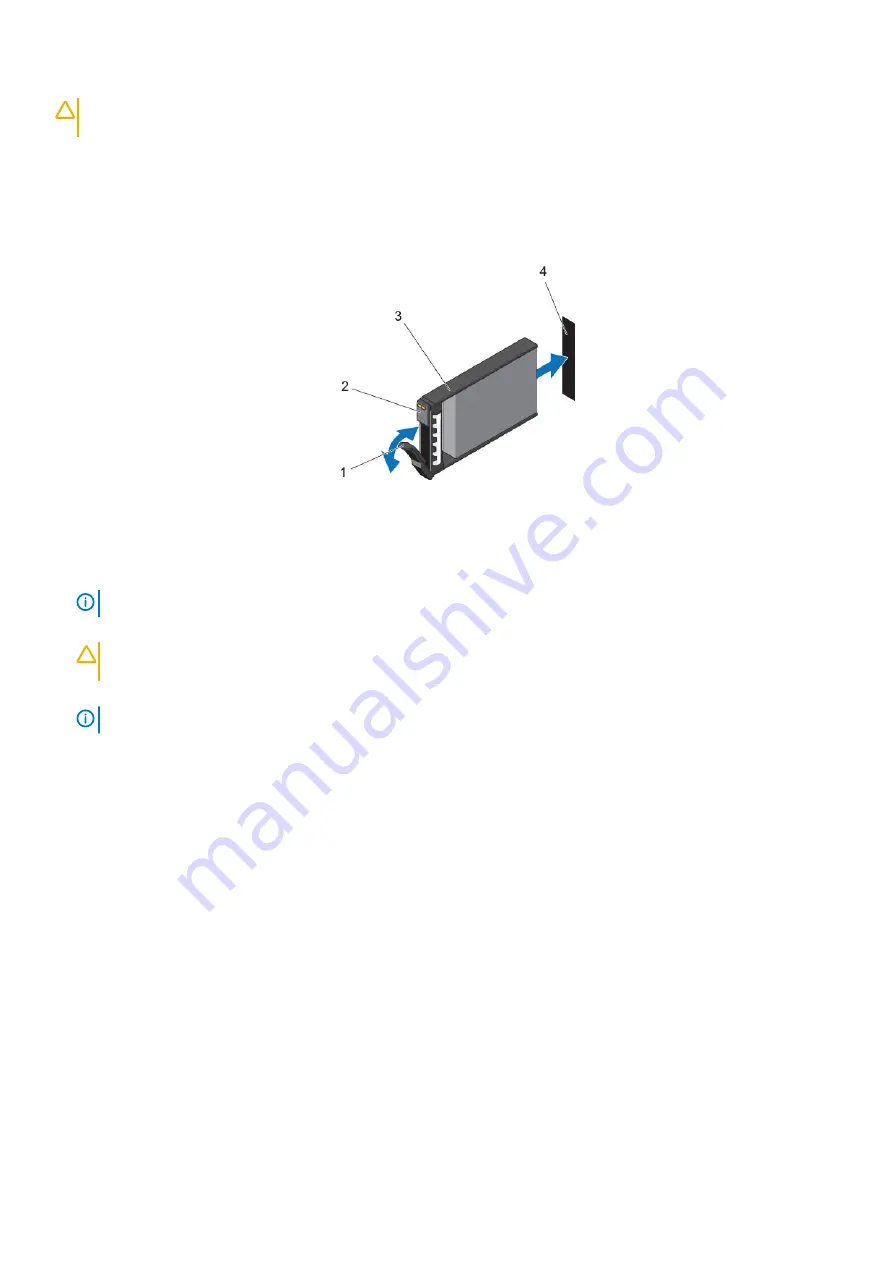
2. Press the release button to open the hard drive carrier release handle.
3. Slide the hard drive out until it is free of the hard drive slot.
Figure 20. Replacing a Hard Drive
1. Hard drive carrier release handle
2. Hard drive indicators
3. Hard drive carrier
4. Hard drive slot
4. Press the release button on the replacement hard drive to open the hard drive carrier release handle.
NOTE:
Hold the hard drive by the plastic part of the hard drive carrier or the handle.
5. Insert the hard drive carrier into the hard drive slot until the carrier make contact with the backplane.
CAUTION:
Do not remove the hard drive blanks that are installed in hard drive slots that are not occupied. The hard
drive blanks ensure proper cooling of the storage system.
6. Close the hard drive carrier handle to lock the hard drive in place.
NOTE:
Allow several seconds for the storage system to recognize the hard drive and determine its status.
7. Replace the front bezel.
8. In Dell Storage Manager , make sure that the replacement hard drive is recognized and shown as up and healthy.
Next steps
Use SupportAssist to send diagnostic data to Dell Technical Support Services.
Installing Hard Drives in a Storage System
The SCv2000/SCv2020 storage system is shipped with the drives installed. Empty drive blanks are inserted in any unused slots.
Prerequisites
Use these instructions if you have purchased new hard drives for your SCv2000/SCv2020 storage system.
About this task
For reference only, the following instructions describe the installation of a Dell Enterprise hard drive.
24
Replacing SCv2000/SCv2020 Storage System Components


