


9
Monitor
•
Control
•
Surveillance
24
Monitor
•
Control
•
Surveillance
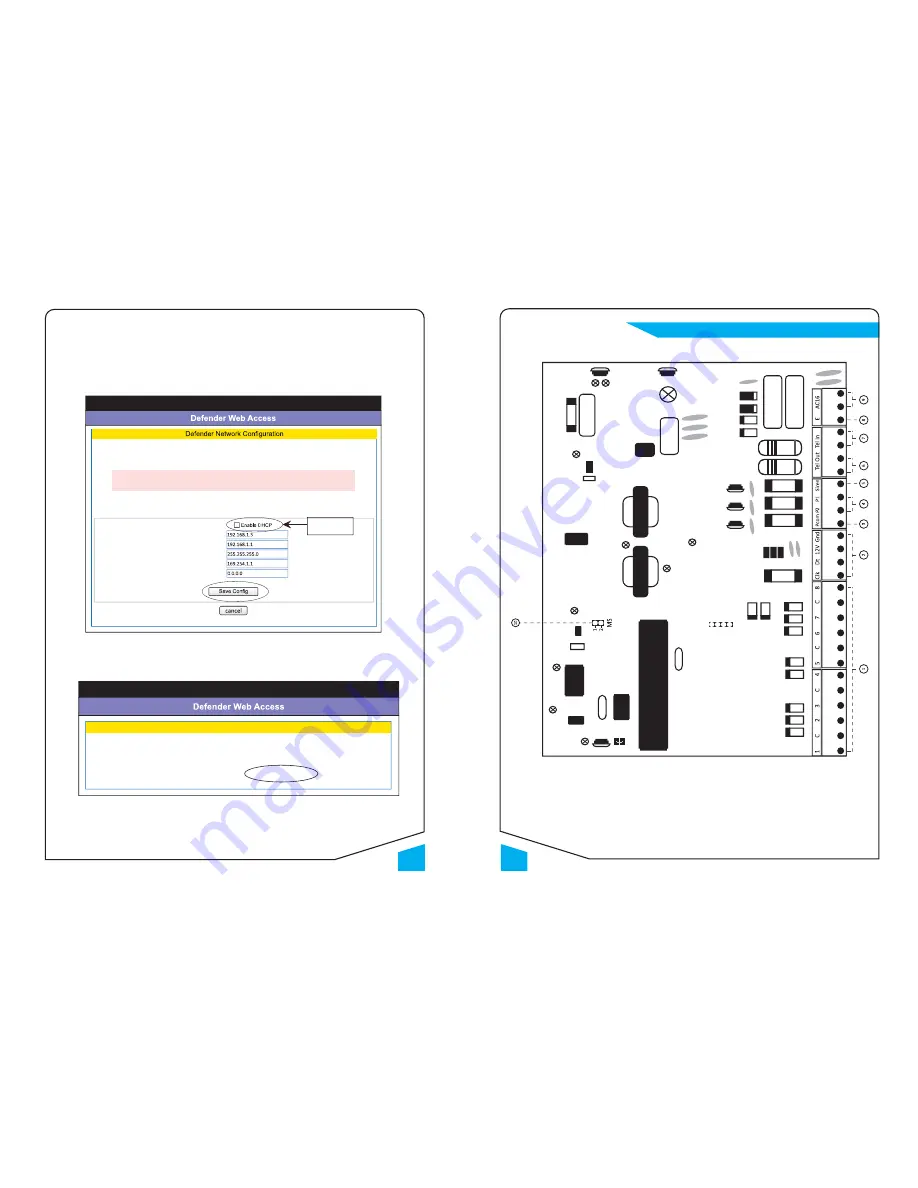
Control Panel Layout
f. Logout – to logout the DSA.
4.0 Instruc
Ɵ
on to con
fi
gure DSA as Sta
Ɵ
c IP
a. Refer to
fi
gure 2.0, the DSA’s IP address was assigned by router as 192.168.1.3 in Dynamic DHCP. If users
want to assign 192.168.1.3 as sta
Ɵ
c IP address for DSA:
• Go to Network Se
ƫ
ng, un-
Ɵ
ck the ENABLE DHCP and click Save Con
fi
g.
Figure 10.0 Network Con
fi
gura
Ɵ
on
• The browser was shown the Reboot message (
fi
gure 10.1) as below. Then open another new web page
login to Router Con
fi
gura
Ɵ
on (
fi
gure 10.2). (PS: Please do not click the link
fi
rst h
Ʃ
p://DEFENDER:8088/ )
Figure 10.1 Reboot
• Login to Router’s con
fi
gura
Ɵ
on, select DSA Mac address and IP address, and change the status
to sta
Ɵ
c. Then click save, the new con
fi
gura
Ɵ
on info was shown in
fi
gure 10.3.
This page allows the configuration of the board’s network settings.
CAUTION: Incorrect settings may cause the board to lose network connectivity. Recovery options will be
provided on the next page.
Enter the new settings for the board below:
IP Address:
Gateway:
Subnet Mask:
Primary DNS:
Secondary DNS:
Un-tick Enable
DHCP
Reboot In Progress...
Your settings were successfully saved, and the board is now rebooting to configure itself with the new settings.
Your board is now located at :
http://DEFENDER:8088/


