


User’s Manual 4CH DVR
- 8 -
1.)
AUTO RECORD
– Set “ON” to automatically start recording in 5 minutes from boot-up. Set
“OFF” to manually initiate recording using the “Record” button on the DVR front panel.
2.)
PASSWORD SETUP
– In the “ON” setting, a valid password (see PASSWORD CHANGE
below) is required to use the “Menu”, “Stop”, and Restore Factory Default buttons on the front
panel.
3.)
PASSWORD CHANGE
4.)
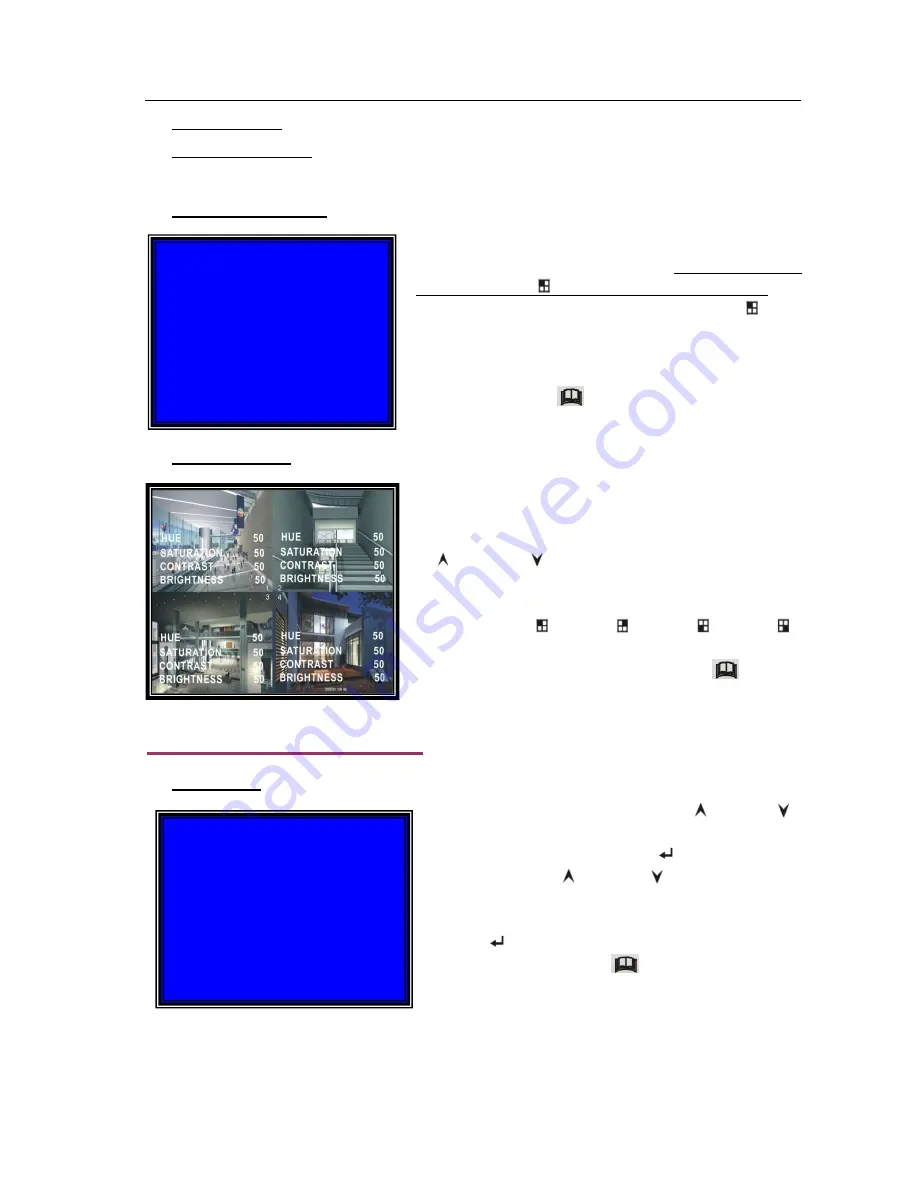
PICTURE SETUP
5. DVR Setup
(cont’d)
5.)
TIME SETUP
– Set
CURRENT PASSWORD :……
NEW PASSWORD :……
CONFIRM PASSWORD :……
To set the Time and Date, use the “ Up” and “
Down” buttons to move to the TIME SETUP Sub
Menu option, and press the “
Select
” button.
Next, use the “ Up” and “ Down” buttons to
reposition the “
▼
” symbol above the time and date
value to be edited. Finally, press, or hold down
the “
Select
” button the change the time or
date value. Press the “
Menu” button to exit.
TIME SETUP
2008/01/18 08:30:00
PRESS(UP,DOWN), THEN(SELECT)
PRESS(MENU) TO EXIT
Used to set a password. Note that the DVR understands
a combination of buttons as a valid password, since there
is no way to enter digits. For instance, the default factory
password is the “
CH1
” button pressed six times. To
change the password, start by pressing the “
CH1
”
button six times which populates the CURRENT
PASSWORD with six
“*”
marks. Then, immediately press
the next six-button combination desired for a new
password (note: the “
Menu” button cannot be used to
create a password). Finally, press the same six buttons
again to establish a new password.
Used to adjust the Hue, Saturation, Contrast and
Brightness for each channel separately. The default
values are “50” for each channel and option. Use the
“
Up” and “
Down” buttons to position the “>”
symbol next to the option to be edited, then use the
“
◄◄
REW
“, or the “
►►
FWD
“ to adjust each option
(0~99). The
“
CH1
”, “
CH2
”, “
CH3
”, “
CH4
”)
buttons can also be used to navigate directly to
the channel to be edited. Press the “
Menu”
button to exit.
Summary of Contents for 82-12150
Page 1: ...Installation Manual Model 82 12150 www mcmelectronics com 4 Channel Simplex DVR ...
Page 17: ...User s Manual 4CH DVR 15 8 3 General Software Navigation Buttons ...
Page 18: ...User s Manual 4CH DVR 16 8 4 General Software Functions ...
Page 19: ...User s Manual 4CH DVR 17 8 4 General Software Functions cont d ...
Page 21: ...User s Manual 4CH DVR 19 ...


