Setup Projector as Extended Desktop in Windows
Setup Projector as Extended Desktop in Windows
Setup Projector as Extended Desktop in Windows
Setup Projector as Extended Desktop in Windows
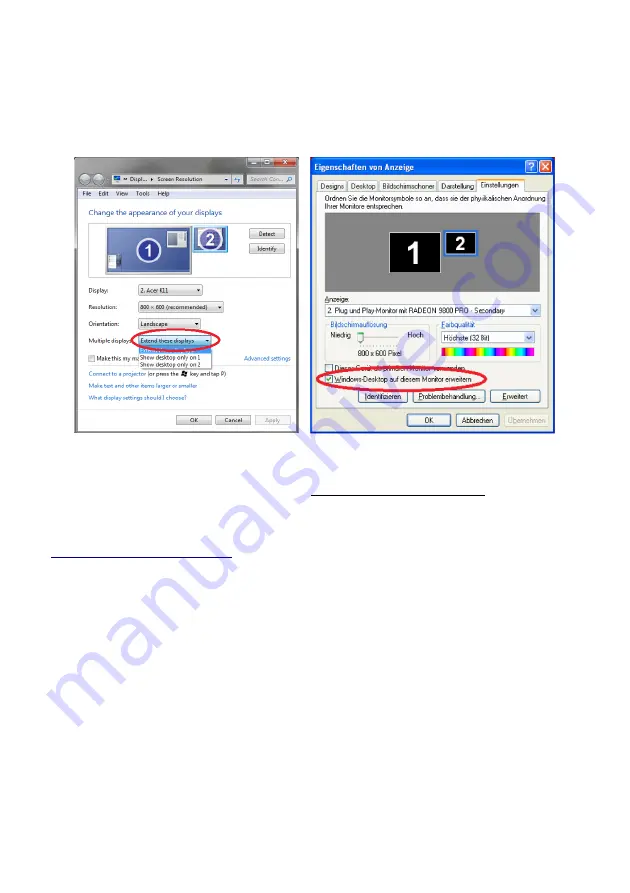
With your right mouse button, click on a free space on your Windows desktop. Choose “Resolution” or
“Properties” (depending on your Windows version).
In this dialogue window, you can separately change the settings of your two displays, monitor and projector.
Your monitor should be set as “main display”. Set the projector to be an extended desktop (“extend these
displays” / “extend desktop to this display”).
This setting is required so that DAVID can project its scan patterns and show the user interface on your
computer screen at the same time. You can find more detailed instructions in our online user manual at
http://www.david-laserscanner.com/
, “Manual”, in chapter “3D Structured Light Scanning“.
When these settings are correct, your monitor and projector will show different contents (but with the same
desktop wallpaper). You can move the mouse pointer sideways from the monitor into the projected image.
The Windows Taskbar and most desktop icons will be shown only on the monitor. All windows can be moved
from monitor to projector, and vice versa.
If the DAVID main window is shown on your projector, grab its title bar with the mouse and move it over to
your monitor.
6
3DPE.ir


