6
PIP PVW
Allows the user to see what the PIP window will look like and make any
adjustments before the PIP window is taken to the PGM output. Pressing the
PIP PVW button toggles the PIP window on and off using a simple dissolve.
PIP PGM
Once the PIP window is ready to be taken to air the PIP PGM button will allow
a simple dissolve in and out over the top of the current program output.
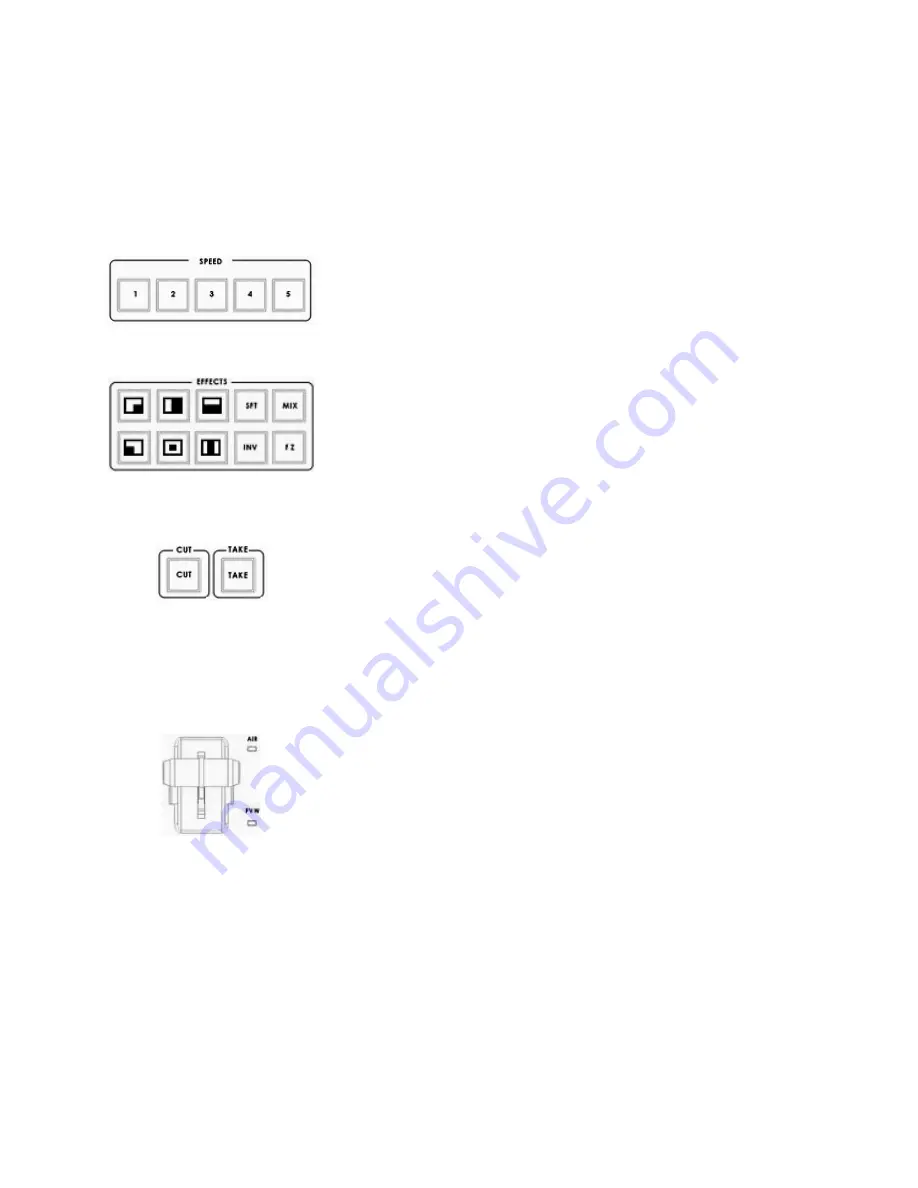
Transition Speed
Five buttons used to choose different speeds for a transition effect when using
the TAKE button to switch between PVW and PGM sources.
Transition Effects
There are 10 Transition Effects keys. Six of these keys relate to the available
types of
WIPE
effect.
INV
(Invert) changes the direction of the chosen
WIPE
.
SFT
changes the softness of the
WIPE
edge.
FZ
freezes the current PGM
image until toggled off or
CUT
away.
MIX
is a dissolve effect between the
PVW and PGM sources.
For more information, see
Transition Effects
CUT
Forces an immediate switch between the selected main and sub sources. The
selected sub source becomes the main program output with no transition
effect applied.
TAKE
Starts an automated switch between the main and sub sources. The selected
sub source becomes the main program output with the selected
Transition
Effect
applied at the selected
Effect Speed
.
T-Bar
The T-Bar is used to carry out a manual transition such as a wipe, fade, mix or
key. When it has travelled as far as it can go the transition is complete.
Calibrating the T-bar:
1. Turn off the HS-2000L power, and push the T-Bar up as far as it can go to
its Top or AIR position.
2. Press and hold in the SET and SUB SOURCE 1 buttons at the same time.
3. Have a colleague turn on the HS-2000L power. When the SET button and
SUB SOURCE 1 buttons are illuminated yellow release both buttons.
4. Press the CUT button, and push down the T-Bar as far as it can go to its
bottom or PVW position.
5. Press the TAKE button, and push the T-Bar up as far as it can go to its Top
or AIR position again.
6. Press SET button again to end the calibration process.
WARNING: If you do not follow the T-Bar calibrating steps correctly the
T-Bar may work incorrectly.


