11
Powering On
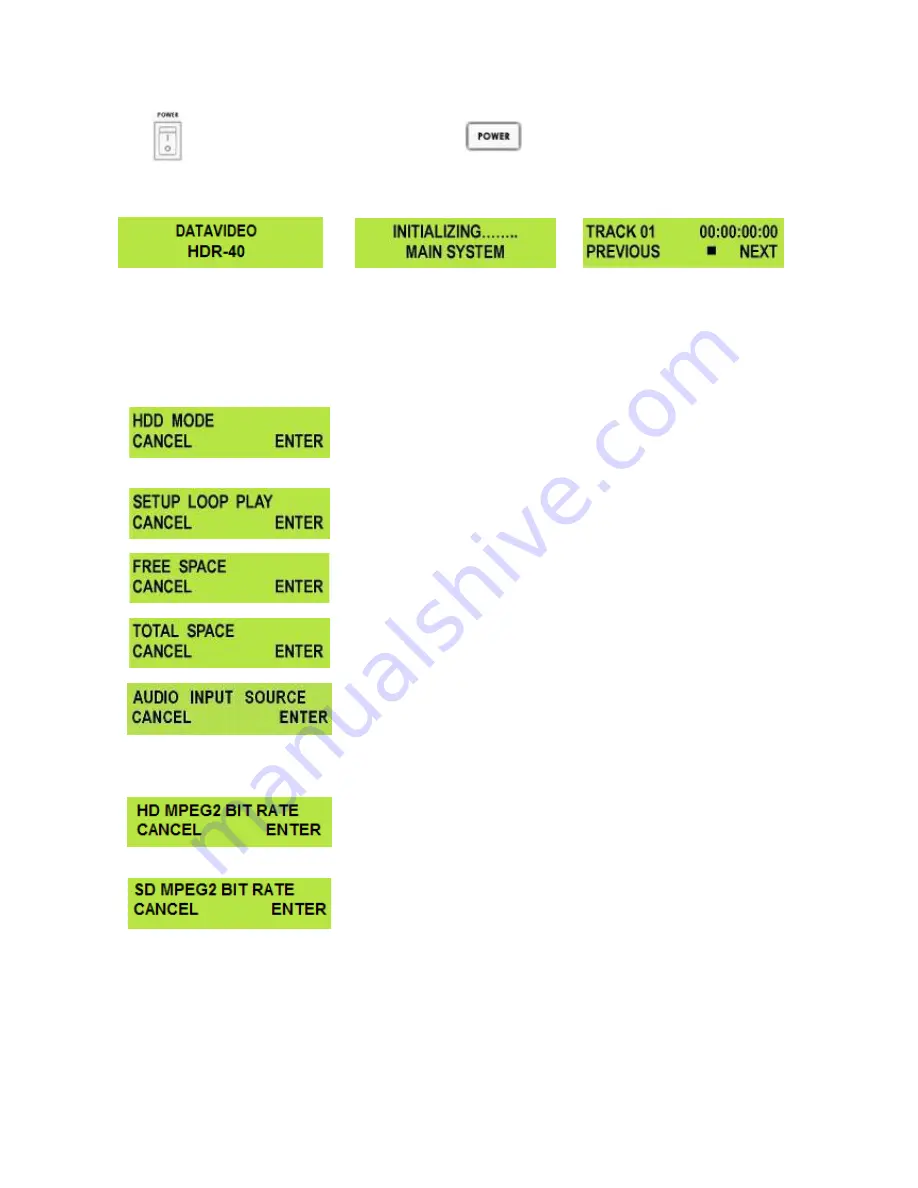
Please ensure the HDR unit’s external power supply is connected to the DC in socket and is supplied with
power from a wall socket before attempting to switch on and power on the HDR unit.
Switch the power On/Off switch
to the ON position
Press the Power Button until it lights up
The LCD display panel should show HDR-40 (or HDR-50) and after a few seconds the track display should
appear and then the HDR unit is ready to be operated.
Menu Options
Your HDR unit is a menu driven unit; there are 18 menus which are used to initially set up the unit. The menu
settings are non-volatile, so they are stored even when the unit is switched off. So many of the settings, such
as date and time, will only need to be set once. We will look at each individual menu in more detail, but here
is a quick overview of them.
N.B. Not all menus appear when the Video Input Button is illuminated.
The 18 Menus are:
HDD MODE
This mode allows the HDR unit to connect to a computer for drag and
drop file transfers via IEEE-1394 cabling to a PC or MAC.
See HDD Mode Menu (Page 13) for more details.
SETUP LOOP PLAY
If set the HDR unit will continuously loop play the selected track until
stopped.
FREE SPACE
Displays how much free space is available on the current HDR unit
removable drive.
TOTAL SPACE
Displays the total space or maximum capacity of the current HDR unit
removable drive.
AUDIO INPUT SOURCE
The HDR unit has two types Audio Input can be set.
-
ANALOG AUDIO
relates to an XLR audio input source, this audio will
be embedded into the
HDMI
output.
-
SDI EMBEDDED AUDIO
relates to an SDI input, this audio will also
be embedded into the
HDMI
output.
HD MPEG2 BIT RATE
The HDR unit has 9 HD Bit Rate modes
Bit rates of 20, 25, 30, 35, 40, 45, 50, 55, or 60 Mbps can be set.
See HD MPEG2 BIT RATE Menu (Page 14) for more details.
SD MPEG2 BIT RATE
The HDR unit has 3 SD Bit Rate modes
Bit rates of 5, 10 or 15 Mbps can be set.
See SD MPEG2 BIT RATE Menu (Page 15) for more details.
USO
RESTRITO


