7
Functions
The DVK-200 has two inputs (one camera input and one background input). Each of the inputs can be set to
CV (Composite Video), S (S-Video (Y/C), YUV (Component) or DVI-I. All of the outputs, one Y/C (S-Video)
and two Composite, are simultaneously live. We recommend that YUV or Y/C is used for the camera or
source inputs wherever possible.
Front Panel
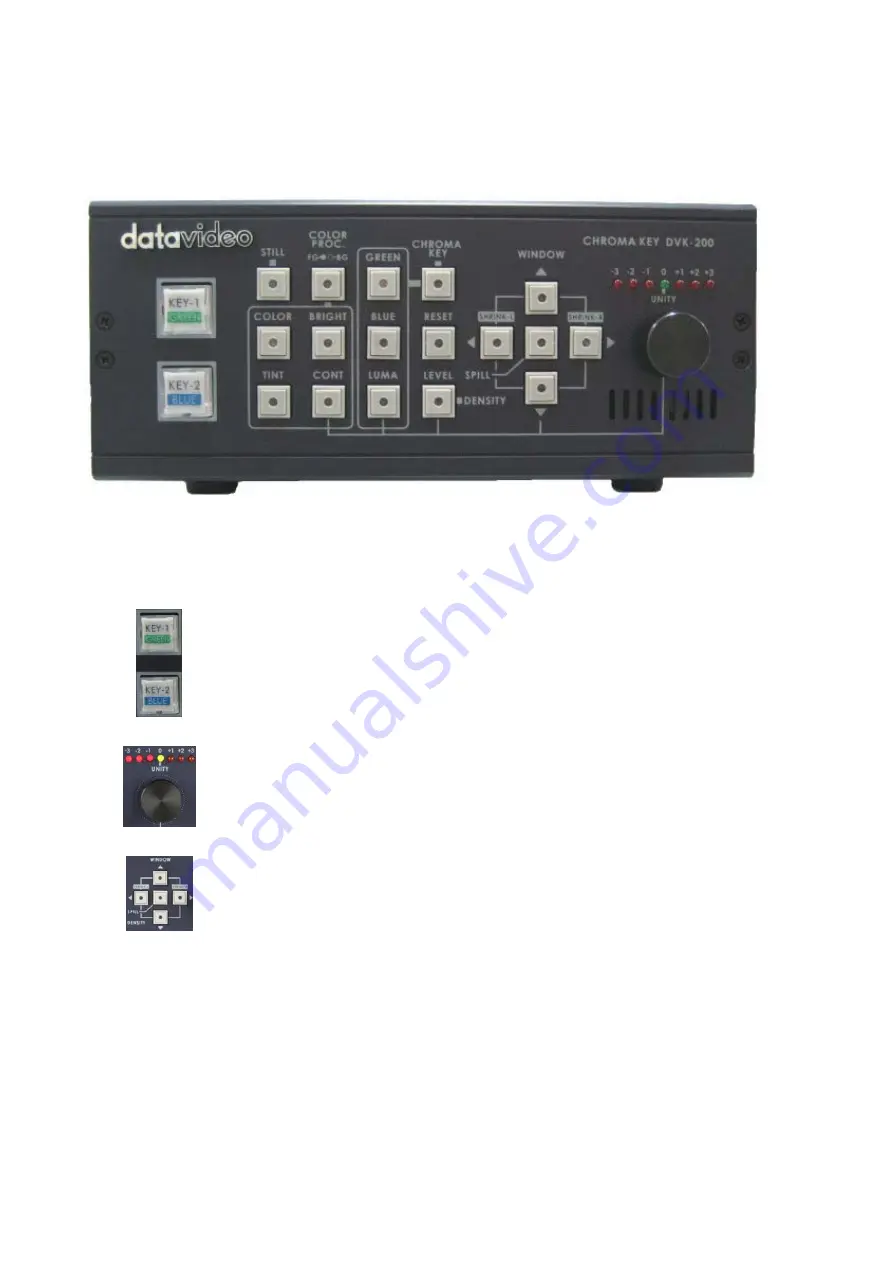
Key-1 and Key-2 are used to save two setting modes, when you are setting up the
DVK-200 front panel functions.
The active settings key will be illuminated in red. The settings are non-volatile (they
remain stored even when the DVK-200 is switched off).
The Adjustment Knob is used to alter whichever function is active. The unity position,
indicated in green, is the neutral setting. The adjustment scale is marked in nominal
settings from -3 to +3. The adjustment can also be used to reset any value to the
factory default; activate the function you want to reset by pressing the appropriate
function button, and then push the adjustment knob in, you will see the LED meter
return to unity.
The Arrow Buttons adjust the window size (garbage matte) and the left and right
edge. The spill button adjusts the colour balance of the keyed image; it enables you
to correct any colour imbalance that remains on the foreground image once the
backdrop has been keyed out.
The window size can be set to remove any unwanted garbage from the foreground
image. Often your backdrop does not fill the whole screen, particularly if you want
your subject to appear small in the finished image. You can use the Up / Down / Left /
Right arrows to make the keying window smaller so that only your backdrop is being
keyed.
To adjust left or right edge press and hold the Left or Right Arrow for two seconds,
the button LED will then flash. While the button LED is flashing you can adjust the
edge detail of the subject, you will see the value on the LED meter above the
adjustment knob.


