Appendix C – Ethernet Setup
55
Once the previous steps have been successfully completed you may now use the IP Address to:
> Install a printer driver, and start printing from your Windows
applications; see Section C.6.
-or-
> Browse to the internal web pages for advanced configuration; see Section C.4.
C
C
C
.
.
.
4
4
4
P
P
P
r
r
r
i
i
i
n
n
n
t
t
t
e
e
e
r
r
r
’
’
’
s
s
s
I
I
I
n
n
n
t
t
t
e
e
e
r
r
r
n
n
n
a
a
a
l
l
l
W
W
W
e
e
e
b
b
b
P
P
P
a
a
a
g
g
g
e
e
e
s
s
s
1.
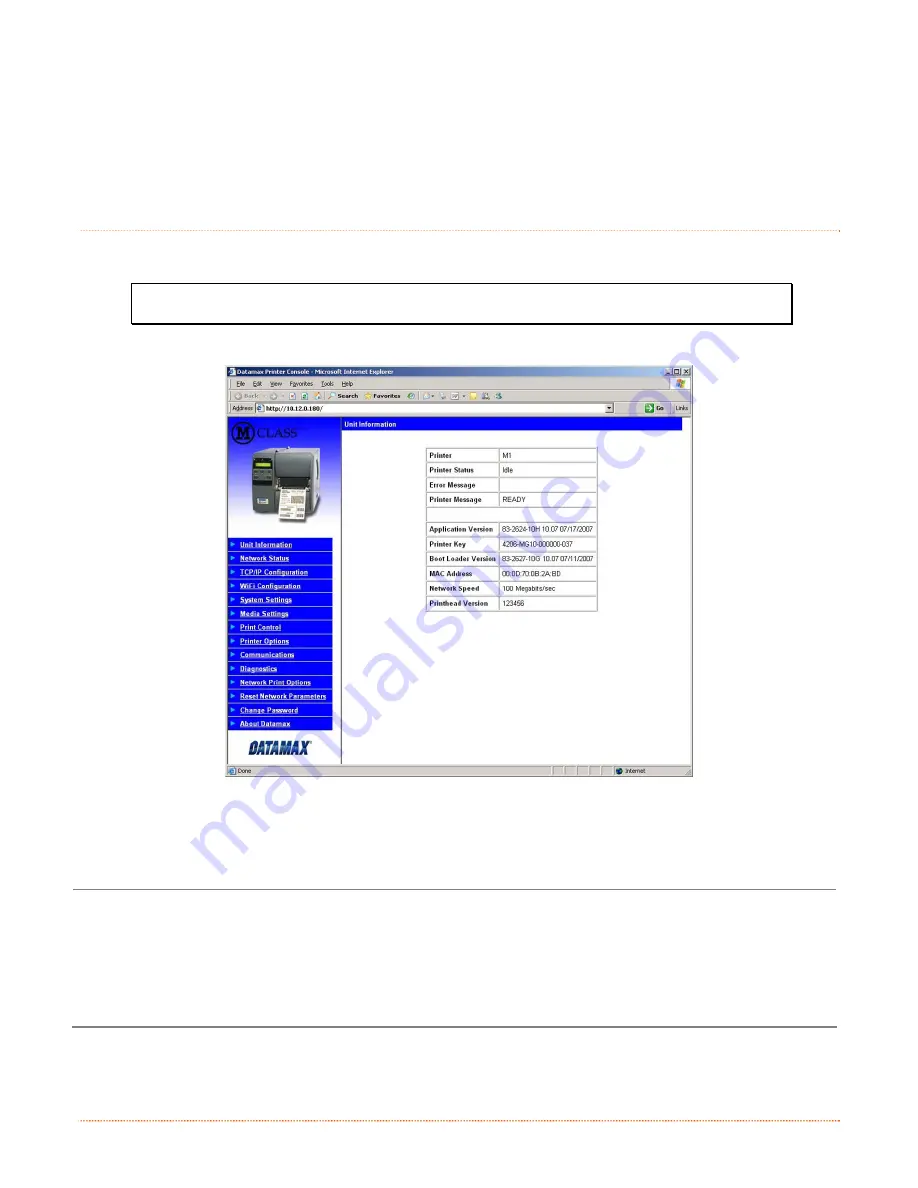
Open your web browser. Type in the IP Address of the printer. The Default IP is: 192.168.10.26.
Note: If you have assigned a different IP Address to the printer, make sure to enter the
correct IP Address.
2.
The following page will appear:
The printer’s fourteen internal web pages are accessible via the navigation bar on the left-hand side.
The TCP/IP Configuration and WiFi Configuration pages contain many items associated with the setup of
the network card as well as wireless security settings. The following tables provide information on each of the
items listed on these pages.
You must provide a password to change any settings; the default password is
sysadm
After changes are sent to the printer (on all web pages), the printer must be reset in order for the
changes to take effect. This can be done from the Reset Network Parameters web page.
If any address parameters were changed such as IP address, subnet or gateway, the printer might
not be viewable from the current host if they are no longer on the same subnet.
Summary of Contents for Mark II
Page 1: ...Operator s Manual ...
Page 2: ......
Page 8: ......
Page 10: ...2 Chapter 1 Getting Started ...
Page 20: ...12 Chapter 2 Printer Setup ...
Page 40: ...32 Chapter 4 Maintenance Adjustments ...
Page 46: ...38 Appendix A Specifications ...


