5
3. All idap cards are set up for a DHCP server as default. Follow step 4 to step 12 to enter a
static IP address if it requires.
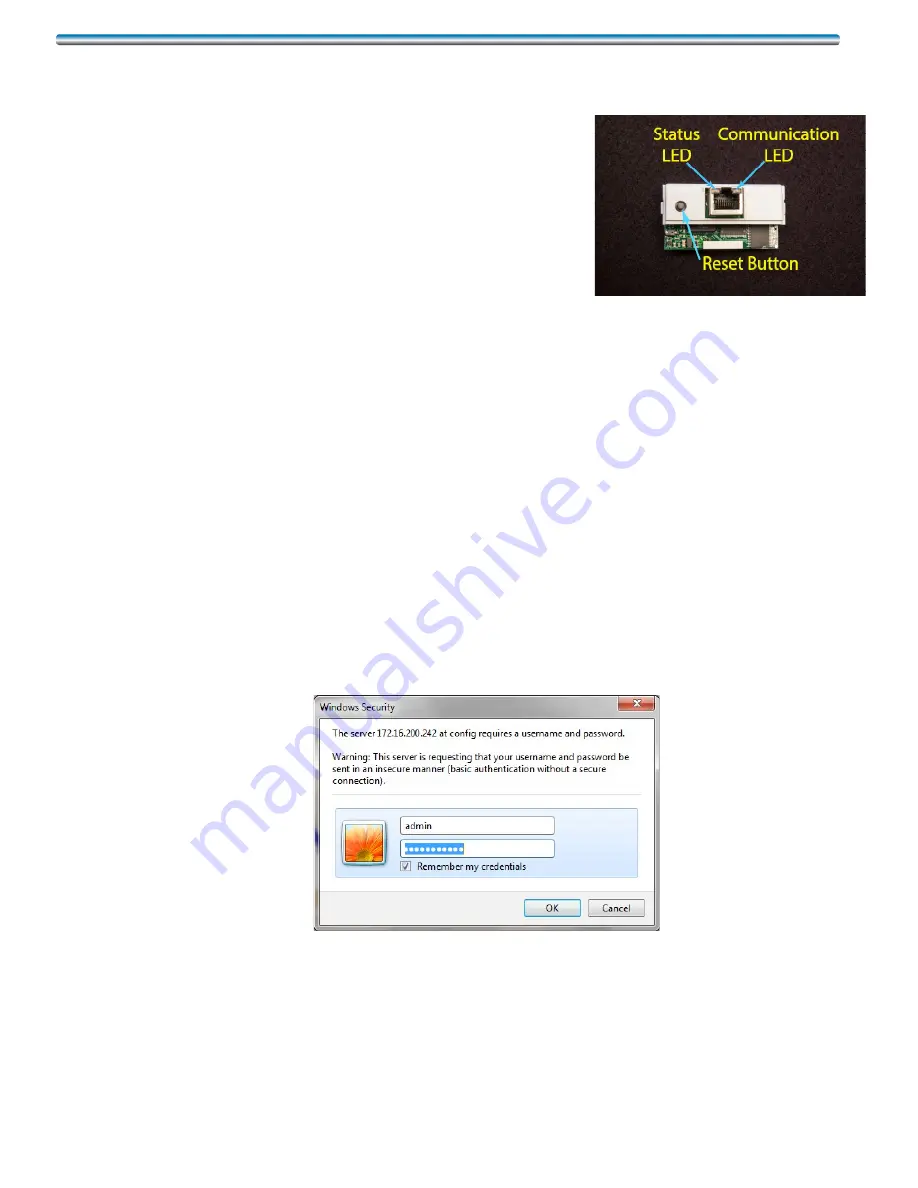
4. Perform a factory reboot of the card by shutting OFF the
power to the dap4 controller. While pressing and hold-
ing the Reset button of the idap card; power the dap4
controller back ON. The status LED will blink red and
green rapidly for couple seconds, continue to hold the
Reset button and wait approximately 20 seconds until
the status LED begins to slowly blink red. After the first
red blink, release the Reset button. The status LED con
-
tinues to blink 2 more times for total of 3 red blinks. After
releasing the Reset button, wait approximately another 50 seconds; and the card will now
default to the factory default IP address. This default IP address only works after a factory
reboot. If dap4 is reset, the card will go back to the IP address that is programmed on the
card.
5. The factory default IP address for the idap card is as follows.
IP address – 172.16.0.1
Net Mask – 255.255.0.0
Once you perform the factory reboot on the idap card, you must
now configure your PC IP address to 172.16.0.* (* any value other then 1) in order to connect
directly to the idap card. Ping the card IP address to verify the connection.
6. After your PC or laptop connects to the idap card, open the Windows Internet Explorer and
enter the card’s IP address (172.16.0.1.) to access the Ethernet card configuration page.
7. When you get to the website click on “Go to Administration Area.” The following prompt will
be displayed on your PC’s Screen, enter User name:
admin
, and Password:
fadmin
. These
are the default User name and Password. They can be changed, see Changing User name
and Password section III-E for details.
8. After entering the correct information to log on to the idap card, you will be taken to the fol
-
lowing screen.


