Test and Remove Modules
12
6�
Insert the
1
/
8
″ hex head wrench into the top access hole and turn approximately a
quarter-turn clockwise or until you feel it latch in place.
7�
Gently pull on the module to verify it is properly seated.
Remove a Module (Rear Access)
Required Tools:
1
/
8
″ hex head wrench, or
1
/
8
″ L-handle hex
head wrench for modules in the bottom or top rows of a
section, module lanyard (from the spare parts rack)
1�
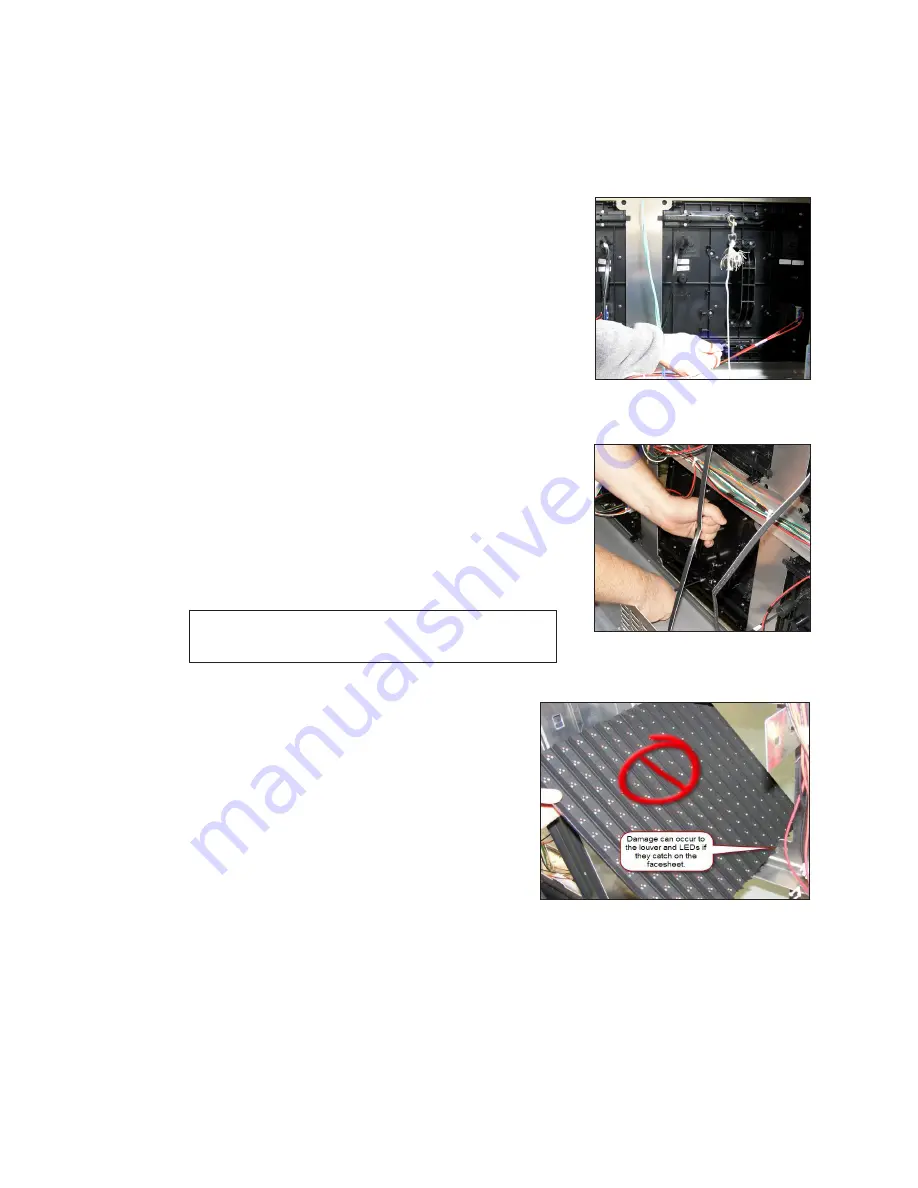
Attach one end of the safety lanyard to a lanyard ring
on the top of the module.
2�
Feed the lanyard through the lanyard ring on the top
of the display directly below the module that will be
removed.
3�
Attach the other end of the lanyard to the lanyard
attachment ring on the bottom of the module that will
be removed. Refer to
.
4�
Disconnect the SATA and power cables from the
back of the module.
5�
With a
1
/
8
″ hex head wrench, turn the bottom latch
gear approximately a quarter-turn clockwise to
disengage the latch.
6�
With a
1
/
8
″ hex head wrench, turn the top latch gear
approximately a quarter-turn clockwise to disengage
the latch.
Note:
Maintain a firm grip on the module as you
remove it from the face sheet.
7�
Rotate the module in a way that allows you to guide
it through the frame opening without catching
the louvers or LEDs on the cabinet.
shows proper module removal from the back.
shows improper module removal
from the back.
Figure 12:
Attach Safety Lanyard
to Modules
Figure 13:
Proper Module
Removal From Back
Figure 14:
Improper Module Removal
From Back


