background image

[12] 

MAN #650695 

SERVICE AND REPAIR


DAKOTA DIGITAL offers complete service and repair of its product line.  In addition, technical support is 
available to help you work through any questions or problems you may be having installing one of our 
products. Please read through the Troubleshooting Guide.  There, you will find the solution to most problems. 
 
For additional support, please visit 

www.dakotadigital.com

. A “

Product Support

” link will be found at the 

bottom of the home page. 
 

Should you ever need to send the unit back for repairs, please call our technical support line,  
(605) 332-6513, to request a Return Merchandise Authorization number.


  Package the product in a good quality box along with plenty of packing material.   


Ship the product by a common carrier with tracking abilities.  


Be sure to include the RMA number on the package.


Include a complete description of the problem, with RMA number, your full name and address (street 
address preferred), and a telephone number where you can be reached during the day.  


Any returns for warranty work must include a copy of the dated sales receipt from your place of 
purchase.  


Send no money.  We will contact you for payment.  


Dakota Digital Limited Lifetime Warranty


DAKOTA DIGITAL warrants to the ORIGINAL PURCHASER of this product that should it, under normal use and 
condition, be proven defective in material or workmanship for the lifetime of the original vehicle it was installed in, such 
defect(s) will be repaired or repla

ced at Dakota Digital’s option. 

 
This warranty does not cover nor extend to damage to the vehi

cle’s systems, and does not cover diagnosis, removal or 

reinstallation of the product.  
This Warranty does not apply to any product or part thereof which in the opinion of the Company has been damaged 
through alteration, improper installation, mishandling, misuse, neglect, or accident.    
Dakota Digital assumes no responsibility for loss of time, vehicle use, owner inconvenience nor related expenses. 
Dakota Digital will cover the return standard freight once the product has been evaluated for warranty consideration, 
however the incoming transportation is to be covered by the owner. 
 
This Warranty is in lieu of all other expressed warranties or liabilities. Any implied warranties, including any implied 
warranty of merchantability, shall be limited to the duration of this written warranty. No person or representative is 
authorized to assume, for Dakota Digital, any liability other than expressed herein in connection with the sale of this 
product. 


WARNING:

 This product can expose you to chemicals including lead, which is known to the 

State of California to cause cancer and birth defects or other reproductive harm. For more 
information go t

www.P65Warnings.ca.gov


Summary of Contents for BIM-01-2-J1939

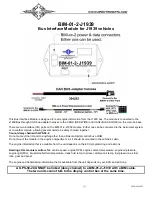
Page 1: ...thing other than a Dakota Digital control box or BIM Do not mount the module in the engine compartment as it should be mounted in the vehicle s cabin The engine information that is available from the unit depends on the ECU programming and add ons Readings this module monitors for vehicle speed engine RPM engine coolant temperature engine oil pressure engine light MIL intake manifold air temperatu...

Page 2: ...rument system control box These are individually selectable in the display system instrument setup menus VFD3 VFD3X Setup Entering the VFD3 setup is done by holding SW1 I and turning the ignition to on or acc Once in setup one can move between speed tach volt water etc by tapping SW1 I If you are setting multiple items once done with one section you will automatically move onto the next item Obtai...

Page 3: ...ys should show and SENDER Press and hold SW1 for at least 3 seconds until changes to The speed display will show the current setting Tap SW1 until and BUS F Fahrenheit is displayed o Tap SW1 once more for and BUS C Celsius if desired Press and hold SW1 until and DONE are displayed Tap SW1 until and DONE are displayed Press and hold SW1 until and DONE are displayed Obtaining oil pressure from the B...

Page 4: ... reached hold SW1 I until DONE is displayed Tap SW1 I until SPEED DONE is displayed Press and hold SW1 I until a big DONE is displayed Obtaining RPM from the BIM 01 2 J1939 Hold the SW1 I switch from the instrument system control box while turning the key on o The message display should show SETUP Release SW1 I LCD1 should show SETUP SPEED Tap SW1 I until SETUP TACH is displayed Press and hold SW1...

Page 5: ...ds until OIL SENDER is displayed Press and hold SW1 I for at least 3 seconds until SENDER NORMAL is displayed Release the switch and SENDER NORMAL will be displayed Tap SW1 I until SENDER BUS is displayed Press and hold SW1 I until DONE is displayed Tap SW1 I until OIL DONE is displayed Press and hold SW1 I until a big DONE is displayed Intake manifold air temp ambient air temp air fuel ratio tran...

Page 6: ...t chosen Once the speed is correct hold either switches until RELEASE is displayed You may now continue to exit the setup menu o The Dakota Digital Automotive app can also be used either while driving or not driving Obtaining RPM from the BIM 01 2 J1939 Tap SWII right switch until TACH is selected Press and hold SWII right switch to enter TACH menu Tap SWII right switch until INPUT is displayed Pr...

Page 7: ...ate To save setting press and hold the switch until you see on the display then release the switch The display will display the next available menu Press and hold the switch to enter that menu or press and release the switch to select another menu To exit press and release the switch until the display shows then press and hold the switch until you see on the display Enabling Boost The BIM 01 2 J19...

Page 8: ...is menu When you see on the display release the switch The display will show the current boost state disable or enable Tap the switch to change the state To save setting press and hold the switch until you see on the display then release the switch The display will show Press and hold the switch to exit setup or tap to choose another menu option To view the current BIM ID numbers Hold the switch o...

Page 9: ...Data Position Resolution Offset RPM 61444 190 Bytes 4 5 0 125 rpm per bit 0 Vehicle Speed 65265 84 Bytes 2 3 1 256 km h per bit 0 Engine coolant temp 65262 110 Byte 1 1 ºC bit 40 ºC Engine oil pressure 65263 100 Byte 4 4 kPa bit 0 Intake air temp 65270 105 Byte 3 1 ºC bit 40 ºC Ambient air temp 65269 171 Bytes 4 5 0 03125 ºC bit 273 ºC Air fuel ratio 61454 3217 Bytes 3 4 0 000514 bit 12 Gear 61445...

Page 10: ...your area the check engine feature of this unit cannot be used to operate the Check Engine or Service Engine indicator Troubleshooting guide Problem Possible cause Solution No BIM data on instrument readout BIM does not light up PWR wire does not have power GND wire is not properly grounded Power data harness is damaged Module is damaged Connect to a location that has 12V key on power Connect to a...

Page 11: ... 11 MAN 650695 Notes ...

Page 12: ...is product that should it under normal use and condition be proven defective in material or workmanship for the lifetime of the original vehicle it was installed in such defect s will be repaired or replaced at Dakota Digital s option This warranty does not cover nor extend to damage to the vehicle s systems and does not cover diagnosis removal or reinstallation of the product This Warranty does n...

Reviews: