background image

44

English

 INFORMATION

Note that during the first running period of the unit (break in period for 

compressor), required power input may be higher. This phenomenon 
originates from the compressor that requires a 50 hour run elapse 
before reaching smooth operation and stable power consumption. 
Reason is that the scroll is made out of iron and that it takes some time 
to smooth the surfaces that make contact.

 NOTE

To protect the compressor, be sure to turn on the power supply 6 
hours before starting operation.

15.4.2.  Test operation

The procedure below describes the test operation of the complete 
system. This operation checks and judges following items:

•  Check of wrong wiring (communication check with indoor units).
•  Check of the stop valves opening.
•  Judgment of piping length.

On top of this system test operation, indoor units operation should 
also be checked separately.

• 

Make sure to carry out the system test operation after the first 

installation. Otherwise, the error code U3 will be displayed on the 
user interface and normal operation or indoor unit test run cannot 
be carried out.

•  Abnormalities on indoor units cannot be checked for each unit 

separately. After the test operation is finished, check the in

-

door units one by one by performing a normal operation using 
the user interface. Refer to the indoor units installation manual 
for more details concerning the individual test run.

 INFORMATION

•  It may take 10 minutes to achieve a uniform refrigerant state before 

the compressor starts. 

•  During the test operation, the refrigerant running sound or the mag-

netic sound of a solenoid valve may become loud and the display 
indication may change. 
These are not malfunctions.

Procedure

Close all front panels in order to not let it be the cause of misjudg-
ment.

Make sure all field settings you want are set; see 15.2. Monitoring 
function and field settings on page 36.

Turn ON the power to the outdoor units and the connected indoor 
units.

 NOTE

Be sure to turn on the power 6 hours before operation in order to have 
power running to the crankcase heater and to protect the compressor.

Make sure the default (idle) situation is existing; see 13.2. Operat-
ing the push buttons and DIP switches on the printed circuit board 

on page 28. Push BS2 for 5 seconds or more. The unit will start 


test operation.

•  The test operation is automatically carried out, the outdoor unit 

display will indicate 

01

 and the indication 

Test operation

 and 

Under centralized control

 will display on the user interface of 

indoor units.
Steps during the automatic system test run procedure:


-   

01

: control before start up (pressure equalization)


-

02

: cooling start up control


-

03

: cooling stable condition


-

04

: communication check


-

05

: stop valve check


-

06

: pipe length check


-

07

: refrigerant amount check


-

08

: −


-

09

: pump down operation


-

10

: unit stop

•  During the test operation, the progress rate*

1

 will be displayed 

alternately with the display.

•  During the test operation, it is not possible to stop the unit 

operation from a user interface. To abort the operation, press 
BS3. The unit will stop after ±30 seconds. 

*1  The progress rate is displayed in 

00P

-

99P

, but it may advance 

rapidly.

Check the test operation results on the outdoor unit segment 
display.


- Normal completion: no indication on the segment display 

(idle).


- Abnormal completion: indication of error code on the seg-

ment display.
Refer to 15.4.3. Correcting after abnormal completion of the 
test operation to take actions for correcting the abnormality. 
When the test operation is fully completed, normal operation 
will be possible after 5 minutes.

15.4.3.  Correcting after abnormal completion of the test 

operation

The test operation is only completed if there is no error code displayed 
on the user interface or outdoor unit segment display. In case an error 
code is displayed, perform correcting actions as explained in the error 

code table. Carry out the test operation again and confirm that the 

abnormality is properly corrected.

 INFORMATION

Refer to the installation manual of the indoor unit for other detailed 
error codes related to indoor units.

15.5.  Error code list

In case of a displayed error code, perform correcting actions as ex-
plained in the error code table.

After correcting the abnormality, press BS3 to reset the error code and 
retry operation.

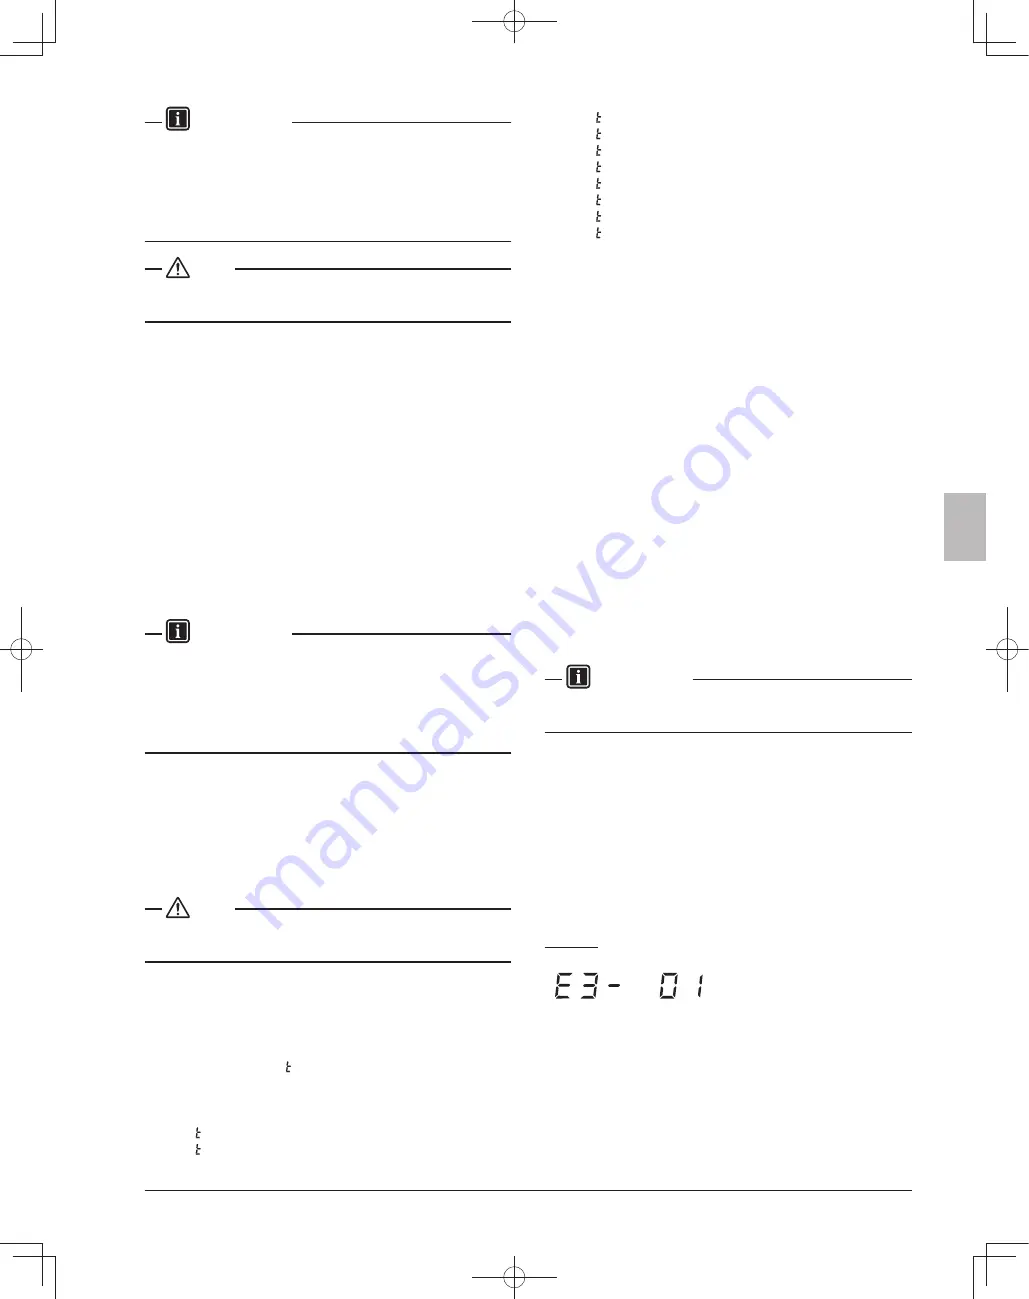
The error code which is displayed on the outdoor unit will indicate a 
main error code and a sub code. The sub code indicates more detailed 
information about the error code. The error code will be displayed 
intermittent.

Example:

Main code

Sub code

With an interval of 1 second, the display will switch between main 
code and sub code.

01_EN_Main_VRV6_HP_IM.indd   44

01_EN_Main_VRV6_HP_IM.indd   44

2022/11/17   16:07:42

2022/11/17   16:07:42

Summary of Contents for VRV RXYQ72AATJ Series

Page 1: ...aikinac com content resources manuals for the most current version of installation instructions In the event of conflicting information the online installation instruction is to be used Veuillez visit...

Page 2: ...rdance with this in stallation manual Improper installation may result in water leakage electric shock or fire When installing the unit in a small room take measures to keep the refrigerant concentrat...

Page 3: ...tdoors or indoors Do not install the air conditioner or heat pump in the fol lowing locations a Where a mineral oil mist or oil spray or vapor is pro duced for example in a kitchen Plastic parts may d...

Page 4: ...ping length limitations 12 8 Precautions on refrigerant piping 17 8 1 Caution for brazing 17 8 2 Connecting the refrigerant piping 17 8 3 Guidelines for handling stop valve 21 9 Field wiring 21 9 1 Po...

Page 5: ...YQ 120 240 single modules as indicated 72 96 120 144 168 192 216 240 RXYQ72AATJ AAYD 1 RXYQ96AATJ AAYD 1 RXYQ120AATJ AAYD 1 RXYQ144AATJ AAYD 1 RXYQ168AATJ AAYD 1 RXYQ192AATJ AAYD 1 RXYQ216AATJ AAYD 1...

Page 6: ...ype Outdoor unit Total capacity index of indoor units RXYQ72AATJ AAYD 36 93 RXYQ96AATJ AAYD 48 124 RXYQ120AATJ AAYD 60 156 RXYQ144AATJ AAYD 72 187 RXYQ168AATJ AAYD 84 218 RXYQ192AATJ AAYD 96 249 RXYQ2...

Page 7: ...strong enough to support the weight of the unit Installation location is flat to prevent vibrations and noise generation and to have sufficient stability The space around the unit is adequate for main...

Page 8: ...n the unit turning over 4 2 Weather related precautions Be sure that the air inlet of the unit is not positioned towards the main wind direction Frontal wind will disturb the operation of the unit If...

Page 9: ...olt holes 9 16 15 7 8 22 5 oblong holes 4 2 Pitch of foundation bolt holes 30 3 16 766 42 3 8 1076 62 7 16 1586 3 Pitch of foundation bolt holes 28 7 16 29 722 737 4 2 7 16 62 5 2 7 16 62 6 30 1 8 765...

Page 10: ...2 or more Service space h1 2 or more h1 b Service space 2 a 59 1 16 in 1500 mm b 19 11 16 in 500 mm In case of an installation site where sides A B C D have obsta cles the wall heights of sides A C ha...

Page 11: ...n to the position of the unit s center of gravity NOTE Use a belt sling of 13 16 in 20 mm wide that adequately bears the weight of the unit CAUTION Lift the unit with caution as the unit s center of g...

Page 12: ...Q192 240 type 62 7 16 in 1586 mm 8 Distance between foundation bolt holes RXYQ72 type 15 1 16 in 383 mm RXYQ96 168 type 21 3 16 in 538 mm RXYQ192 240 type 31 1 4 in 793 mm 9 1 Hole for foundation bolt...

Page 13: ...mplies with national and local laws For piping work follow the maximum tolerated length difference in height and length after a branch indicated in the 7 5 System piping length limitations on page 12...

Page 14: ...g between BP unit and Mini split indoor unit G Only in case Mini split indoor units are connected Indoor unit capacity index Gas pipe Liquid pipe 07 09 12 3 8 in 9 5 mm 1 4 in 6 4 mm 15 1 2 in 12 7 mm...

Page 15: ...downstream of REFNET headers Indoor unit total capacity at REFNET joints accord ing to the REFNET header are as follows REFNET joint Downstream of REFNET joint Indoor unit REFNET header Indoor unit R...

Page 16: ...xample 2 2 1 a b c d j i A 1 2 3 4 5 6 7 8 H2 e f g h H1 Example 1 2 2 a t s H3 b c d j i A 1 2 3 4 5 6 7 8 H2 e f g h H1 Example 2 2 2 Branch with REFNET header a c b d e f i g h 1 2 3 4 5 6 7 8 H1 H...

Page 17: ...1 4 in 31 8 mm 1 RXYQ168 216A type 5 8 in 15 9 mm 3 4 in 19 1 mm RXYQ240A type Increase is NOT allowed RXYQ264 336A type 1 3 8 in 34 9 mm 1 1 2 in 38 1 mm 1 3 4 in 19 1 mm 7 8 in 22 2 mm RXYQ360 480A...

Page 18: ...m 33 ft 10 m 540 ft 165 m See 2 35 Height difference setting on page 38 2 49 Height difference setting on page 39 Table C Refrigerant charge limits when 295 H1 361 Outdoor unit capacity type Additiona...

Page 19: ...ndoor unit 8 The nearest indoor unit 1 a b c d e f g p a h 130 ft 40 m 7 5 3 System containing VRV indoor units and Mini split indoor units System setup H5 H4 a c f e h H1 BP1 6 i j g b d A B 7 k l BP...

Page 20: ...eak Use Dry Nitrogen to perform a gas leak detection After cutting the slit holes it is recommended to remove burrs in the slit holes and paint the edges and areas around the edges using the repair pa...

Page 21: ...12 Field piping 13 Gas flow 14 Stop valve service port A Valve A B Valve B 3 Recover gas and oil from the pinched piping by using a recovery unit CAUTION Do not vent gases into the atmosphere 4 When...

Page 22: ...onnection from the stop valves to the field piping can be done by us ing accessory pipes supplied as accessory NOTE Make sure that the onsite piping does not come in contact with other piping the bott...

Page 23: ...r REFNET header for multiple connections of indoor units and others other than outdoor units REFNET joint Mount the REFNET joint so that it branches either horizontally within 30 or vertically 3 0 Hor...

Page 24: ...ield wiring and components must be installed by a licensed elec trician and must comply with relevant local and national regulations Be sure to use a dedicated power circuit Never use a power supply s...

Page 25: ...AWG18 16 AWG18 16 AWG18 16 AWG18 16 AWG18 16 RXYQ72AAYD RXYQ96AAYD RXYQ120AAYD RXYQ144AAYD RXYQ168AAYD RXYQ192AAYD RXYQ216AAYD RXYQ240AAYD RXYQ264AAYD RXYQ288AAYD RXYQ312AAYD RXYQ336AAYD RXYQ360AAYD...

Page 26: ...ire 7 To outdoor unit of other system 8 Use duplex wires No polarity 9 Indoor unit The outdoor unit that connect the transmission wiring to an indoor unit is Master unit of the multi system And the ot...

Page 27: ...ircuit board of the master unit The outdoor unit that connects transmission wiring to indoor unit is the master unit The others are sub unit 9 5 Power wiring connection procedure Be sure to connect th...

Page 28: ...er and trans mission wiring using the included clamp Wire so that the ground wiring does not come into contact with the compressor lead wiring If they touch this may have an adverse effect on other de...

Page 29: ...the front panel of the outdoor unit for details on the location of the service port see the figure below R410A Label See 14 3 Method for adding refrigerant on page 31 for details on handling the stop...

Page 30: ...riorated Measure the insulation and check the insulation is above regular value in accordance with relevant local and national regulations For those doing pipe work 1 Make sure piping size is correct...

Page 31: ...ndication as indicated When above situation cannot be confirmed after 12 minutes the error code can be checked on the indoor unit user interface and the outdoor unit segment display Solve the error co...

Page 32: ...return to the default situation when shipped from factory 13 2 2 Operating the DIP switches By operating the DIP switches it is possible to What to do with DIP switch DS1 1 Cool Heat selector refer t...

Page 33: ...0 kg unit RXYQ 120A type 0 0 lbs unit 0 0 kg unit RXYQ 144A type 3 4 lbs unit 1 5 kg unit RXYQ 168A type 3 9 lbs unit 1 8 kg unit RXYQ 192A type 18 5 lbs unit 8 4 kg unit RXYQ 216A type 18 7 lbs unit...

Page 34: ...15 4 Test opera tion on page 43 R Q You want to execute automatic refrigerant charge B A Step 4b 5 Manual refrigerant charging method in cooling operation NO YES Step 4b 5 Automatic refrigerant charg...

Page 35: ...on to change preventing normal operation Before charging check whether the refrigerant cylinder is equipped with a siphon tube or not Charge the liquid refrigerant with the cylinder in upright positio...

Page 36: ...step is included in below procedure This step can be skipped charging will take longer in such a case Follow the steps as described below and take into account whether you want to use the automatic ch...

Page 37: ...ge or E 3 in case the out door temperature is out of range In this case when the additional refrigerant charging was not finished step 6A has to be repeated INFORMATION When a malfunction is detected...

Page 38: ...s applicable DANGER ELECTRICAL SHOCK See Safety considerations on page i 15 1 Checks before initial start up After the installation of the unit first check the following items Once all below checks ar...

Page 39: ...tion of the unit compared to nominal operating conditions Power consumption limitation can be set in mode 2 There are two methods to activate power consumption limitation of the outdoor unit system T...

Page 40: ...rcuit Standard 2 Eco mode active by demand terminal short circuit 2 C short circuit Low 3 C short circuit Standard Eco mode can be activated by short circuit the terminal on External control adaptor O...

Page 41: ...conditions when an external signal is sent to the unit this setting defines the level power consumption limitation that will be applied for step 1 The level is according to the table Default value 3...

Page 42: ...n and advice about the effect of these settings see 15 3 Energy saving and optimum operation on page 41 2 83 Master user interface allocation in case VRV indoor units and Mini split indoor units are u...

Page 43: ...ump lockout release differential Heat pump would be resumed when the outdoor ambient temp is recovered by differential below above the Heat Pump Lockout Temp Value 2 47 Fahrenheit F Celsius C 0 5 2 8...

Page 44: ...n nected indoor unit type E g when your system is operating in heating you do not need as much heating under high outdoor ambient temperatures e g 68 F 20 C as under low outdoor ambient temperatures e...

Page 45: ...of cooling operation the evaporating temperature is allowed to go down to 43 F 6 C on temporary base depending on the situation In case of heating operation the condense temperature is allowed to go u...

Page 46: ...r purge etc See installation manual of the indoor units for details CAUTION Do not insert fingers rods or other objects into the air inlet or outlet When the fan is rotating at high speed it will caus...

Page 47: ...5 seconds or more The unit will start test operation The test operation is automatically carried out the outdoor unit display will indicate 01 and the indication Test operation and Under centralized c...

Page 48: ...A8P X8A Check connection on printed circuit board or actuator 26 27 Electronic expansion valve malfunction Y4E A1P X25A Check connection on printed circuit board or actuator 29 34 Electronic expansion...

Page 49: ...A Check connection on printed circuit board or actuator 07 09 High pressure sensor malfunction short circuit S1NPH A1P X32A Check connection on printed circuit board or actuator JC 06 08 Low pressure...

Page 50: ...ch R407C Mini split etc Check if other indoor units have malfunction and con firm indoor unit mix is allowed 18 20 Wrong combination different series e g RXYQ and REYQ or different type e g A type and...

Page 51: ...ester 3 White connector 3 To prevent damaging the printed circuit board touch a noncoated metal part to eliminate static electricity before pulling out or plug ging in connectors 4 Pull out junction c...

Page 52: ...directly related to the humanly occupied space in to which it could leak The unit of measurement of the concentration is lbs ft 3 kg m3 the weight in lbs kg of the refrigerant gas in 1 ft 3 1 m3 volu...

Page 53: ...Daikin Texas Technology Park 19001 Kermier Road Waller TX 77484 U S A 3P657316 2F EM22A039 2212 SP 00_CV_VRV6_HP_IM indd 2 00_CV_VRV6_HP_IM indd 2 2022 12 14 18 06 05 2022 12 14 18 06 05...

Reviews: