Installer reference guide
11
DCC601A51
intelligent Tab Controller
4P420109-1 – 2015.10
e.
In the
Properties
window, choose
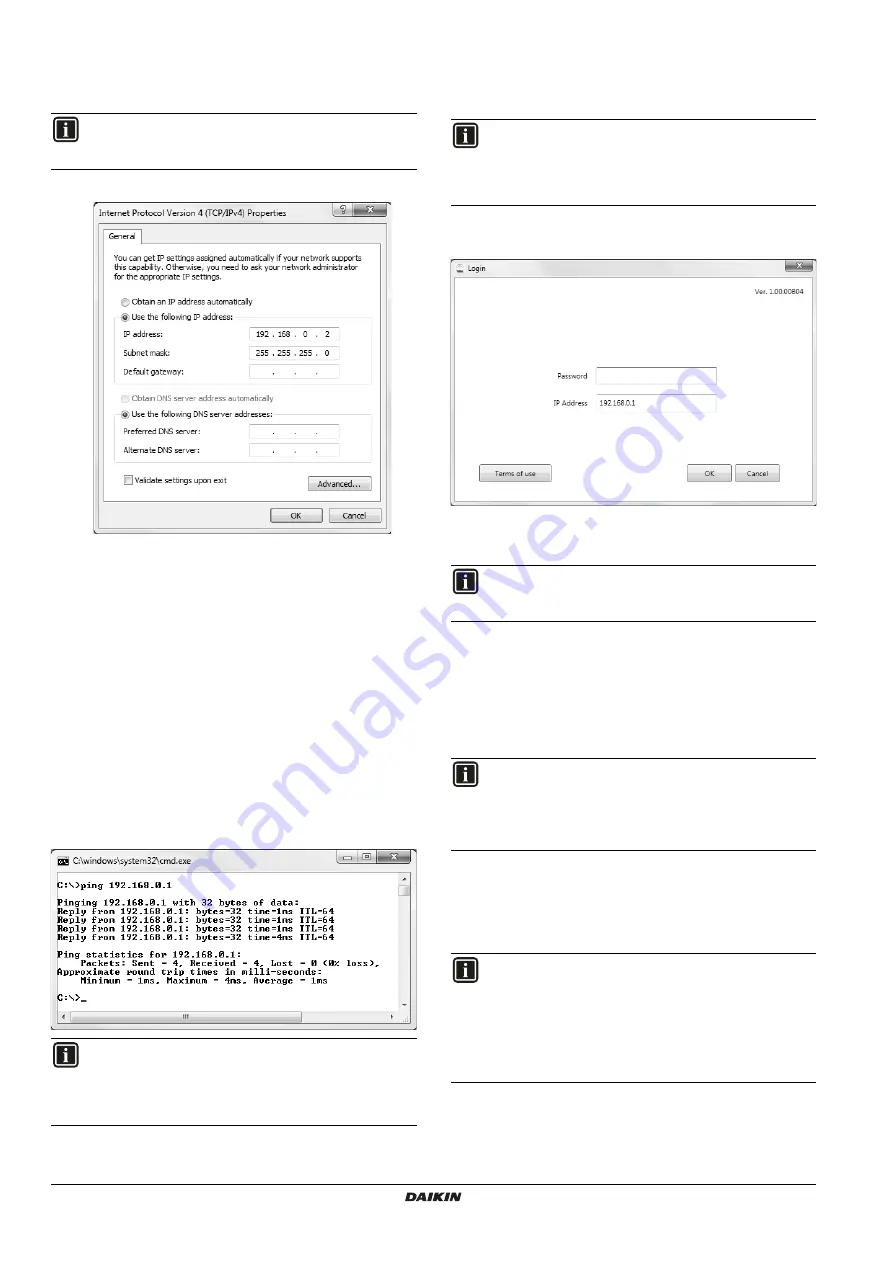
Use the Following IP
Address
.
f.
Set the following IP address: "
192.168.0.2
".
g.
Set the following Subnet mask: "
255.255.255.0
".
4
To prevent interference from any wireless network, disable all
wireless network cards on your computer as follows:
a.
In the
Network Connections
window, right-click
Wireless
Network Connection
.
b.
Select
Disable
.
5
Check if you can make a connection from your computer to the
CPU module. To do so, open the command prompt on your
computer as follows:
a.
Click the Windows Start button.
b.
In the Search box, type "
command prompt
", or alternatively
"cmd".
c.
In the list of results, click
Command Prompt
or
Cmd
respectively.
d.
Ping to the IP address of the CPU module.
To do so, enter: "
ping 192.168.0.1
" and confirm by pressing
the Enter key.
You will receive an answer like the following:
9.4.
Upgrading the firmware to the latest version
Now that you are connected to the intelligent Tab Controller, you will
have to upgrade the firmware to optimise the intelligent Tab
Controller. To do so, proceed as follows:
1
Start the version-up tool
VerUpTool.exe
.
The login window will be displayed.
2
The first time you start this version, the terms of use will be
displayed. Carefully read and accept the terms of use.
3
Enter the password (default: "
daikin
").
4
Make sure the IP address is: "
192.168.0.1
".
5
Click
OK
to log in.
6
In the
Execution Confirmation
window, make sure the version
of the firmware that will be installed is newer than the Current
version.
7
Click
Execute
to confirm the upgrade.
The upgrade will be executed. Wait until you get a confirmation
that the firmware has been completely upgraded.
8
Click
OK
to finish the installation.
INFORMATION
While this example uses 192.168.0.2, you can choose any
address in the range of 192.168.0.2~192.168.0.254.
INFORMATION
If you do not get replies, but time-outs instead, there might
be something wrong with the connection. Refer to
"15. Technical specifications" on page 25
to fix the
problem.
INFORMATION
The firmware is included in the version-up tool. Make sure
you use the most recent version of the version-up tool, as
described in section
"9.1. Minimum requirements for the
INFORMATION
The
Accept
button will only be enabled after you have
scrolled down and have read all of the terms.
INFORMATION
If the Current version reads: "
---
", this means that no
firmware is installed.
As long as no firmware is installed, the ALARM LED will be
lit on the CPU module.
INFORMATION
The version-up tool will automatically close.
The CPU module will restart automatically and will be
ready to be commissioned.
If no firmware was installed before, the ALARM LED would
be lit. After installation of this firmware, the ALARM LED
should no longer be lit.


