4 Installation
Installation manual
25
D2CND024A1/4AB + D2TND012~024A4AB
Wall-mounted condensing boiler
3P469346-3N – 2019.11
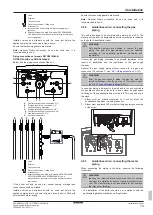
a
1
2
3
4
6
7
5
E
D
F
B
A
a
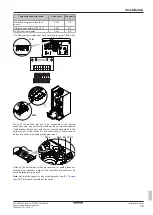
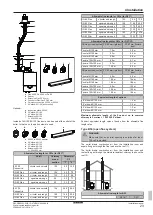
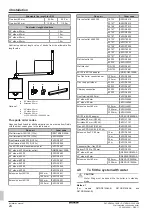
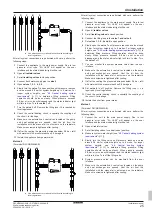
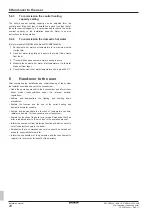
Use a disconnector or a double check valve according to
local regulations.
After all system connections are performed with care, perform the
following steps:
1
Connect the appliance to the main power supply. Due to low
pressure, error code "Err HJ-09" will appear on the user
interface and the status indicator light will be red.
2
Open
all radiator valves
.
3
Set
all isolating valves
to closed position.
4
Connect fresh water supply pipe to
valve 5
.
5
Open
valves 1, 2, 3, 4, 5, 6
.
6
Slowly turn the
valve 7
to open position until pressure reaches
a value around 0.8 bar for system heights up to 6 metres. For
longer system heights, see
11] to determine filling pressure. Filling
operation should be done slowly. When pressure exceeds
0.8 bar, error code will disappear and the status indicator light
will turn to blue. Turn the
valve 7
off.
7
Turn the
valve
5 off. Remove the filling loop if it is required by
local regulations.
8
Check the central heating circuit - especially the couplings of
the circuit - for leakage.
9
Make sure the automatic air vent valves located on the pump
and heat exchanger are opened. Vent the air from the
installation with the manual air vent screws on the radiators.
Make sure screws are tightened after venting.
10
If after the venting the pressure decreases below 0.8 bar, refill
with water until the pressure reaches 0.8 bar again.
11
Isolate the appliance from power mains.
Method 2
(For model D2CND024A4AB)
E
1
2
4
3
6
5
D
F
B
7
a
8
A
a
Use a disconnector or a double check valve according to
local regulations.
After all system connections are performed with care, perform the
following steps:
1
Connect the appliance to the main power supply. Due to low
pressure, error code "Err HJ-09" will appear on the user
interface and the status indicator light will be red.
2
Open all
radiator valves
.
3
Set all
isolating valves
to closed position.
4
Connect the filling loop to the
valve 7 and valve 8
.
5
Set
valves 1, 3, 5, 6 and 8
to open position.
6
Slowly open the
valve 7
until pressure reaches a value around
0.8 bar for system heights up to 6 metres. For longer system
heights, see
"4.5 Central heating system requirements"
11] to
determine filling pressure. Filling operation should be done
slowly. When pressure exceeds 0.8 bar, error code will
disappear and the status indicator light will turn to blue. Turn
the
valve 7
off.
7
You can monitor the system pressure value from the user
interface.
8
Make sure the automatic air vent valves located on the pump
and heat exchanger are opened. Vent the air from the
installation with the manual air vent screws on the radiators.
Make sure screws are tightened after venting.
9
If after the venting the pressure decreases below 0.8 bar, refill
with water until the pressure reaches 0.8 bar again.
10
Set
valve 8
to off position. Remove the filling loop if it is
required by local regulations.
11
Check the central heating circuit - especially the couplings of
the circuit - for leakage.
12
Isolate the boiler from power mains.
Method 3
(For model D2CND024A1AB)
After all system connections are performed with care, perform the
following steps:
1
Connect the unit to the main power supply. Due to low
pressure, error code "Err HJ-09" will appear on the user
interface and the status indicator light will be red.
2
Open all radiator valves.
3
Set all isolating valves to vertical (open) position.
4
Measure system water height (see
11]).
5
Slowly turn the filling valve until pressure reaches a value
around 0.8 bar for system heights up to 6 metre. For longer
system
heights,
see
11] to determine filling pressure. Filling
operation should be done slowly. When pressure exceeds
0.8 bar, error code will disappear and the status indicator light
will turn to blue. Turn off the filling valve.
6
System pressure value can be monitored from the user
interface.
7
Make sure the automatic air vent valves located on the pump
and heat exchanger are opened. Vent the air from the
installation with the manual air vent screws on the radiators.
Make sure screws are tightened after venting.
Summary of Contents for D2CND024A4AB
Page 31: ......

