Dahua ISC-D206, User Manual
Explore the comprehensive User Manual for the Dahua ISC-D206, available for free download at manualshive.com. This manual offers detailed guidance on utilizing all features of this advanced security camera. Ensure optimal use by downloading your free copy today from manualshive.com. Perfect for enhancing your device's performance and security setup.
Share
Download


Reviews:
No comments
Related manuals for ISC-D206
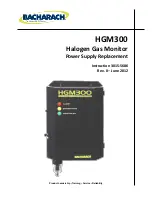
HGM300
Brand: Bacharach Pages: 8

Pure Touch
Brand: Road Angel Pages: 20

Radar Flash
Brand: Quintezz Pages: 14

MQG 0200
Brand: Dräger Pages: 40

OLCT 60
Brand: Teledyne Pages: 68

Adventure 5500
Brand: Cabela's Pages: 20

CS9000 MK2
Brand: C-SCOPE Pages: 19

SLKD-M801
Brand: PQWT Pages: 17

SR-1007
Brand: Lanberg Pages: 6

SR-1005
Brand: Lanberg Pages: 15

Quantum XT
Brand: Whites Pages: 42

RGS 328
Brand: Coster Pages: 4

GTC-540
Brand: GASTRON Pages: 30

GTC-200A
Brand: GASTRON Pages: 28

AirLink 9850
Brand: RKI Instruments Pages: 44

Gold MAXX Power
Brand: XP Pages: 29

TREASURE HUNTER CS50
Brand: Velleman Pages: 12

LRD6499SWS
Brand: Uniden Pages: 28


