Web Interface
68
7.5.1.1 Adding VTO
Click
Add
.
Step 1
The
Add
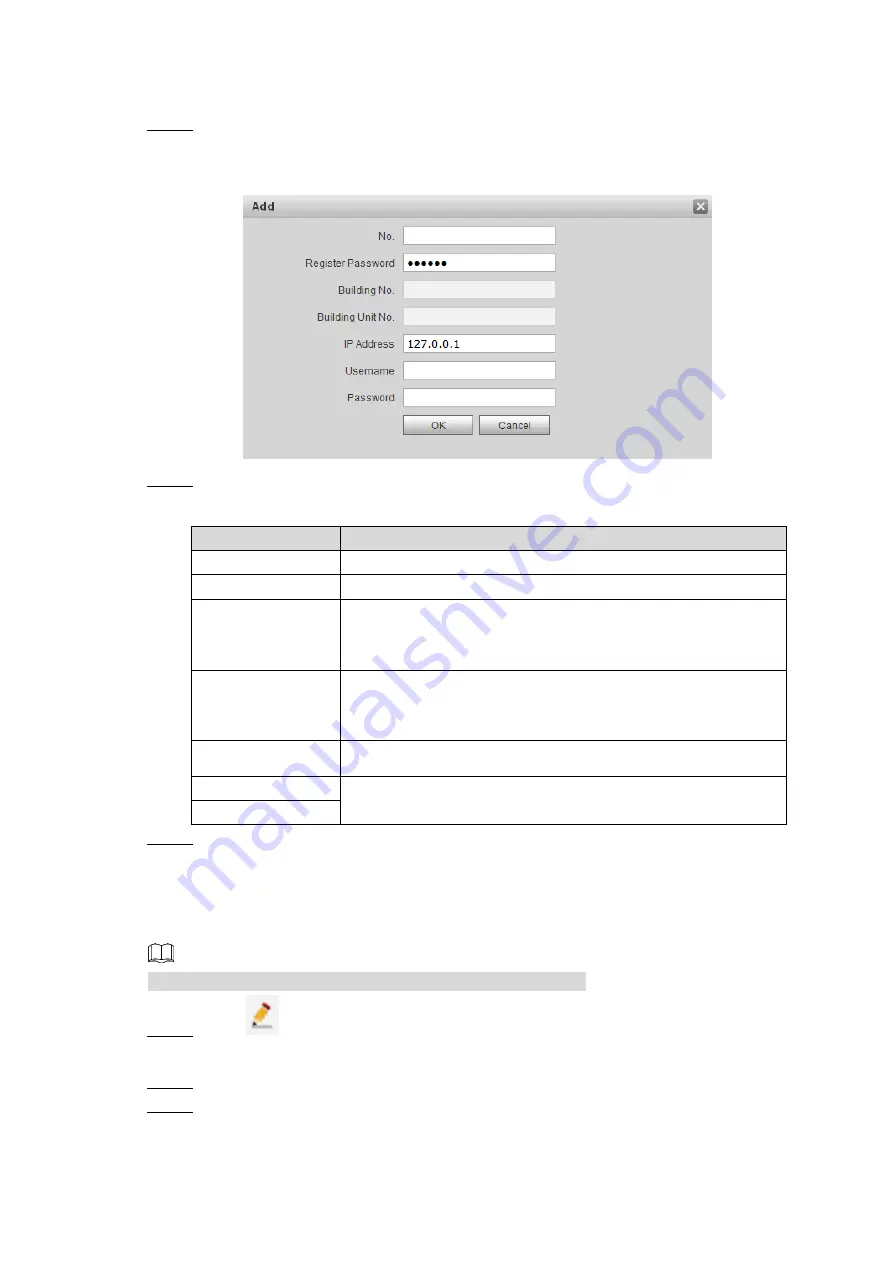
interface is displayed. See Figure 7-14.
Add VTO
Figure 7-14
Configure VTO parameters. See Table 7-8 for the details.
Step 2
Table 7-8 VTO parameters
Parameter
Description
No.
The number of the VTO.
Register Password Leave to the default.
Building No.
Configure the number of the building that the VTO is being
installed. This option is editable only when third party server
works as SIP server and the
Support Building
is enabled.
Building Unit No.
Configure the number of the building unit that the VTO is
being installed. This option is editable only when third party
server works as SIP server and the
Support Unit
is enabled.
IP Address
The IP address of the VTO
Username
The username and password for the Web interface of the
VTO.
Password
Click
OK
to finish configuration.
Step 3
The VTO information is listed.
7.5.1.2 Modifying VTO
The VTO that is currently at use cannot be modified or deleted.
Click
.
Step 1
The
Modify
interface is displayed.
Modify the register password, username, and password of the VTO. See Table 7-8.
Step 2
Click
OK
to finish.
Step 3


