ROOF, BACK PANEL AND REAR FLOOR PANEL 5–9
4. Peel off the undercoat and sealer.
•
Heat the undercoat and sealer at the welding
areas of the rear side outer panel and extension
rear floor with a gas torch and peel off the under-
coat and sealer with a steel spatula.
5. Mold damaged related parts.
•
Use a hammer and dolly to mold damaged areas
of the rear side outer and extension rear floor
panel.
•
Even out the welding flanges with a hammer and
dolly.
•
Fill any holes drilled by welding.
6. Set the new rear panel.
•
Grind both sides of the welding section of the rear
panel with a sander to remove the paint and ex-
pose the steel plate.
CAUTION: To prevent eye injury, wear goggles or
safety glasses whenever sanding, cutting, or grind-
ing.
•
Clamp both the right and left sides with the vise
grips as shown.
•
Weld the clamped sections for temporary instal-
lation.
CAUTION: To prevent eye injury and burns when
welding, wear an approved welding helmet, gloves
and safety shoes.
7. Measure and check.
•
Measure the trunk compartment diagonally to
check it for twisting or bending and its correct
position with the rear bumper installed.
•
Temporarily assemble the rear combination lamps
and trunk, then check the clearances and level
differences.
8. Perform the main welding.
•
Make MIG or gas welds at the butt joints.
•
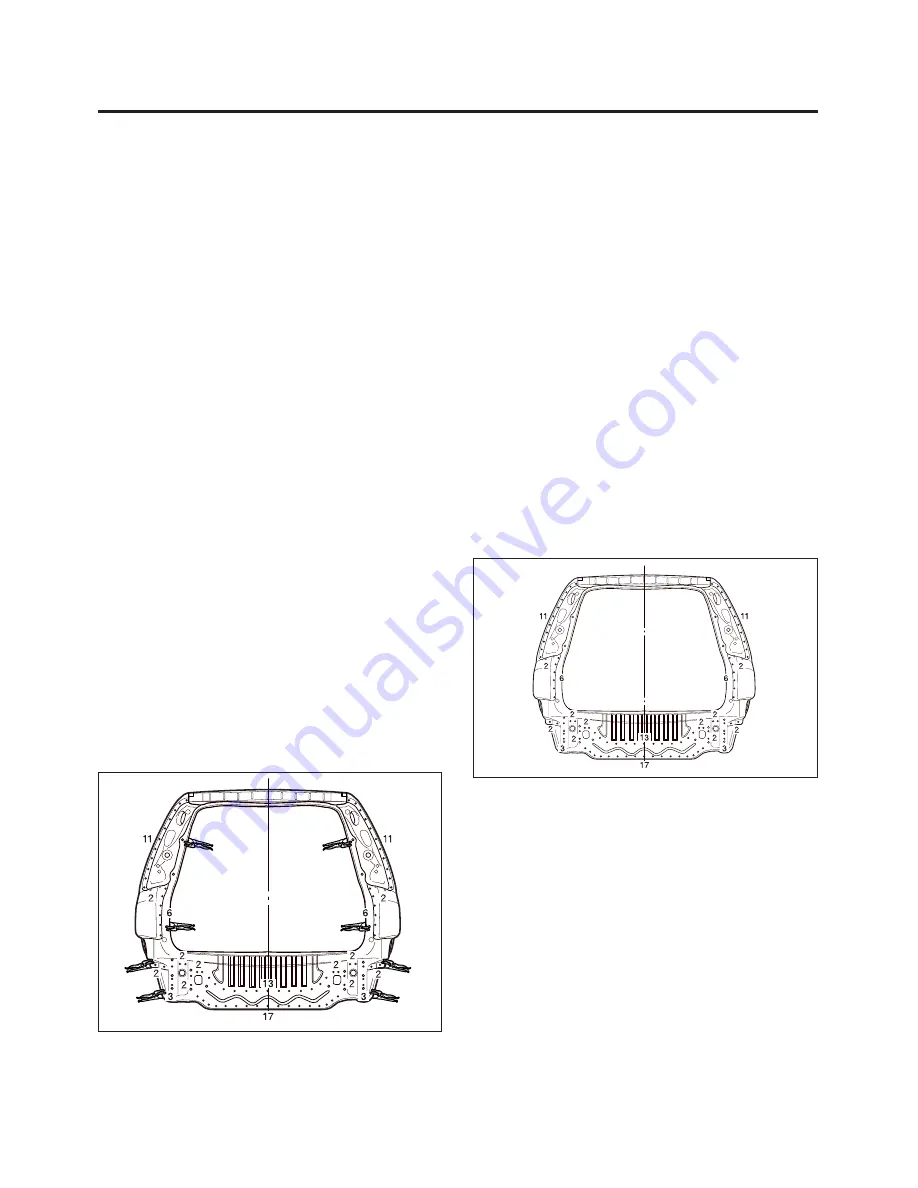
Spot weld the back panel as shown.
CAUTION: To prevent eye injury and burns when
welding, wear an approved welding helmet, gloves
and safety shoes.
•
Perform a trial welding first, and check the weld-
ing condition.
•
Increase the number of spot by 20% for areas to
be spot welded.
Fig. 12
Fig. 13
9. Finish the welding areas.
•
Level the gas or MIG welded areas with disc
sander, then even out high areas with a hammer
being careful not to deform them.
•
Use a hammer and dolly to even out the rear side
outer and extension rear floor panel flanges for a
close fit with the surface of the rear panel.
Summary of Contents for TACUMA
Page 1: ...BODY REPAIR MANUAL TACUMA ...
Page 9: ...GENERAL INFORMATION 1 5 BLANK ...
Page 10: ...1 6 GENERAL INFORMATION Fig 3 9 TECHNICAL ILLUSTRATION ...
Page 12: ...1 8 GENERAL INFORMATION Fig 4 ...
Page 14: ...1 10 GENERAL INFORMATION Fig 5 ...
Page 16: ...1 12 GENERAL INFORMATION Fig 6 ...
Page 89: ...BODY DIMENSION 8 3 Fig 2 1 1 UNDER BODY ...
Page 90: ...8 4 BODY DIMENSION Fig 3 1 2 FRONT FRAME ...
Page 91: ...BODY DIMENSION 8 5 Fig 4 1 3 REAR FRAME ...
Page 92: ...8 6 BODY DIMENSION Fig 5 1 4 FRONT PANEL ...
Page 93: ...BODY DIMENSION 8 7 Fig 6 1 5 ENGINE ROOM ...
Page 94: ...8 8 BODY DIMENSION Fig 7 ENGINE ROOM Continued ...
Page 95: ...BODY DIMENSION 8 9 Fig 8 ENGINE ROOM Continued ...
Page 96: ...8 10 BODY DIMENSION Fig 9 1 6 SIDE OUTER ...
Page 97: ...BODY DIMENSION 8 11 Fig 10 2 BODY WELDING DIAGRAM 2 1 FRONT PANEL UPPER ...
Page 98: ...8 12 BODY DIMENSION Fig 11 2 2 FRONT WHEEL HOUSE ...
Page 100: ...8 14 BODY DIMENSION Fig 13 2 4 DASH PANEL UPPER ...
Page 102: ...8 16 BODY DIMENSION Fig 15 DASH PANEL LOWER Continued 1 2 2 4 5 2 2 1 Arc welding Arc welding ...
Page 103: ...BODY DIMENSION 8 17 Fig 16 2 6 ROOF ...
Page 104: ...8 18 BODY DIMENSION Fig 17 2 7 BODY SIDE AND WHEEL HOUSE INNER ...
Page 105: ...BODY DIMENSION 8 19 Fig 18 2 8 REAR FRAME ...
Page 106: ...8 20 BODY DIMENSION Fig 19 2 9 TAIL GATE ...
Page 112: ...9 4 SEALING CAULKING AND DEADNER ENGINE ROOM Continued Fig 3 C A B VIEW B VIEW A VIEW C ...
Page 113: ...SEALING CAULKING AND DEADNER 9 5 ROOF Fig 4 A A RUB AFTER SEALING SECT A A ...
Page 114: ...9 6 SEALING CAULKING AND DEADNER INSIDE ROOM Fig 5 B C C A A B SECT A A SECT B B SECT C C ...
Page 116: ...9 8 SEALING CAULKING AND DEADNER HOOD Fig 7 A A A SECT A A RUB AFTER SEALING VIEW A ...
Page 119: ...SEALING CAULKING AND DEADNER 9 11 Fig 10 1 2 CAULKING ENGINE ROOM ...
Page 120: ...9 12 SEALING CAULKING AND DEADNER UNDER BODY Fig 11 ...
Page 121: ...SEALING CAULKING AND DEADNER 9 13 BACK PANEL Fig 12 ...
Page 124: ...9 16 SEALING CAULKING AND DEADNER Fig 16 UNDER BODY ...
Page 125: ...SEALING CAULKING AND DEADNER 9 17 ROOF DOOR Fig 17 ...


