14
Surface travel is stopped automatically in the fully opened and closed positions by limit switches that are properly
adjusted at Da-Lite. Should it be necessary to adjust for more or less drop of screen, proceed in the following manner:
Remove two screws to remove access door.
NOTE:
Use a screw driver or 5/32" Allen wrench to make adjustments.
Down Limit Adjustment – More Screen Drop
1. Place operating switch in “down” position.
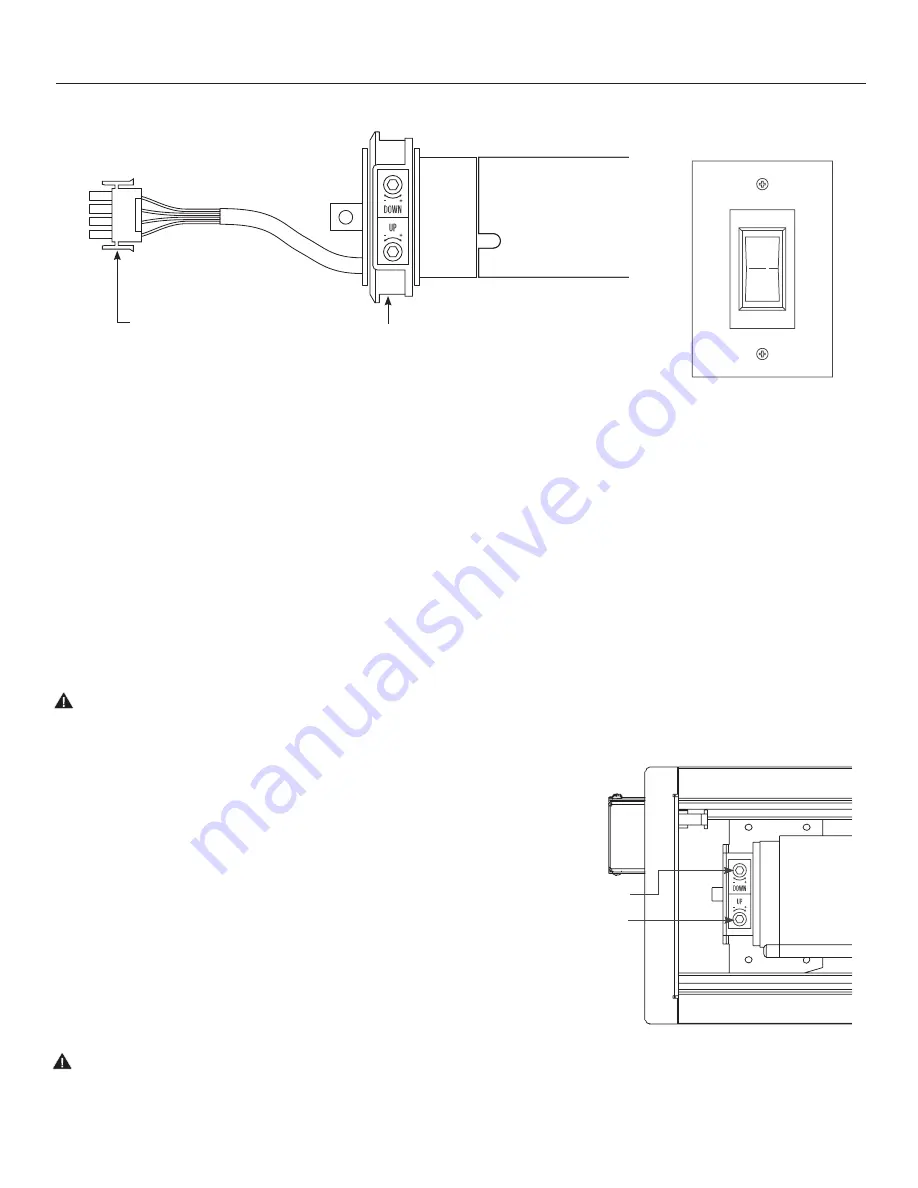
2. When the screen stops, turn the “down” limit knob (Figure 22)
one turn counterclockwise. Test by raising screen surface
approximately two feet, then lower again. Repeat until desired
screen surface position is attained.
CAUTION: Do not adjust for more drop than what was
ordered. At least 1–1/2 wraps of fabric must remain on the
roller. This screen comes standard with 12" black at the top.
Down Limit Adjustment – Less Screen Drop
1. Raise screen surface approximately two feet above desired level.
2. Place operating switch in “off” position.
3. Turn the “down” limit knob (Figure 22) one turn clockwise. Test by
raising screen surface approximately two feet, then lower again.
Repeat until desired screen surface position is attained.
Up Limit Adjustment – Too Far Out of Case
1. Place operating switch in “up” position.
2. When the screen stops, turn the “up” limit knob (Figure 21) one
turn counterclockwise. Test by lowering screen surface
approximately two feet, then raise again. Repeat until slat bar is
just in case.
CAUTION: Adjusting the limits by more than 6” can cause the
screen surface to lose proper tensioning.
Up Limit Adjustment – Too Far Into Case
1. Lower screen surface approximately two feet below screen case
opening.
2. Place operating switch in “off” position.
3. Turn the “up” limit knob (Figure 22) one turn clockwise. Test by
lowering screen surface approximately two feet, then raise again.
Repeat until slat bar is just in case.
Appendix A: Screen Adjustment for Type 1 Motor (HV suffix in Part Number)
TYPE 1 MOTOR
Has manual limit
adjustments
on end of motor
4-wire connection
TYPE 1 WALL SWITCH
Adjustment Knob “Down”
Adjustment Knob “Up”
Figure 22
Summary of Contents for ViewShare
Page 1: ...INSTRUCTION BOOK FOR ViewShare Tensioned Advantage Electrol Retrofit ...
Page 18: ...18 ...
Page 19: ...19 ...


