


xStack DGS-3400 Series Layer 2 Gigabit Managed Switch CLI Manual
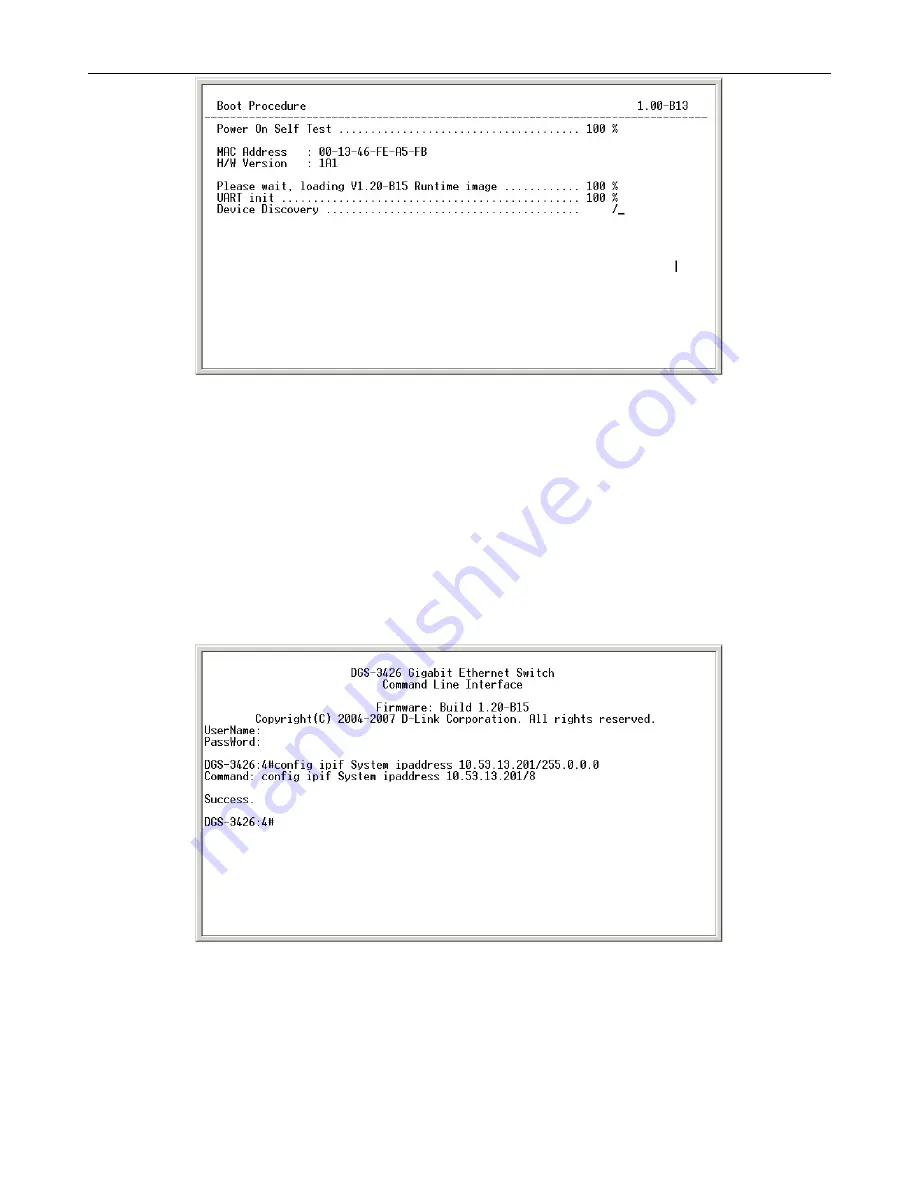
Figure 1-2. Boot Screen
The Switch’s MAC address can also be found in the Web management program on the Switch Information (Basic Settings)
window on the Configuration menu.
The IP address for the Switch must be set before it can be managed with the Web-based manager. The Switch IP address can be
automatically set using BOOTP or DHCP protocols, in which case the actual address assigned to the Switch must be known.
The IP address may be set using the Command Line Interface (CLI) over the console serial port as follows:
1. Starting at the command line prompt, enter the commands
config ipif System ipaddress
xxx.xxx.xxx.xxx/yyy.yyy.yyy.yyy
. Where the
x
’s represent the IP address to be assigned to the IP interface named
System
and the
y
’s represent the corresponding subnet mask.
2. Alternatively, you can enter
config ipif System ipaddress xxx.xxx.xxx.xxx/z
. Where the
x
’s represent the IP address to
be assigned to the IP interface named
System
and the
z
represents the corresponding number of subnets in CIDR
notation.
The IP interface named
System
on the Switch can be assigned an IP address and subnet mask which can then be used to connect a
management station to the Switch’s Telnet or Web-based management agent.
Figure 1-3. Assigning an IP Address
In the above example, the Switch was assigned an IP address of 10.53.13.201 with a subnet mask of 255.0.0.0. The system
message
Success
indicates that the command was executed successfully. The Switch can now be configured and managed via
Telnet, SNMP MIB browser and the CLI or via the Web-based management agent using the above IP address to connect to the
Switch.
2


