background image

Configuring VLANs

Defining VLAN Properties

Page 113 

Defining VLAN Properties

The 

VLAN Membership Properties

 page provides information and global parameters for configuring and working 

with VLANs. To define VLAN properties:

1.

Click 

Basic Setup > VLAN > Membership > Properties

. The 

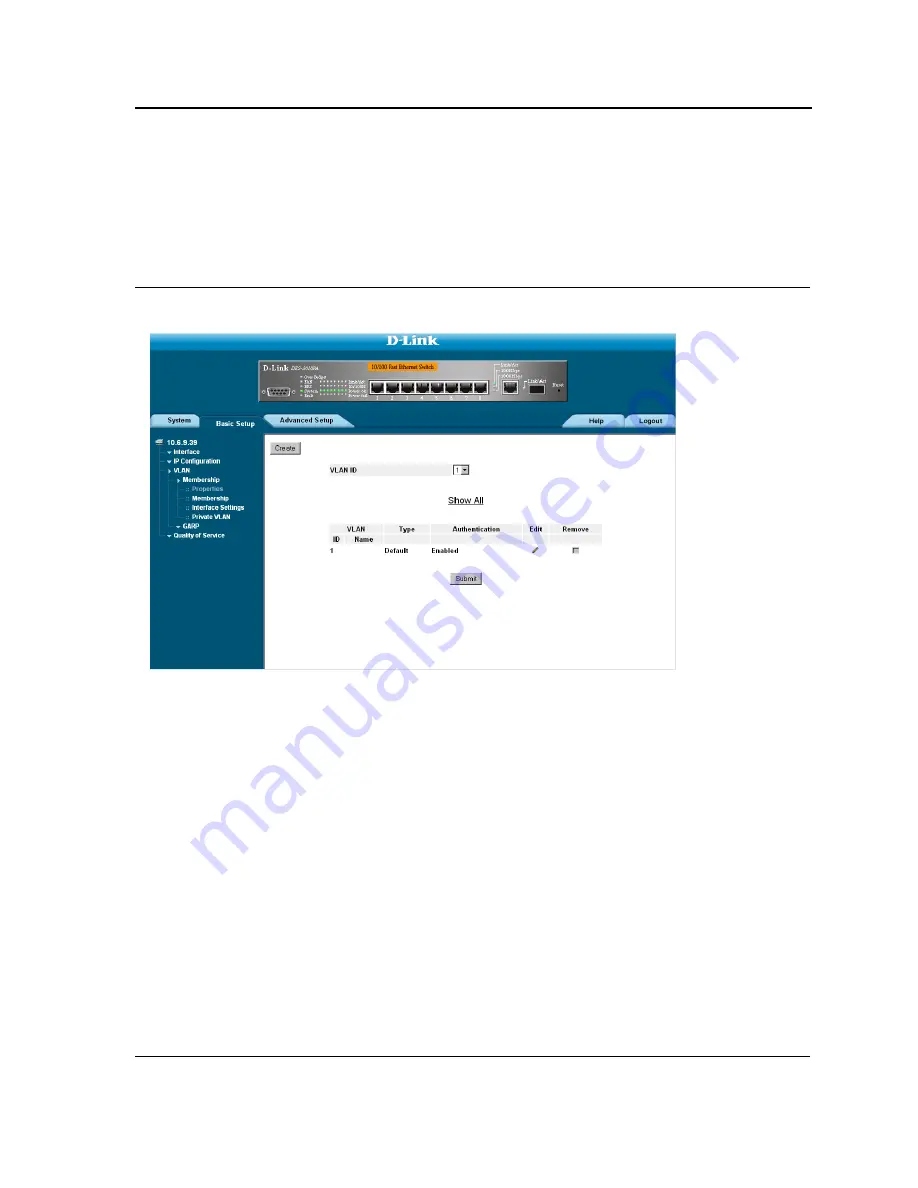
VLAN Properties Page 

opens.

Figure 61: VLAN Properties Page

The 

VLAN Properties

 page contains the following fields:

VLAN ID 

— Displays the VLAN ID.

Name 

— Displays the user-defined VLAN name.

Type

— Displays the VLAN type. The possible field values are:

Dynamic 

— The VLAN was dynamically created through GARP.

Static 

— The VLAN is user-defined.

Default 

— The VLAN is the default VLAN.

Authentication

— Indicates whether unauthorized users can access a Guest VLAN. The possible field values 

are:

Enable 

— Enables unauthorized users to use the Guest VLAN.

Disable 

— Disables unauthorized users from using the Guest VLAN.

Remove

— Removes VLANs. The possible field values are:

Checked 

— Removes the selected VLAN(s).

Unchecked

 — Maintains VLAN(s).

Summary of Contents for DES-3010PA - Switch

Page 1: ......

Page 2: ...ort LEDs 14 System LEDs 16 Cable Port and Pinout Information 17 Pin Connections for the 10 100 1000 Ethernet Interface 17 Physical Dimensions 18 Mounting Device 19 Preparing for Installation 20 Installation Precautions 20 Site Requirements 20 Unpacking 21 Installing the Device 22 Desktop or Shelf Installation 22 Rack Installation 22 Wall Installation 25 Connecting the Device 26 Connecting the Swit...

Page 3: ...ation Information 53 Modifying Configuration Information 53 Deleting Configuration Information 54 Resetting the Device 55 Logging off from the Device 57 Managing Device Information 58 Managing Power over Ethernet Devices 60 Defining PoE System Information 61 Defining PoE Interfaces 63 Configuring Device Security 66 Configuring Management Security 67 Configuring Authentication Methods 67 Configurin...

Page 4: ...ining Classic Spanning Tree 144 Defining STP on Interfaces 146 Defining Rapid Spanning Tree 149 Defining Multiple Spanning Tree 152 Defining MSTP Instance Settings 152 Defining MSTP Interface Settings 155 Configuring Multicast Forwarding 158 Defining IGMP Snooping 159 Defining Multicast Bridging Groups 161 Defining Multicast Forward All Settings 163 Configuring SNMP 165 SNMP v1 and v2c 165 SNMP v3...

Page 5: ... Files 201 Upload Type 201 Software Image Upload 202 Configuration Upload 202 Copying Files 203 Restoring the Default Configuration File 203 Managing System Logs 204 Enabling System Logs 205 Viewing the Device Memory Logs 207 Clearing Device Memory Logs 207 Viewing the FLASH Logs 208 Clearing FLASH Logs 208 Defining Servers Log Parameters 209 Managing Device Diagnostics 210 Configuring Port Mirror...

Page 6: ...s Counters 237 Viewing GVRP Statistics 238 Resetting GVRP Statistics Counters 239 Viewing EAP Statistics 239 Managing RMON Statistics 241 Viewing RMON Statistics 241 Resetting RMON Statistics Counters 242 Configuring RMON History 243 Defining RMON Alarms 249 Appendix A Device Specifications Features 251 Hardware Specifications 251 DES 3010PA Features 252 Appendix B Troubleshooting 258 Problem Solv...

Page 7: ... 4 Getting Started Provides information about using the EWS including The D Link Embedded Web Interface management and information buttons as well as information about adding modifying and deleting device information Section 5 Managing Device Information Provides information about opening the device zoom view and defining general system information Section 6 Managing Power over Ethernet Devices Pr...

Page 8: ...ing Device Diagnostics Provides information about configuring port mirroring testing copper and fiber cables and viewing device health information Section 20 Configuring System Time Provides information about configuring system time including Daylight Savings Time parameters and Simple Network Time Protocol SNTP parameters Section 22 Viewing Statistics Provides information about viewing device sta...

Page 9: ...Page 8 D Link DES 3010PA Installation Guide ...

Page 10: ...vice Description This section contains a description of the D Link DES 3010PA and contains the following topics Viewing the Device Ports Description Cable Specifications LED Definitions Cable Port and Pinout Information Physical Dimensions ...

Page 11: ...nt panel Figure 1 D Link DES 3010PA Front Panel The device front panel is configured as follows 8 Fast Ethernet ports RJ 45 ports designated as 10 100Base TX The RJ 45 ports are designated as ports 1 8 DB 9 Console port An asynchronous serial console port supporting the RS 232 electrical specification The port is used to connect the device to the console managing the device 1000Base T Copper port ...

Page 12: ...ase T Gigabit Ethernet Ports SFP Port DB 9 Console Port 10 100Base TX Fast Ethernet Ports The 10 100Base TX Fast Ethernet ports are RJ 45 1000Base T Gigabit Ethernet Ports The device contains a 1000 Base TX Gigabit port The port is an RJ 45 port which supports half and full duplex mode 10 100 1000 Mbps SFP Port Small Form Factor Pluggable SFP Optical Transceivers are integrated duplex data GBIC li...

Page 13: ...ynchronous serial console port supporting the RS 232 electrical specification The port is used to connect the device to a console managing the device This interface configuration is as follows Eight data bits One stop bit No parity Baud rate is 9600 default The console can be reconfigured for speeds of 57600 and 115200 ...

Page 14: ...ti mode fiber module 550m 1000BASE LH Single mode fiber module 40km 1000BASE ZX Single mode fiber module 80km Mini GBIC SFP Transceiver for 1000BASE LX Single mode fiber module 10km SFP Transceiver for 1000BASE SX Multi mode fiber module 550m SFP Transceiver for 1000BASE LH Single mode fiber module 40km SFP Transceiver for 1000BASE ZX Single mode fiber module 80km Table 2 DES 3010PA Cable Lengths ...

Page 15: ...h RJ 45 ports has 4 LEDs one for speed one for Link Activity and two for PoE The LED indications are described in the following table Table 3 10 100Base TX Fast Ethernet RJ 45 Port LED Indications Port Description LED Indication Description 10 100M Green A 100 Mbps link is established on the port Off A 10 Mbps link is established on the port or no link is estab lished on the port Link Activity LED...

Page 16: ...ibed in the following table Table 4 1000Base T Gigabit Ethernet RJ 45 Port LED Indications Port Description LED Indication Description Link Activity LED Green A link is established on the port Flashing Green There is data transmission on the port Off No link is established on the port 100Mbps Green A 100 Mbps link is established on the port Off A 1000 Mbps or 10 Mbps link is established on the por...

Page 17: ...y The LED indications are described in the following table System LEDs The following figure illustrates the system LEDs Figure 7 System LEDs Table 5 SFP Port LED Indications Port Description LED Indication Description Link Activity LED Green A link is established on the port Flashing Green There is data transmission on the port Off No link is established on the port ...

Page 18: ...andard RJ 45 Ethernet station mode using straight cables Transmission devices connected to each other use crossed cables The following figure illustrates the pin allocation Figure 8 RJ 45 Pin Allocation The following table describes the pin allocation Table 6 System LED Indications Port Description LED Indication Description PoE Power Overload Flashing Red POE power exceed max power 110w FAN Red F...

Page 19: ...hysical Dimensions The device has the following physical dimensions Width 280 mm 11 inch Depth 180 mm 7 1 inch Height 45 mm 1 75 inch 4 TxRx 2 5 TxRx 3 6 TxRx 3 7 TxRx 4 8 TxRx 4 Table 7 RJ 45 Pin Connections for 10 100 1000 Base T Pin Use ...

Page 20: ...ection 2 Mounting Device This section contains information for installing the device and includes the following sections Preparing for Installation Installing the Device Connecting the Device Rack Installation Wall Installation ...

Page 21: ...d over current protection To deter mine the possibility of overloading the supply circuits add together the ampere ratings of all devices installed on the same circuit as the device being installed Compare this total with the rating limit for the circuit The maximum ampere ratings are usually printed on the switch near their AC power con nectors Cautions Ensure the air flow around the front sides ...

Page 22: ...ing the container 3 Open the container 4 Carefully remove the device from the container and place it on a secure and clean surface 5 Remove all packing material 6 Inspect the product for damage Report any damage immediately If any item is found missing or damaged please contact your local D Link reseller for a replacement Rack Installation The device can be mounted in an EIA standard sized 19 inch...

Page 23: ...he device cables To install the device on a surface perform the following 1 Attach the rubber feet on the bottom of the device The following figure illustrates the rubber feet installation on the device Figure 9 Installing Rubber Feet 2 Set device down on a flat surface while leaving 2 inches on each side and 5 inches at the back 3 Ensure that the device has proper ventilation by allowing adequate...

Page 24: ... holes on the device line up to the mounting holes on the rack mounting bracket The following figure illustrates where to mount the brackets Figure 10 Attaching the Mounting Brackets 2 Insert the supplied screws into the rack mounting holes and tighten with a screwdriver 3 Repeat the process for the rack mounting bracket on the other side of the device 4 Insert the unit into the 19 inch rack ensur...

Page 25: ...Rack 5 Secure the unit to the rack with the rack screws not provided Fasten the lower pair of screws before the upper pair of screws This ensures that the weight of the unit is evenly distributed during installation Ensure that the ventilation holes are not obstructed ...

Page 26: ...the marks have been made The hole diameter and depth is defined by the wall plug and screw combination being used to mount the device 3 Insert the wall plugs unto the holes 4 Screw the screws into the wall plugs allowing the heads to protrude from the wall The device is mounted on the protruded heads Figure 12 Inserting wall plugs and screws 5 Align the mounting holes on the back of the device wit...

Page 27: ...esktop system running a terminal emulation software for monitoring and configuring the device The terminal must be a VT100 compatible terminal or a desktop or portable system with a serial port and running VT100 terminal emulation software To connect a terminal to the device Console port perform the following 1 Connect a cable to the terminal running VT100 terminal emulation software 2 Ensure that...

Page 28: ... Pack 2 the arrow keys function properly in HyperTerminal s VT100 emulation Go to www microsoft com for information on Windows 2000 service packs 3 Connect the cable to the console port on the device front panel AC Power Connection To connect the power supply perform the following 1 Using a 5 foot 1 5 m standard power cable with safety ground connected connect the power cable to the AC main socket...

Page 29: ...arting and Configuring the Device This section describes initial device configuration and includes the following topics Configuring the Terminal Installation Procedure Booting the Device Configuration Overview Advanced Configuration Startup Procedures ...

Page 30: ...Note When using HyperTerminal with Microsoft Windows 2000 make sure that Windows 2000 Service Pack 2 or later is installed With Windows 2000 Service Pack 2 the arrow keys function properly in HyperTerminal s VT100 emulation Go to www microsoft com for information on Windows 2000 service packs Installation Procedure The order of installation and configuration procedures is illustrated in the follow...

Page 31: ...tected the program flow stops If POST passes successfully a valid executable image is loaded into RAM POST messages are displayed on the terminal and indicate test success or failure As the device boots the bootup test first counts the device memory availability and then continues to boot The following screen is an example of the displayed POST Performing the Power On Self Test POST UART Channel L...

Page 32: ...ation which starts after the device has booted successfully includes static IP address and subnet mask configuration and setting user names and privilege levels to allow remote management If the device is to be managed from an SNMP based management station SNMP community strings must also be configured The following configurations are completed and the initial configuration uses the following assu...

Page 33: ...agement station the IP address is defined on VLAN 1 and the default gateway is defined as 100 1 1 10 Note that by default all ports are members of VLAN 1 which is the default VLAN console configure console config interface vlan 1 console config if ip address 100 1 1 1 255 255 255 0 console config if exit console default gateway 100 1 1 10 255 255 255 0 Confirm that the IP address has been correctl...

Page 34: ...mple console enable console configure console config username admin password lee privilege 15 SNMP Community Strings Simple Network Management Protocol SNMP provides a method for managing network devices Devices supporting SNMP run a local software agent The SNMP agents maintain a list of variables used to manage the device The variables are defined in the Management Information Base MIB The SNMP ...

Page 35: ...he initial configuration procedure the community string community access and IP address can be set through the local terminal The SNMP configuration options are Community string Read Only Community members can view configuration information but cannot change any information Read Write Community members can view and modify configuration information Super Community members have administration access...

Page 36: ...he Device Configuration Overview Page 35 Contact System Location This completes the initial configuration of the device from a local terminal The configured parameters enable further device configuration from any remote location ...

Page 37: ...thernet 1 console config if ip address dhcp hostname admin host console config if exit console config 3 To verify the IP address enter the show ip interface command at the system prompt as shown in the following example console show ip interface IP Address I F Type 100 1 1 1 24 vlan 1 dynamic Notes The device configuration does not have to be deleted to retrieve an IP address for the DHCP server W...

Page 38: ...Configuration System security is handled through the AAA Authentication Authorization and Accounting mechanism that manages user access rights privileges and management methods AAA uses both local and remote user databases Data encryption is handled through the SSH mechanism Note Support for SSH crypto key was extended Currently a 768 bytes SSH crypto key is supported The system is delivered with ...

Page 39: ...A User Guide Page 38 can be assigned privilege level 15 without a password it is recommended to always assign a password If there is no specified password privileged users can access the web interface with any password ...

Page 40: ... To configure an initial Telnet password enter the following commands console config aaa authentication login default line console config aaa authentication enable default line console config line telnet console config line login authentication default console config line enable authentication default console config line password bob When initially logging onto a device through a Telnet session en...

Page 41: ...n password user1 level 15 Enter the following commands when configuring to use a console a Telnet or an SSH session to use an HTTPS session In the Web browser enable SSL 2 0 or greater for the content of the page to appear console config crypto certificate generate key_generate console config ip https server When initially enabling an http or https session enter admin for user name and user1 for p...

Page 42: ...ion Do you want to continue y n n y SYSTEM RESET Performing the Power On Self Test POST UART Channel Loopback Test PASS Testing the System SDRAM PASS Boot1 Checksum Test PASS Boot2 Checksum Test PASS Flash Image Validation Test PASS BOOT Software Version 1 0 0 03 Built 09 Mar 2006 19 33 13 DLink 3010 Switch based on 88E6218 with ARM946E S 32MByte SDRAM I Cache 8 KB D Cache 8 KB Cache Enabled Autob...

Page 43: ...he Startup menu 1 From the Startup menu press 1 The following prompt appears Downloading code using XMODEM 2 When using HyperTerminal click Transfer on the HyperTerminal Menu Bar 3 In the Filename field enter the file path for the file to be downloaded 4 Ensure that the Xmodem protocol is selected in the Protocol field 5 Press Send The software is downloaded Note After software download the device...

Page 44: ...t it is possible to switch between images if required On the next boot the device decompresses and runs the currently active system image unless otherwise directed To download a system image through the TFTP server 1 Ensure that an IP address is configured on one of the device ports and pings can be sent to the TFTP server 2 Make sure that the file to be downloaded is saved on the TFTP server the ...

Page 45: ... Enter show version to verify which software version is currently running on the device The following is an example of the information that appears console sh ver SW version 1 0 0 42 date 22 Jul 2005 time 13 42 41 Boot version 1 0 0 18 date 01 Jun 2005 time 15 12 20 HW version 00 00 01 date 01 May 2005 time 12 12 20 4 Enter copy tftp tftp address file name boot to copy the boot image to the device...

Page 46: ...ified within 20 seconds the command times out To download a software image file using XModem 1 Enter the command console xmodem image The switch is ready to receive the file via the XModem protocol 2 Specify the path of the source file to begin the transfer process The following is an example of the information that appears console copy xmodem image Please download program using XMODEM ...

Page 47: ...D Link DES 3010PA User Guide Page 46 D Link DES 3010PA EWS User Guide ...

Page 48: ...eb pages are easy to use and easy to navigate In addition The D Link Embedded Web Interface pro vides real time graphs and RMON statistics to help system administrators monitor network performance This section provides an introduction to the user interface and includes the following topics Starting the D Link Embedded Web Interface Understanding the D Link Embedded Web Interface Using Screen and T...

Page 49: ... device information messages may not open 3 Enter the device IP address in the address bar and press Enter The Enter Network Password Page opens Figure 14 Enter Network Password Page 4 Enter your user name and password Notes The device is configured with a user name that is admin and a password that is blank and can be configured without entering a password Passwords are case sensitive Disable all...

Page 50: ...Getting Started Starting the D Link Embedded Web Interface Page 49 Figure 15 D Link Embedded Web Interface Home Page ...

Page 51: ... page the device view provides a view of the device an information or table area and configuration instructions Figure 16 D Link Embedded Web Interface Components The following table lists the user interface components with their corresponding numbers Table 9 Interface Components View Description 1 Tree View Tree View provides easy navigation through the configurable device features The main branc...

Page 52: ...b Interface Management Buttons Configuration Management buttons and icons provide an easy method of configuring device information and include the following 3 Tab Area The Tab Area enables navigation through the different device features Click the tabs to view all the components under a specific feature 4 Zoom View Provides a graphic of the device on which D Link Web Interface runs 5 D Link Web In...

Page 53: ...cable tests Query Queries the device table Table 11 D Link Web Interface Information Tabs Tab Tab Name Description Help Opens the online help Logout Opens the Logout page Table 10 D Link Web Interface Configuration Buttons Button Button Name Description ...

Page 54: ... information can be added to specific D Link Web Interface pages by opening a new Add page To add information to tables or D Link Web Interface pages 1 Open a D Link Web Interface page 2 Click An add page opens such as the Add SNTP Interface Page Figure 18 Add SNTP Interface 3 Define the fields 4 Click The configuration information is saved and the device is updated Modifying Configuration Informa...

Page 55: ...e fields as required 5 Click The fields are modified and the information is saved to the device Deleting Configuration Information 1 Open The D Link Embedded Web Interface page 2 Select a table row 3 Select the Remove checkbox 4 Click The information is deleted and the device is updated ...

Page 56: ...revent the current configuration from being lost save all changes from the running configuration file to the startup configuration file before resetting the device For instructions see Copying Files on page 203 To reset the device 1 Click System General Reset The Reset page opens Figure 20 Reset Page 2 Click A confirmation message is displayed ...

Page 57: ...3010PA User Guide Page 56 Figure 21 Reset Confirmation Message 3 Click The device is reset and a prompt for a user name and password is displayed 4 Enter a user name and password to reconnect to the web interface ...

Page 58: ...Getting Started Logging off from the Device Page 57 Logging off from the Device 1 Click The Logout Page opens Figure 22 Logout Page 2 Click The D Link Embedded Web Interface Home Page closes ...

Page 59: ...ins the following fields Model Name Displays the device model number and name System Name Defines the user defined device name The field range is 0 160 characters System Location Defines the location where the system is currently running The field range is 0 160 characters System Contact Defines the name of the contact person The field range is 0 160 characters System Object ID Displays the vendor...

Page 60: ... the installed device hardware version number Software Version Displays the installed software version number Boot Version Displays the current boot version running on the device 2 Define the System Name System Location and System Contact fields 3 Click The device information is saved and the device is updated ...

Page 61: ...he necessity of placing network devices next to power sources Power over Ethernet can be used with IP Phones Wireless Access Points IP Gateways PDAs Audio and video remote monitoring Powered Devices are devices which receive power from the device power supplies for example IP phones Pow ered Devices are connected to the device via Ethernet ports This section includes the following topics Defining ...

Page 62: ... is functioning Off Indicates that the power supply unit is not functioning Faulty Indicates that the power supply unit is functioning but an error has occurred For example a power overload or a short circuit Nominal Power Indicates the actual amount of power the device can supply The field value is displayed in Watts Consumed Power Indicates the amount of the power used by the device The field va...

Page 63: ...DLINK DES 3010PA User Guide Page 62 2 Define the System Usage Threshold field 3 Check the Traps checkbox 4 Click The system PoE parameters are defined and the device is updated ...

Page 64: ...des power to the device using the PoE module The Device Discovery Protocol enables the device to discover Powered Devices attached to the device interfaces and to learn their classification This is the default settings Never Disables the Device Discovery protocol and stops the power supply to the device using the PoE module PoE Operation Status Indicates if the port is enabled to work on PoE The p...

Page 65: ...ed device and the classification information used The field values are represented in Watts The possible field values are 0 44 12 95 Indicates that the port is assigned a power consumption level of 44 to 12 95 Watts 0 44 3 8 Indicates that the port is assigned a power consumption level of 44 to 3 8 Watts 3 84 6 49 Indicates that the port is assigned a power consumption level of 3 84 to 6 49 Watts ...

Page 66: ...mes the power supply was stopped to the powered device because the powered device was no longer detected Invalid Signature Counter Indicates the times an invalid signature was received Signatures are the means by which the powered device identifies itself to the PSE Signatures are generated during powered device detection classification or maintenance 3 Modify the PoE Admin Status Power Priority L...

Page 67: ...urity This section provides access to security pages that contain fields for setting security parameters for ports device management methods users and server security This section contains the following topics Configuring Management Security Configuring Network Security ...

Page 68: ...s section includes the following topics Configuring Authentication Methods Configuring Passwords Configuring Authentication Methods This section provides information for configuring device authentication methods This section includes the topics Defining Access Profiles Defining Profile Rules Defining Authentication Profiles Mapping Authentication Methods Defining RADIUS Settings ...

Page 69: ...can access the switch module only via an HTTPS session while User Group 2 can access the switch module via both HTTPS and Telnet sessions The Access Profile Page contains the currently configured access profiles and their activity status Assigning an access profile to an interface denies access via other interfaces If an access profile is assigned to any interface the device can be accessed by all...

Page 70: ...les Page Management Method Defines the management method for which the rule is defined Users with this access profile can access the device using the management method selected The possible field values are All Assigns all management methods to the rule Telnet Assigns Telnet access to the rule If selected users accessing the device using Telnet meeting access profile criteria are permitted or deni...

Page 71: ... port on which the access profile is defined LAG Specifies the LAG on which the access profile is defined VLAN Specifies the VLAN on which the access profile is defined Source IP Address Defines the interface source IP address to which the access profile applies The Source IP Address field is valid for a subnetwork 3 Define the Access Profile Name Rule Priority Management Method Interface Source I...

Page 72: ...rules 1 Click System Management Security Authentication Profile Rules The Profile Rules Page opens Figure 29 Profile Rules Page The Profile Rules Page contains the following fields Access Profile Name Displays the access profile to which the rule is attached Priority Defines the rule priority When the packet is matched to a rule user groups are either granted per mission or denied device managemen...

Page 73: ... to the device Secure HTTP HTTPS Assigns HTTPS access to the rule If selected users accessing the device using HTTPS meeting access profile criteria are permitted or denied access to the device SNMP Assigns SNMP access to the rule If selected users accessing the device using SNMP meeting access profile criteria are permitted or denied access to the device Source IP Address Defines the interface so...

Page 74: ... Management Method Interface Source IP Address Network Mask or Prefix Length and Action fields 4 Click The profile rule is added to the access profile and the device is updated To modify a Profile Rule 1 Click Security Management Security Authentication Access Profile The Access Profile Page opens 2 Click The Profile Rule Settings Page opens ...

Page 75: ...D Link DES 3010PA User Guide Page 74 Figure 31 Profile Rule Settings Page 3 Modify the fields 4 Click The profile rule is modified and the device is updated ...

Page 76: ...profiles 1 Click System Management Security Authentication Authentication Profiles The Authentication Profile Page opens Figure 32 Authentication Profile Page The Authentication Profile Page contains the following fields Profile Name User defined authentication profile lists to which user defined authentication profiles are added Methods Defines the user authentication methods The possible field v...

Page 77: ...2 Click The Add Authentication Profile Page opens Figure 33 Add Authentication Profile Page 3 Define the Profile Name and Authentication Methods fields 4 Click The authentication profile is defined and the device is updated To modify an authentication profile 1 Click System Management Security Authentication Authentication Profiles The Authentication Profile Page opens 2 Click The Authentication P...

Page 78: ...ty Configuring Management Security Page 77 Figure 34 Authentication Profile Settings Page 3 Select an authentication method from the Optional Methods list 4 Click The authentication method is selected and the device is updated ...

Page 79: ...nagement Security Authentication Authentication Mapping The Authentication Mapping Page opens Figure 35 Authentication Mapping Page The Authentication Mapping Page contains the following fields Console Authentication profiles used to authenticate console users Telnet Authentication profiles used to authenticate Telnet users Secure Telnet SSH Authentication profiles used to authenticate Secure Shel...

Page 80: ...on method is used for access Local Authentication occurs locally RADIUS Authentication occurs at the RADIUS server Line Authentication using a line password Enable Authentication using enable Local RADIUS Authentication first occurs locally If authentication cannot be verified locally the RADIUS server authenticates the management method If the RADIUS server cannot authenticate the management meth...

Page 81: ... fields Retries Defines the number of transmitted requests sent to the RADIUS server before a failure occurs Possible field values are 1 10 Timeout for Reply Defines the amount of time in seconds the device waits for an answer from the RADIUS server before retrying the query or switching to the next server Possible field values are 1 30 Dead Time Defines the default amount of time in minutes that ...

Page 82: ...m the RADIUS server before retrying the query or switching to the next server The possible field values are 1 30 Three is the default value Dead Time Defines the amount of time in minutes that a RADIUS server is bypassed for service requests The range is 0 2000 The default is 0 minutes Source IP Address Defines the source IP address that is used for communication with RADIUS servers Usage Type Spe...

Page 83: ...ss Priority Authenticated Port Timeout for Reply Dead Time and Usage Type fields 4 Click The RADIUS server is added and the device is updated To edit RADIUS Server Settings 1 Click System Management Security Authentication Radius The RADIUS Page opens 2 Click The RADIUS Server Settings Page opens ...

Page 84: ...nt Security Page 83 Figure 38 RADIUS Server Settings Page 3 Define the Priority Source IP Address Key String Authentication Port Timeout for Reply Dead Time and Usage Type fields 4 Click The RADIUS server settings are saved and the device is updated ...

Page 85: ...agement Security Passwords Local Users The Local User Page opens Figure 39 Local User Page The Local User Page contains the following fields User Name Displays the user name Access Level Displays the user access level The lowest user access level is 1 and the highest is 15 Users with access level 15 are Privileged Users and only they can access and use the OpenManage Switch Administrator Lockout S...

Page 86: ...ocal User Page opens Figure 40 Add Local User Page In addition to the fields in the Local User Page the Add Local User Page contains the following fields Password Defines the local user password Local user passwords can contain up to 159 characters Confirm Password Verifies the password ...

Page 87: ...ccessing the device via a Console session Pass words can contain a maximum of 159 characters Telnet Line Password Defines the line password for accessing the device via a Telnet session Pass words can contain a maximum of 159 characters Secure Telnet Line Password Defines the line password for accessing the device via a secure Telnet session Passwords can contain a maximum of 159 characters Confir...

Page 88: ...assword Page opens Figure 42 Enable Password Page The Enable Password Page contains the following fields Level Defines the access level associated with the enable password Possible field values are 1 15 Password Defines the enable password Confirm Password Confirms the new enable password The password appears in the format 2 Define the Select Enable Access Level Password and Confirm Password field...

Page 89: ... Controlled Access Permits communication between the supplicant and the system if the supplicant is authorized Uncontrolled Access Permits uncontrolled communication regardless of the port state The device currently supports port based authentication via RADIUS servers Advanced Port Based Authentication Advanced port based authentication enables multiple hosts to be attached to a single port Advan...

Page 90: ...work Authentication Properties The Network Authentication Properties Page allows network managers to configure network authentication parameters In addition Guest VLANs are enabled from the Network Authentication Properties Page To define the network authentication properties 1 Click Advanced Setup Network Security Authentication Properties The Network Authentication Properties Page opens Figure 4...

Page 91: ...s permitted Guest VLAN Specifies whether the Guest VLAN is enabled on the device The possible field values are Enable Enables using a Guest VLAN for unauthorized ports If a Guest VLAN is enabled the unauthorized port automatically joins the VLAN selected in the VLAN List field Disable Disables port based authentication on the device This is the default VLAN List Contains a list of VLANs The Guest ...

Page 92: ...Port A list of interfaces on which port based authentication is enabled User Name Displays the supplicant user name Admin Port Control Displays the current port authorization state The possible field values are Auto Port based authentication is enabled on the device The interface moves between an authorized or unauthorized state based on the authentication exchange between the device and the clien...

Page 93: ...owing a failed authentication exchange The possible field range is 0 65535 The field default is 60 seconds Resending EAP Defines the amount of time in seconds that lapses before EAP requests are resent The field default is 30 seconds Max EAP Requests Displays the total amount of EAP requests sent If a response is not received after the defined period the authentication process is restarted The fie...

Page 94: ... 93 Figure 45 Port Authentication Settings Page 3 Modify the Admin Port Control Enable Periodic Reauthentication Quiet Period Resending EAP Supplicant Timeout and Server Timeout fields 4 Click The port authentication settings are defined and the device is updated ...

Page 95: ...e port number for which advanced port based authentication is enabled Multiple Hosts Indicates whether multiple hosts are enabled Multiple hosts must be enabled in order to either disable the ingress filter or to use port lock security on the selected port The possible field values are Multiple Multiple hosts are enabled Disable Multiple hosts are disabled Action on Violation Defines the action to...

Page 96: ...ntrol is Force Unauthorized and the port link is down or the port control is Auto but a client has not been authenticated via the port Not in Auto Mode Indicates that the port control is Forced Authorized and clients have full port access Single host Lock Indicates that the port control is Auto and a single client has been authenticated via the port No Single Host Indicates that Multiple Host is e...

Page 97: ...fields User Name Lists the supplicants that were authenticated and are permitted on each port Port Displays the port number Session Time Displays the amount of time in seconds the supplicant was logged on the port Authentication Method Displays the method by which the last session was authenticated The possible field values are Remote 802 1x authentication is not used on this port port is forced a...

Page 98: ... is limited to users with specific MAC addresses These addresses are either manually defined on the port or learned on that port up to the point when it is locked When a packet is received on a locked port and the packet D Link source MAC address is not tied to that port either it was learned on a different port or it is unknown to the system the protec tion mechanism is invoked and can provide va...

Page 99: ...trol is Auto and a single client has been authenticated via the port Learning Mode Defines the locked port type The Learning Mode field is enabled only if Locked is selected in the Set Port field The possible field values are Classic Lock Locks the port using the classic lock mechanism The port is immediately locked regardless of the number of addresses that have already been learned Limited Dynam...

Page 100: ...down the port The port remains shut down until reactivated or until the device is reset Trap Enables traps when a packet is received on a locked port The possible field values are Checked Enables traps Unchecked Disables traps Trap Frequency Sec The amount of time in seconds between traps The default value is 10 seconds 2 Click The Port Security Settings Page opens Figure 50 Port Security Settings...

Page 101: ...for all Gigabit ports by defining the packet type and the rate the packets are transmitted The system measures the incoming Broadcast and Multicast frame rates separately on each port and discards the frames when the rate exceeds a user defined rate The Storm Control Page provides fields for configuring broadcast storm control To enable storm control 1 Click Advanced Setup Network Security Traffic...

Page 102: ...y Broadcast traffic Broadcast Rate Threshold The maximum rate kilobytes per second at which unknown packets are for warded The range is 0 1 000 000 The default value is zero All values are rounded to the nearest 64Kbps If the field value is under 64Kbps the value is rounded up to 64Kbps with the exception of the value zero 2 Click The Storm Control Settings Page opens Figure 52 Storm Control Setti...

Page 103: ...face Configuration LAG table The Interface Configuration ports table contains the following fields Interface Displays the port number Port Status Indicates whether the port is currently operational or non operational The possible field val ues are Up Indicates the port is currently operating Down Indicates the port is currently not operating Port Speed Displays the configured rate for the port The...

Page 104: ...tus on the port Operates when the port is in full duplex mode MDI MDIX Displays the MDI MDIX status on the port Hubs and switches are deliberately wired opposite the way end stations are wired so that when a hub or switch is connected to an end station a straight through Ethernet cable can be used and the pairs are matched up properly When two hubs or switches are con nected to each other or two e...

Page 105: ...e the Port or LAG Configuration Settings Page includes the field Reactivate Suspended Port or Reactivate Suspended Lag Select this field to return a suspended port or LAG to active status Figure 54 Port Configuration Settings Page 3 Modify the Admin Speed Admin Duplex and Admin Advertisement fields 4 Click The parameters are saved and the device is updated ...

Page 106: ...ies Page The Interface Properties Page contains the following fields Interface Displays the port number Port Type Displays the port type The possible field values are Copper Indicates the port has a copper port connection Fiber Indicates the port has a fiber optic port connection Description Provides a user defined port description To edit the port properties 1 Click Basic Setup Interface Interfac...

Page 107: ...D Link DES 3010PA User Guide Page 106 Figure 56 Interface Properties Page 3 Define the fields 4 Click The interface properties are modified and the device is updated ...

Page 108: ...ion mode is not configured on the port The port is in full duplex mode All ports in the LAG have the same ingress filtering and tagged modes All ports in the LAG have the same back pressure and flow control modes All ports in the LAG have the same priority All ports in the LAG have the same transceiver type The device supports up to eight LAGs and eight ports in each LAG Ports can be configured as...

Page 109: ...device supports up to eight ports per LAG and eight LAGs per system To define LAG parameters 1 Click Advanced Setup Interface LAG Membership The LAG Membership Page opens Figure 57 LAG Membership Page The LAG Membership Page contains the following fields LAG Port Displays the LAG number Name Displays the user defined port name Link State Displays the link operational status Member Displays the por...

Page 110: ...Aggregating Ports Aggregating Ports Page 109 Figure 58 LAG Membership Settings Page 3 Define the Port and LACP fields 4 Click The LAG membership settings are saved and the device is updated ...

Page 111: ...te ports can be linked into link aggregation port groups Each group is comprised of ports with the same speed The LACP Parameters Page contains fields for configuring LACP LAGs To configure LACP for LAGs 1 Click Advanced Setup Interface LACP Parameters tab The LACP Parameters Page opens Figure 59 LACP Parameters Page The LACP Parameters Page contains the following fields Port Displays the port num...

Page 112: ...Aggregating Ports Configuring LACP Page 111 Figure 60 LACP Parameters Settings Page 3 Edit the Port Priority and LACP Timeout fields 4 Click The LACP settings are saved and the device is updated ...

Page 113: ...3 router working at a protocol level is required to allow traffic flow between VLANs Layer 3 routers identify segments and coordinate with VLANs VLANs are Broadcast and Multicast domains Broadcast and Multicast traffic is transmitted only in the VLAN in which the traffic is generated VLAN tagging provides a method of transferring VLAN information between VLAN groups VLAN tagging attaches a 4 byte ...

Page 114: ...LAN ID Displays the VLAN ID Name Displays the user defined VLAN name Type Displays the VLAN type The possible field values are Dynamic The VLAN was dynamically created through GARP Static The VLAN is user defined Default The VLAN is the default VLAN Authentication Indicates whether unauthorized users can access a Guest VLAN The possible field values are Enable Enables unauthorized users to use the...

Page 115: ...D Link DES 3010PA User Guide Page 114 2 Click The Add VLAN page opens Figure 62 Add VLAN Page 3 Define the VLAN ID and VLAN Name fields 4 Click The VLAN ID is defined and the device is updated ...

Page 116: ...plays the user defined VLAN ID VLAN Name Displays the name of the VLAN VLAN Type Indicates the VLAN type The possible field values are Dynamic The VLAN was dynamically created through GARP Static The VLAN is user defined Default The VLAN is the default VLAN Port Indicates the port membership LAG Indicates the LAG membership Untagged Orange Indicates the interface is an untagged VLAN member Packets...

Page 117: ...asic Setup VLAN Membership Interface Settings The VLAN Interface Settings Page opens Figure 64 VLAN Interface Settings Page The VLAN Interface Settings Page contains the following fields Interface Displays the port number included in the VLAN Interface VLAN Mode Displays the port mode The possible values are General Indicates the port belongs to VLANs and each VLAN is user defined as tagged or unt...

Page 118: ...dmit Tag Only Only tagged packets are accepted on the port Admit All Both tagged and untagged packets are accepted on the port Ingress Filtering Indicates whether ingress filtering is enabled on the port The possible field values are Enable Enables ingress filtering on the device Ingress filtering discards packets that are defined to VLANs of which the specific port is not a member Disable Disable...

Page 119: ...unity VLANs Isolated Isolated ports are completely isolated from other ports in the same PVLAN However isolated ports can communicate with promiscuous ports In addition all traffic to and from isolated ports with VLANs are blocked except for traffic from promiscuous ports All isolated ports are automatically assigned to the Iso lated VLAN Community Community ports communicate with other community ...

Page 120: ...mmunity Ports Adds a Community VLAN to which community ports are assigned Remove Removes a Private VLAN when checked The possible field values are Checked Removes the selected Private VLAN Unchecked Maintains Private VLANs 2 Click The VLAN Interface Settings Page opens Figure 67 Add Private VLAN 3 Define the New Private VLAN and Community VLAN 2 4093 or Isolated VLAN 2 4093 fields 4 Click The Priv...

Page 121: ...me must be greater than or equal to three times the join time The leave all time must be greater than the leave time Set the same GARP timer values on all Layer 2 connected devices If the GARP timers are set differently on the Layer 2 connected devices the GARP application does not operate successfully To define GARP on the device 1 Click Basic Setup VLAN GARP The GARP Parameters Page opens Figure...

Page 122: ... Leave time must be greater than or equal to three times the join time The default value is 60 centiseconds Leave All Timer Indicates the amount of time lapse in centiseconds that all devices wait before leaving the GARP state The leave all time must be greater than the leave time The default value is 1000 centisec onds 2 Click The GARP Parameters Settings Page opens Figure 69 GARP Parameters Sett...

Page 123: ...s are the same The GVRP Parameters Page contains the following fields GVRP Global Status Indicates if GVRP is enabled on the device The possible field values are Enable Enables GVRP on the selected device Disable Disables GVRP on the selected device Copy from Entry Number Indicates the row number from which GVRP parameters are copied To Entry Number s Indicates the entry number to which GVRP param...

Page 124: ...on on the interface GVRP Registration Indicates if VLAN registration through GVRP is enabled on the device The possible field values are Enable Enables GVRP registration on the device Disable Disables GVRP registration on the device 2 Click The GVRP Parameters Page opens Figure 71 GVRP Parameters Page 3 Define the GVRP State Dynamic VLAN Creation and GVRP Registration fields 4 Click The GVRP Inter...

Page 125: ...ning device IP addresses and includes the following topics Configuring IP Interfaces Configuring Domain Name Servers Configuring IP Interfaces This section contains information for defining IP interfaces and includes the following sections Defining IP Addresses Defining Default Gateways Configuring DHCP Configuring ARP ...

Page 126: ... interface 1 Click Basic Setup IP Configuration IP Addressing IP Interface The IP Interface Page opens Figure 72 IP Interface Page The IP Interface Page contains the following fields IP Address Displays the currently configured IP address Mask Displays the currently configured IP address mask Interface Displays the interface used to manage the device Remove Removes the selected IP address from the...

Page 127: ...or Prefix Length and Interface fields 4 Click The IP configuration fields are saved and the device is updated To modify an IP interface 1 Click Basic Setup IP Configuration IP Addressing IP Interface The IP Interface Page opens 2 Click The IP Interface Settings Page opens Figure 74 IP Interface Settings Page ...

Page 128: ...Configuring IP Information Configuring IP Interfaces Page 127 3 Modify the IP Address Network Mask or Prefix Length and Interface fields 4 Click The IP Interface is modified and the device is updated ...

Page 129: ...tains the following fields User Defined Default Gateway Defines the default gateway IP address Active Default Gateway Indicates if the default gateway is active The possible field values are Checked Activates the default gateway Unchecked Maintains the default gateway as inactive This is the default value Remove Removes the default gateway The possible field values are Checked Removes the selected...

Page 130: ...network To define a DHCP Interface 1 Click Basic Setup IP Configuration IP Addressing DHCP The DHCP Page opens Figure 76 DHCP Page The DHCP Page contains the following fields Interface Displays the interface D Link IP address which is connected to the device Host Name Displays the system name Remove Removes DHCP interfaces The possible field values are Checked Removes the selected DHCP interface U...

Page 131: ...D Link DES 3010PA User Guide Page 130 Figure 77 Add DHCP IP Interface Page 3 Define the Interface and Host Name fields 4 Click The DHCP interface is added and the device is updated ...

Page 132: ... amount of time in seconds that passes between ARP Table entry requests Following the ARP Entry Age period the entry is deleted from the table The range is 1 40000000 The default value is 60000 seconds Clear ARP Table Entries Specifies the types of ARP entries that are cleared The possible values are None Does not clear ARP entries All Clears all ARP entries Dynamic Clears only dynamic ARP entries...

Page 133: ... static entry Remove Removes a specific ARP entry The possible field values are Checked Removes the selected ARP entries Unchecked Maintains the current ARP entries 2 Define the ARP Entry Age Out and Clear ARP Table Entries fields 3 Click The ARP parameters are defined and the device is updated To create a new ARP entry 1 Click Basic Setup IP Configuration IP Addressing ARP The ARP Page opens 2 Cl...

Page 134: ...ames into IP addresses Each time a domain name is assigned the DNS service translates the name into a numeric IP address For example www ipexample com is translated into 192 87 56 2 DNS servers maintain databases of domain names and their corresponding IP addresses This section contains the following topics Defining DNS Servers Defining DNS Host Mapping ...

Page 135: ...Enable Translates the domains into IP addresses Disable Disables translating domains into IP addresses Default Domain Name Specifies the user defined DNS server name Type Displays the IP address type The possible field values are Dynamic The IP address is dynamically created Static The IP address is a static IP address Remove Removes DNS servers The possible field values are Checked Removes the se...

Page 136: ...Active Server fields 4 Click The DNS server is enabled and the device is updated To add a new DNS Server 1 Click Basic Setup IP Configuration Domain Name System DNS Server The DNS Server Page opens 2 Click The Add DNS Server Page opens Figure 81 Add DNS Server Page 3 Define the DNS Server DNS Server Currently Active and Set DNS Server Active fields 4 Click The DNS server is added and the device is...

Page 137: ...apping Page The DNS Host Mapping Page contains the following fields Host Names Displays a user defined default domain name When defined the default domain name is applied to all unqualified host names The Host Name field can contain up to 158 characters IP Address Displays the DNS host D Link IP address Remove Removes default domain names The possible field values are Checked Removes the selected ...

Page 138: ...Configuring IP Information Configuring Domain Name Servers Page 137 Figure 83 Add DNS Host Page 3 Define the Host Name and IP Address fields 4 Click The DNS host is added and the device is updated ...

Page 139: ...red manu ally An address becomes associated with a port by learning the port from the frame s source address but if a frame that is addressed to a destination MAC address is not associated with a port that frame is flooded to all relevant VLAN ports To prevent the bridging table from overflowing a dynamic MAC address from which no traffic arrives for a set period is erased This section contains in...

Page 140: ...ing Database Static Addresses Page The Forwarding Database Static Addresses Page contains the following fields MAC Address Displays the MAC address to which the entry refers VLAN ID Displays the VLAN ID number to which the entry refers Interface Displays the interface to which the entry refers Port The specific port number to which the forwarding database parameters refer LAG The specific LAG numb...

Page 141: ...set make sure that the port attached to the MAC address is locked To add a new static forwarding database entry 1 Click Advanced Setup Forwarding Database Static Addresses The Forwarding Database Static Addresses Page opens 2 Click The Add Forwarding Database Page opens Figure 85 Add Forwarding Database Page 3 Define the Interface MAC Address VLAN ID or VLAN Name and Status fields 4 Click The forw...

Page 142: ...erface VLAN and MAC Address To configure the Dynamic MAC Address table 1 Click Advanced Setup Forwarding Database Dynamic Addresses The Dynamic Addresses Page opens Figure 86 Dynamic Addresses Page The Dynamic Addresses Page contains the following fields Aging Interval secs Specifies the amount of time the MAC address remains in the Dynamic MAC Address table before it is timed out if no traffic fr...

Page 143: ...nd the device is updated To query the Dynamic MAC Address Table 1 Click Advanced Setup Forwarding Database Dynamic Addresses The Dynamic Addresses Page opens 2 Select a port MAC Address and VLAN ID 3 Select an Address Table Sort Key 4 Click The Dynamic MAC Address Table is queried and the results are displayed ...

Page 144: ... and eliminating loops For more infor mation on configuring Classic STP see Defining Classic Spanning Tree Rapid STP Detects and uses network topologies that provide faster convergence of the spanning tree without creating forwarding loops For more information on configuring Rapid STP see Defining Rapid Span ning Tree Multiple STP Provides various load balancing scenarios For example if port A is ...

Page 145: ...ecifies the STP mode that is enabled on the device The possible field values are Classic STP Enables Classic STP on the device This is the default value Rapid STP Enables Rapid STP on the device Multiple STP Enables Multiple STP on the device BPDU Handling Determines how BPDU packets are managed when STP is disabled on the port or device BPDUs are used to transmit spanning tree information The pos...

Page 146: ...elay 4 30 Specifies the device Forward Delay Time The Forward Delay Time is the amount of time in seconds a bridge remains in a listening and learning state before forwarding packets The default is 10 seconds Bridge ID Identifies the Bridge priority and MAC address Root Bridge ID Identifies the Root Bridge priority and MAC address Root Port Indicates the port number that offers the lowest cost pat...

Page 147: ...ndicates that STP is disabled on the port Fast Link Indicates if Fast Link is enabled on the port If Fast Link mode is enabled for a port the Port State is automatically placed in the Forwarding state when the port link is up Fast Link optimizes the STP protocol convergence STP convergence can take 30 60 seconds in large networks Root Guard Prevents devices outside the network core from being assi...

Page 148: ... The priority value is determined in increments of 16 Designated Bridge ID Indicates the bridge priority and the MAC Address of the designated bridge Designated Port ID Indicates the selected port D Link priority and interface Designated Cost Indicates the cost of the port participating in the STP topology Ports with a lower cost are less likely to be blocked if STP detects loops Forward Transitio...

Page 149: ...D Link DES 3010PA User Guide Page 148 4 Define the Fast Link Enable Root Guard Path Cost Default Path Cost and Priority fields 5 Click STP is enabled on the interface and the device is updated ...

Page 150: ... Tree RSTP RSTP The RSTP Page opens Figure 90 RSTP Page The RSTP Page contains the following fields Interface Displays the port or LAG on which Rapid STP is enabled Role Displays the port role assigned by the STP algorithm to provide to STP paths The possible field val ues are Root Provides the lowest cost path to forward packets to the root switch Designated The port or LAG through which the desi...

Page 151: ...ured to automatically establish a point to point link To establish communications over a point to point link the originating PPP first sends Link Control Protocol LCP packets to configure and test the data link After a link is established and optional facilities are negotiated as needed by the LCP the originating PPP sends Network Control Protocol NCP packets to select and configure one or more ne...

Page 152: ...e Defining Rapid Spanning Tree Page 151 Figure 91 RSTP Settings Page 3 Define the Interface Point to Point Admin Status and Activate Protocol Migration fields 4 Click RSTP is defined for the interface and the device is updated ...

Page 153: ...number that identifies the revision of the current MSTP configuration The revision number is required as part of the MSTP configuration The possible field range is 0 65535 Max Hops Specifies the total number of hops that occur in a specific region before the BPDU is discarded Once the BPDU is discarded the port information is aged out The possible field range is 1 40 The field default is 20 hops I...

Page 154: ...MSTP Instance Settings Page contains the following fields Instance ID Specifies the VLAN group to which the interface is assigned Included VLAN Maps the selected VLANs to the selected instance Each VLAN belongs to one instance Bridge Priority Specifies the selected spanning tree instance device priority The field range is 0 61440 Designated Root Bridge ID Indicates the ID of the bridge with the lo...

Page 155: ...D Link DES 3010PA User Guide Page 154 Figure 94 VLAN Instance Configuration Table 3 Define the Instance ID field 4 Click The MSTP Instances are assigned and the device is updated ...

Page 156: ...configured on the device Possible field range is 0 15 Interface Displays the interface for which the MSTP settings are displayed The possible field values are Port Specifies the port for which the MSTP settings are displayed LAG Specifies the LAG for which the MSTP settings are displayed MSTP Specifies whether or not MSTP is enable on the interface The possible field values are Enabled Enables MST...

Page 157: ...y a point to point link or when a LAN has two or more connections connected to a shared segment Disabled Indicates the port is not participating in the Spanning Tree Mode Indicates the STP mode by which STP is enabled on the device The possible field values are Classic STP Classic STP is enabled on the device This is the default value Rapid STP Rapid STP is enabled on the device Multiple STP Multi...

Page 158: ... Spanning Tree Defining Multiple Spanning Tree Page 157 Figure 96 MSTP Interface Table 3 Define the Port Priority and the Path Cost fields 4 Click The MSTP interface settings are defined and the device is updated ...

Page 159: ... 3010PA User Guide Page 158 Section 14 Configuring Multicast Forwarding This section contains the following topics Defining IGMP Snooping Defining Multicast Bridging Groups Defining Multicast Forward All Settings ...

Page 160: ...rs This results in the creation of the Multicast filtering database To enable IGMP Snooping 1 Click Multicast Support IGMP The IGMP Snooping Page opens Figure 97 IGMP Snooping Page The IGMP Snooping Page contains the following fields Enable IGMP Snooping Status Indicates if IGMP Snooping is enabled on the device IGMP Snooping can be enabled only if Bridge Multicast Filtering is enabled The possibl...

Page 161: ... default value is 300 seconds Leave Timeout Indicates the amount of time the host waits after requesting to leave the IGMP group and not receiving a Join message from another station before timing out If a Leave Timeout occurs the switch notifies the Multicast device to stop sending traffic The Leave Timeout value is either user defined or an immediate leave value The default timeout is 10 seconds...

Page 162: ...ticast groups 1 Click Advanced Setup Multicast Support Bridge Multicast Multicast Group The Multicast Group Page opens Figure 99 Multicast Group Page The Multicast Group Page contains the following information Enables Bridge Multicast Filtering Indicate if bridge Multicast filtering is enabled on the device The pos sible field values are Checked Enables Multicast filtering on the device Unchecked ...

Page 163: ...ort settings 6 Click The Multicast group is defined and the device is updated Table 12 IGMP Port LAG Members Table Control Settings Port Control Definition D Dynamically joins ports LAG to the Multicast group in the Current Row S Attaches the port to the Multicast group as static member in the Static Row The port LAG has joined the Multicast group statically in the Current Row F Forbidden ports ar...

Page 164: ...nced Setup Multicast Support Bridge Multicast Multicast Forward All The Multicast Forward All Page opens Figure 101 Multicast Forward All Page The Multicast Forward All Page contains the following fields VLAN ID Displays the VLAN for which Multicast parameters are displayed Ports Ports that can be added to a Multicast service The following table summarizes the Multicast settings which can be assig...

Page 165: ...3 Define the VLAN port settings 4 Click The Multicast forward all settings are defined and the device is updated F Forbidden Blank The port is not attached to a Multicast router or switch Table 13 Bridge Multicast Forward All Router Port Control Settings Table Port Control Definition ...

Page 166: ...for SNMPv3 including Authentication Provides data integrity and data origin authentication Privacy Protects against the disclosure of message content Cipher Block Chaining CBC is used for encryption Either authentication is enabled on an SNMP message or both authentication and privacy are enabled on a SNMP message However privacy cannot be enabled without authentication Timeliness Protects against...

Page 167: ...ications To define the SNMP security parameters 1 Click System SNMP Security Global Parameters The SNMP Security Global Parameters Page opens Figure 102 SNMP Security Global Parameters Page The SNMP Security Global Parameters Page contains the following fields Local Engine ID Displays the local device Engine ID The field value is a hexadecimal string Each byte in hexadecimal character strings is t...

Page 168: ...vice MAC address and is defined per standard as First 4 octets first bit 1 the rest is IANA Enterprise number Fifth octet Set to 3 to indicate the MAC address that follows Last 6 octets MAC address of the device 2 Define the Local Engine ID and Use Default fields 3 Click The SNMP global security parameters are set and the device is updated ...

Page 169: ...he SNMP Security Views Page opens Figure 103 SNMP Security Views Page The SNMP Security Views Page contains the following fields View Name Displays the user defined views The view name can contain a maximum of 30 alphanumeric characters Object ID Subtree Displays the device feature OID included in or excluded from the selected SNMP view View Type Indicates whether the defined OID branch will be in...

Page 170: ...g SNMP Configuring SNMP Security Page 169 Figure 104 Add SNMP View Page 3 Define the View Name field 4 Define the view using and 5 Define the View Type field 6 Click The view is defined and the device is updated ...

Page 171: ...The SNMP Group Profile Page contains the following fields Group Name Displays the user defined group to which access control rules are applied The field range is up to 30 characters Security Model Defines the SNMP version attached to the group The possible field values are SNMPv1 SNMPv1 is defined for the group SNMPv2c SNMPv2c is defined for the group SNMPv3 SNMPv3 is defined for the group Securit...

Page 172: ...ges can be made to the assigned SNMP view Notify Sends traps for the assigned SNMP view Remove Removes SNMP groups The possible field values are Checked Removes the selected SNMP group s Unchecked Maintains the SNMP groups s 2 Click The Add SNMP Group Profile Page opens Figure 106 Add SNMP Group Profile Page 3 Define the Group Name Security Model Security Level and Operation fields 4 Click The SNM...

Page 173: ...010PA User Guide Page 172 Figure 107 SNMP Group Profile Settings Page 3 Modify the Group Name Security Model Security Level and Operation fields 4 Click The SNMP group profile is modified and the device is updated ...

Page 174: ...Engine ID Displays either the local or remote SNMP entity to which the user is connected Changing or removing the local SNMP Engine ID deletes the SNMPv3 user database Local Indicates that the user is connected to a local SNMP entity Remote Indicates that the user is connected to a remote SNMP entity If the Engine ID is defined remote devices receive inform messages Authentication Displays the met...

Page 175: ...16 bytes are defined If both privacy and authentication are required 32 bytes are defined Each byte in hexadecimal character strings is two hexadecimal digits Each byte can be separated by a period or a colon Privacy Key Defines the privacy key LSB If only authentication is required 20 bytes are defined If both privacy and authentication are required 36 bytes are defined Each byte in hexadecimal c...

Page 176: ...rity Page 175 Figure 110 SNMP Group Membership Settings Page 3 Modify the Group Name Engine ID Authentication Method Password Authentication Key and Privacy Key fields 4 Click The SNMP group membership is modified and the device is updated ...

Page 177: ...the following tables Basic Table Advanced Table SNMP Communities Basic Table The SNMP Communities Basic Table contains the following fields Management Station Displays the management station IP address for which the basic SNMP community is defined Community String Defines the password used to authenticate the management station to the device Access Mode Defines the access rights of the community T...

Page 178: ... which the advanced SNMP com munity is defined Community String Defines the password used to authenticate the management station to the device Group Name Defines advanced SNMP community group names Remove Removes a community The possible field values are Checked Removes the selected SNMP communities Unchecked Maintains the SNMP communities 2 Click The Add SNMP Community Page opens Figure 112 Add S...

Page 179: ...010PA User Guide Page 178 Figure 113 SNMP Community Settings Page 3 Modify the SNMP Management Station Community String and Basic or Advanced fields 4 Click The SNMP community is modified and the device is updated ...

Page 180: ...179 Configuring SNMP Notifications This section contains information for configuring SNMP Notifications and contains the following topics Defining SNMP Notification Global Parameters Defining SNMP Notification Filters Defining SNMP Notification Recipients ...

Page 181: ...SNMP Notifications Specifies whether the device can send SNMP notifications The possible field values are Enable Enables SNMP notifications Disable Disables SNMP notifications Enable Authentication Notifications Specifies whether SNMP authentication failure notification is enabled on the device The possible field values are Enable Enables the device to send authentication failure notifications Dis...

Page 182: ...e The SNMP Notification Filter Page contains the following fields Filter Name Contains a list of user defined notification filters Object ID Subtree Displays the OID for which notifications are sent or blocked If a filter is attached to an OID traps or informs are generated and sent to the trap recipients OIDs are selected from either the Select from field or the Object ID field Filter Type Indica...

Page 183: ...PA User Guide Page 182 Figure 116 Add SNMP Notification Filter Page 3 Define the Filter Name New Object Identifier Tree and Filter Type fields 4 Click The SNMP notification filter is defined and the device is updated ...

Page 184: ... filters provide the following services Identifying Management Trap Targets Trap Filtering Selecting Trap Generation Parameters Providing Access Control Checks To define SNMP notification filters 1 Click System SNMP Notification Notification Receiver The SNMP Notification Receiver Page opens Figure 117 SNMP Notification Receiver Page The SNMP Notification Receiver Page is divided into the followin...

Page 185: ...ues are SNMP V1 Indicates that SNMP Version 1 traps are sent SNMP V2c Indicates that SNMP Version 2 traps are sent UDP Port Displays the UDP port used to send notifications The default is 162 Filter Name Indicates if the SNMP filter for which the SNMP Notification filter is defined Timeout Indicates the amount of time in seconds the device waits before re sending informs The default is 15 seconds ...

Page 186: ... that the packet is neither authenticated nor encrypted Authentication Indicates that the packet is authenticated UDP Port The UDP port used to send notifications The field range is 1 65535 The default is 162 Filter Name Includes or excludes SNMP filters Timeout The amount of time seconds the device waits before resending informs The field range is 1 300 The default is 10 seconds Retries The amoun...

Page 187: ...ed To modify SNMP notification recipients 1 Click System SNMP Notification Notification Receiver The SNMP Notification Receiver Page opens 2 Click The SNMP Notification Receiver Settings Page opens Figure 119 SNMP Notification Receiver Settings Page 3 Modify the Notification Type SNMPV1 v2c or SNMPv3 UPD Port Filter Name TImeout and Retries fields 4 Click The SNMP notification recipients are defin...

Page 188: ...t field values such as VLAN Priority Tag VPT and DiffServ Code Point DSCP VPT Classification Information VLAN Priority Tags VPT are used to classify packets by mapping packets to one of the egress queues VPT to queue assignments are user definable Packets arriving untagged are assigned a default VPT value which is set on a per port basis The assigned VPT is used to map the packet to the egress que...

Page 189: ...rwarded before FTP or e mail SMTP traffic Weighted Round Robin Ensures that a single application does not dominate the device forwarding capacity Weighted Round Robin WRR forwards entire queues in a round robin order All queues can partic ipate in WRR except SP queues SP queues are serviced before WRR queues If the traffic flow is minimal and SP queues do not occupy the whole bandwidth allocated t...

Page 190: ...General Settings Page contains fields for enabling or disabling CoS In addition the Trust mode can be selected The Trust mode relies on predefined fields within the packet to determine the egress queue settings To define the QoS settings 1 Click Basic Setup Quality of Service General Settings General Settings The QoS General Settings Page opens Figure 120 QoS General Settings Page The QoS General ...

Page 191: ...field is mapped according to the relevant trust mode table Traffic not containing a predefined packet field is mapped to best effort The possible Trust Mode field values are CoS Classifies traffic based on the CoS tag value DSCP Classifies traffic based on the DSCP tag value 2 Select Enable in the Quality of Service field 3 Define the Trust Mode field 4 Click Quality of Service is enabled on the d...

Page 192: ...s Figure 121 Bandwidth Settings Page The Bandwidth Settings Page displays the following fields Status Indicates if rate limiting is enabled on the interface The possible field values are Enable Indicates that rate limiting is enabled on the interface Disable Indicates that rate limiting is disabled on the interface Rate Limit Configures the rate to which traffic is limited The range is 70 285 000 ...

Page 193: ...Interface Page contains the following fields Interface The port or LAG for which the default CoS policy is defined Trust Mode Indicates whether or not Trust Mode is enabled on the interface The possible field values are Not enabled Trust mode is not enabled on the interface Enabled Trust mode is enabled on the interface Default CoS for Incoming Traffic The default CoS value for incoming packets fo...

Page 194: ...vice Defining Bandwidth Settings Page 193 Figure 123 Edit Interface Settings Page 3 Define the Disable Trust Mode Default CoS and Restore Defaults fields 4 Click The QoS Interface settings are modified and the device is updated ...

Page 195: ...tains the following fields Strict Priority Specifies whether traffic scheduling is based strictly on the queue priority WRR Assigns WRR weights to queues This field is enabled only for queues in WRR queue mode If a queue is set to 0 weight the queue is not operational and is effectively closed Each queue has a weight range queues 1 3 have the range 0 255 and queue 4 has the range 1 255 2 Select St...

Page 196: ... Queue Mapping CoS to Queue The CoS to Queue Page opens Figure 125 CoS to Queue Page The CoS to Queue Page contains the following fields Class of Service Specifies the CoS priority tag values where zero is the lowest and 7 is the highest Queue Defines the traffic forwarding queue to which the CoS priority is mapped Four traffic priority queues are supported Restore Defaults Restores the device fac...

Page 197: ...ality of Service Queue Mapping DSCP to Queue The DSCP to Queue Page opens Figure 126 DSCP to Queue Page The DSCP to Queue Page contains the following fields DSCP In Displays the incoming packet s DSCP value Queue Specifies the traffic forwarding queue to which the DSCP priority is mapped Four traffic priority queues are supported 2 Define the queue number in the Queue field next to the required DS...

Page 198: ...17 Managing System Files File maintenance includes both configuration file management as well as device access This section contains the following topics File Management Overview Downloading System Files Uploading System Files Copying Files ...

Page 199: ...n the Run ning Configuration file are lost During the startup process all commands in the Startup file are copied to the Running Configuration File and applied to the device During the session all new commands entered are added to the commands existing in the Running Configuration file Commands are not overwritten To update the Startup file before powering down the device the Running Configuration...

Page 200: ...Page The File Download Page is divided into the following sections Firmware Download Configuration Download Firmware Download The Firmware Download section contains the following fields Firmware Download Indicates that the download is for firmware If Firmware Download is selected the Configuration Download fields are grayed out TFTP Server IP Address Specifies the TFTP Server IP Address from which...

Page 201: ...dress Specifies the TFTP Server IP Address from which the configuration files are downloaded Source File Name Specifies the configuration files to be downloaded Destination File Specifies the destination file to which the configuration file is downloaded The possible field values are Running Configuration Downloads commands into the Running Configuration file Startup Configuration Downloads the St...

Page 202: ...ile Upload Page The File Upload Page is divided into the following sections Software Image Upload Configuration Upload Upload Type The Upload Type section contains the following fields Firmware Upload Specifies that the software image file is uploaded If Firmware Upload is selected the Configuration Upload fields are grayed out Configuration Upload Specifies that the Configuration file is uploaded...

Page 203: ...llowing fields TFTP Server IP Address Specifies the TFTP Server IP Address to which the Configuration file is uploaded Destination File Name Specifies the file name to which the Startup Configuration file is uploaded Transfer file name Specifies the Configuration file name that is uploaded The possible field values are Running Configuration Uploads the Running Configuration file Startup Configurat...

Page 204: ...nning Configuration file is selected Destination Indicates the Startup Configuration file is selected Restore Configuration Factory Defaults Resets the Configuration file to the factory defaults The factory defaults are reset after the device is reset When unselected the device maintains the current Configu ration file 2 Select Copy Configuration 3 Click The file is copied Restoring the Default Co...

Page 205: ...ased on their urgency or relevancy Each message severity determines the set of event logging devices that are sent per each event message The following table lists the log severity levels This section includes the following topics Enabling System Logs Viewing the Device Memory Logs Viewing the FLASH Logs Defining Servers Log Parameters Table 16 System Log Severity Levels Severity Level Message Eme...

Page 206: ...t The possible field values are Checked Enables device logs Unchecked Disables device logs Severity The following are the available log severity levels Emergency The highest warning level If the device is down or not functioning properly an emergency log message is saved to the specified logging location Alert The second highest warning level An alert log is saved if there is a serious device malf...

Page 207: ...n are selected automatically Console Defines the minimum severity level from which logs are sent to the console RAM Logs Defines the minimum severity level from which logs are sent to the RAM Log kept in RAM Cache Log File Defines the minimum severity level from which logs are sent to the log file kept in FLASH memory 2 Define the Logging Enable and Severity fields 3 Click The global log parameter...

Page 208: ...g Page opens Figure 131 Device Memory Log Page The Device Memory Log Page contains the following fields Log Index Displays the log number Log Time Displays the time at which the log was generated Severity Displays the log severity Description Displays the log message text Clearing Device Memory Logs Message logs can be cleared from the Device Memory Log Page To clear message logs 1 Click System Sy...

Page 209: ...e message logs Click System Syslog Flash The Syslog Flash Page opens Figure 132 Syslog FLASH Page The Syslog Flash Page contains the following fields Log Index Displays the log number Log Time Displays the time at which the log was generated Severity Displays the log severity Description Displays the log message text Clearing FLASH Logs Message logs can be cleared from the Syslog Flash Page To cle...

Page 210: ... sent to the remote server Only one facility can be assigned to a single server If a second facility level is assigned the first facility is overridden All applica tions defined for a device utilize the same facility on a server The field default is Local 7 The possible field values are Local 0 Local 7 Description Provides a user defined server description Minimum Severity Indicates the minimum se...

Page 211: ...A User Guide Page 210 Section 19 Managing Device Diagnostics This section contains the following topics Configuring Port Mirroring Viewing Integrated Cable Tests Viewing Optical Transceivers Viewing the CPU Utilization ...

Page 212: ...ens Figure 134 Port Mirroring Page The Port Mirroring Page contains the following fields Destination Port Defines the port number to which port traffic is copied Transmit Packets Defines how the packets are mirrored The possible field values are Untagged Mirrors packets as untagged VLAN packets This is the default value Tagged Mirrors packets as tagged VLAN packets Source Port Indicates the port f...

Page 213: ...ck The Add Port Mirroring Page opens Figure 135 Add Port Mirroring Page 3 Select a port in the Source Port field 4 Select a port type in the Type field 5 Click The port mirroring session is defined and the device is updated To edit the port mirroring settings 1 Click System Diagnostics Port Mirroring The Port Mirroring Page opens 2 Click The Port Mirroring Settings Page opens Figure 136 Port Mirro...

Page 214: ...To test cables 1 Click System Diagnostics Copper Cable The Cable Tests Page opens Figure 137 Cable Tests Page The Cable Tests Page contains the following fields Port Specifies the port to which the cable is connected Test Result Displays the cable test results Possible values are No Cable Indicates that a cable is not connected to the port Open Cable Indicates that a cable is connected on only one...

Page 215: ...ns the field Port Displays the port IP address on which the cable is tested Temperature Displays the temperature C at which the cable is operating Voltage Displays the voltage at which the cable is operating Current Displays the current at which the cable is operating Output Power Indicates the rate at which the output power is transmitted Input Power Indicates the rate at which the input power is...

Page 216: ...on Click System Diagnostics CPU Utilization The CPU Utilization Page opens Figure 139 CPU Utilization Page The CPU Utilization Page contains the following fields Refresh Rate Amount of time that passes before the statistics are refreshed Usage Percentages Indicates the percentage of the CPU s resources consumed by the device Time Indicates the time in 15 second intervals the usage samples are take...

Page 217: ...Link DES 3010PA User Guide Page 216 Section 20 Configuring System Time This section provides information for configuring system time parameters including Configuring Daylight Savings Time Configuring SNTP ...

Page 218: ... first Sunday in April until the last Sunday of October Daylight Saving Time is usually regulated by provincial and territorial governments Exceptions may exist in certain municipalities Cuba From the last Sunday of March to the last Sunday of October Cyprus From the last weekend of March until the last weekend of October Denmark From the last weekend of March until the last weekend of October Egy...

Page 219: ... last weekend of October Russia From the last weekend of March until the last weekend of October Serbia From the last weekend of March until the last weekend of October Slovak Republic From the last weekend of March until the last weekend of October South Africa South Africa does not use Daylight Saving Time Spain From the last weekend of March until the last weekend of October Sweden From the las...

Page 220: ... the device s location There are two types of daylight settings either by a specific date in a particular year or a recurring setting irrespective of the year For a specific setting in a particular year complete the Daylight Savings area and for a recurring setting complete the Recurring area The possible field values are USA Enables switching to DST at 2 00 a m on the first Sunday of April and re...

Page 221: ...nd Europe From The time that DST begins each year In the example DST begins locally every first Sunday in April at midnight The possible field values are Day The day of the week from which DST begins every year The possible field range is Sunday Saturday Week The week within the month from which DST begins every year The possible field range is 1 5 Month The month of the year in which DST begins e...

Page 222: ...d by the following time levels T1 The time at which the original request was sent by the client T2 The time at which the original request was received by the server T3 The time at which the server sent the client a reply T4 The time at which the client received the server s reply Polling for Unicast Time Information Polling for Unicast information is used for polling a server for which the IP addr...

Page 223: ...D Link DES 3010PA User Guide Page 222 This section contains the following topics Defining SNTP Global Settings Defining SNTP Authentication Defining SNTP Servers Defining SNTP Interface Settings ...

Page 224: ... the selected interfaces The possible values are Enable Enables the device to receive Broadcast server updates Disable Disables the device from receiving Broadcast server updates Enable Receive Anycast Servers Updates Defines whether or not the device polls the SNTP server for Anycast server time information If both the Enable Receive Anycast Servers Update and the Enable Receive Broadcast Servers...

Page 225: ... Servers Defines whether or not the device sends SNTP Unicast forwarding informa tion to the SNTP server The possible values are Enable Enables the device to receive Poll Unicast server updates Disable Disables the device from receiving Poll Unicast server updates 2 Define the Poll Interval Enable Receive Broadcast Servers Update Enable Receive Anycast Servers Update Enable Receive Unicast Servers...

Page 226: ...s SNTP sessions between the device and the SNTP server Unchecked Disables authenticating SNTP sessions between the device and the SNTP server Encryption Key ID Indicates if the encryption key identification is used to authenticate the SNTP server and device The field value is up to 4294967295 Authentication Key Indicates the key used for authentication Trusted Key Indicates the encryption key used...

Page 227: ...P authentication parameters 1 Click The Add SNTP Authentication page opens Figure 143 Add SNTP Authentication 2 Define the Encryption Key ID Authentication Key and Trusted Key fields 3 Click The SNTP Authentication Key is added and the device is updated ...

Page 228: ...dicates whether or not the device polls the selected SNTP server for system time informa tion Encryption Key ID Displays the encryption key identification used to communicate between the SNTP server and device The field range is 1 4294967295 Preference Status Displays the SNTP server operating status Last Response Displays the last time a response was received from the SNTP server Offset Indicates...

Page 229: ...er Guide Page 228 2 Click The Add SNTP Server Page opens Figure 145 Add SNTP Server Page 3 Define the SNTP Server Enable Poll Interval and Encryption Key ID fields 4 Click The SNTP Server is added and the device is updated ...

Page 230: ...ngs Page contains the following fields Interface Indicates the interface on which SNTP can be enabled The possible field values are Port Indicates the specific port number on which SNTP is enabled LAG Indicates the specific LAG number on which SNTP is enabled VLAN Indicates the specific VLAN number on which SNTP is enabled Receive Servers Updates Enables the server to receive or not receive update...

Page 231: ...D Link DES 3010PA User Guide Page 230 Figure 147 Add SNTP Interface Page 3 Define the Interface and Receive Server Updates fields 4 Click The SNTP interface is added and the device is updated ...

Page 232: ...n session is completed an authorization session starts using the authenticated user name The TACACS protocol ensures network integrity through encrypted protocol exchanges between the client and TACACS server The TACACS default parameters are user assigned defaults The default settings are applied to newly defined TACACS servers If default values are not defined the system defaults are applied to ...

Page 233: ... session occurs The default port is port 49 Timeout for Reply Defines the amount of time in seconds that passes before the connection between the device and the TACACS times out The field range is 1 1000 seconds Single Connection Maintains a single open connection between the device and the TACACS server The possible field values are Checked Enables a single connection Unchecked Disables a single ...

Page 234: ...4 Click The TACACS server is defined and the device is updated To edit a TACACS server settings 1 Click System Management Security Authentication TACACS The TACACS Page opens 2 Select TACACS server entry 3 Click The Add TACACS Host Page opens Figure 150 TACACS Host Settings Page 4 Define the fields 5 Click The TACACS host settings are saved and the device is updated ...

Page 235: ...erfaces GVRP EAP and Etherlike statistics This section contains the following topics Viewing Interface Statistics Managing RMON Statistics Viewing Interface Statistics This section contains the following topics Viewing Device Interface Statistics Viewing Etherlike Statistics Viewing GVRP Statistics Viewing EAP Statistics ...

Page 236: ...t passes before the interface statistics are refreshed The possible field values are 15 Sec Indicates that the Interface statistics are refreshed every 15 seconds 30 Sec Indicates that the Interface statistics are refreshed every 30 seconds 60 Sec Indicates that the Interface statistics are refreshed every 60 seconds No Refresh Indicates that the Interface statistics are not refreshed Receive Stat...

Page 237: ...t Packets Displays the number of Broadcast packets transmitted from the selected interface 2 Select an interface in the Interface field The interface statistics are displayed Resetting Interface Statistics Counters 1 Open the Interface Statistics Page 2 Click The interface statistics counters are cleared Viewing Etherlike Statistics The Etherlike Statistics Page contains interface statistics To vi...

Page 238: ... FCS errors received on the selected interface Single Collision Frames Displays the number of single collision frames received on the selected interface Late Collisions Displays the number of late collision frames received on the selected interface Excessive Collisions Displays the number of excessive collisions received on the selected interface Internal MAC Transmit Errors Displays the number of...

Page 239: ...mount of time that passes before the GVRP statistics are refreshed The pos sible field values are 15 Sec Indicates that the GVRP statistics are refreshed every 15 seconds 30 Sec Indicates that the GVRP statistics are refreshed every 30 seconds 60 Sec Indicates that the GVRP statistics are refreshed every 60 seconds No Refresh Indicates that the GVRP statistics are not refreshed Join Empty Displays...

Page 240: ...RP Invalid Attribute Length statistics Invalid Event Displays the device GVRP Invalid Event statistics 3 Select an interface in the Interface field The GVRP statistics are displayed Resetting GVRP Statistics Counters 1 Open the GVRP Statistics Page 2 Click The GVRP statistics counters are cleared Viewing EAP Statistics The EAP Statistics Page contains information about EAP packets received on a sp...

Page 241: ...rt frames received on the port Log off Frames Receive Indicates the number of EAPOL Logoff frames that have been received on the port Respond ID Frames Receive Indicates the number of EAP Resp Id frames that have been received on the port Respond Frames Receive Indicates the number of valid EAP Response frames received on the port Request ID Frames Transmit Indicates the number of EAP Req Id frame...

Page 242: ...ics The RMON Statistics Page opens Figure 155 RMON Statistics Page The RMON Statistics Page contains the following fields Interface Indicates the device for which statistics are displayed The possible field values are Port Defines the specific port for which RMON statistics are displayed LAG Defines the specific LAG for which RMON statistics are displayed Refresh Rate Defines the amount of time th...

Page 243: ...ed Undersize Packets Displays the number of undersized packets less than 64 octets received on the interface since the device was last refreshed Oversize Packets Displays the number of oversized packets over 1518 octets received on the interface since the device was last refreshed Fragments Displays the number of fragments packets with less than 64 octets excluding framing bits but including FCS o...

Page 244: ...g fields History Entry No Displays the entry number for the History Control Table page Source Interface Displays the interface from which the history samples were taken The possible field values are Port Specifies the port from which the RMON information was taken LAG Specifies the port from which the RMON information was taken Sampling Interval Indicates in seconds the time that samplings are tak...

Page 245: ...ol entry Unchecked Maintains the current History Control entries 2 Click The RMON History Control Settings Page opens Figure 157 RMON History Control Settings Page 3 Complete the History Entry No Source Interface Owner Samples Requested and Current Sampling fields 4 Click The entry is added to the RMON History Control Page and the device is updated ...

Page 246: ...rred on the interface since the device was last refreshed Received Bytes Octets Displays the number of octets received on the interface since the device was last refreshed This number includes bad packets and FCS octets but excludes framing bits Received Packets Displays the number of packets received on the interface since the device was last refreshed including bad packets Multicast packets and ...

Page 247: ... total number of received packets that were longer than 1518 octets This number excludes frame bits but includes FCS octets that had either a bad Frame Check Sequence FCS with an inte gral number of octets FCS Error or a bad FCS with a non integral octet Alignment Error number The field range to detect jabbers is between 20 ms and 150 ms Collisions Displays the number of collisions received on the...

Page 248: ...ontains the following fields Event Entry Displays the event Community Displays the community to which the event belongs Description Displays the user defined event description Type Describes the event type Possible values are Log Indicates that the event is a log entry Trap Indicates that the event is a trap Log and Trap Indicates that the event is both a log entry and a trap None Indicates that n...

Page 249: ...Click Advanced Setup RMON Events Events Logs The RMON Events Logs Page opens Figure 160 RMON Events Logs Page The RMON Events Logs Page contains the following fields Event Displays the RMON Events Log entry number Log No Displays the log number Log Time Displays the time when the log entry was entered Description Displays the log entry description ...

Page 250: ...ed value from the current value The difference in the values is compared to the threshold Absolute Compares the values directly with the thresholds at the end of the sampling interval Rising Threshold Displays the rising counter value that triggers the rising threshold alarm The rising threshold is presented on top of the graph bars Each monitored variable is designated a color Rising Event Displa...

Page 251: ...val Defines the alarm interval time in seconds Owner Displays the device or user that defined the alarm Remove Removes the RMON Alarms Table entry 2 Click The RMON Alarms Definition Page opens Figure 162 RMON Alarms Definition Page 3 Complete Sample Type Rising Threshold Rising Event Falling Threshold Falling Event Startup Alarm Interval and Owner fields 4 Click The RMON alarm is added and the dev...

Page 252: ...ion contains the DES 3010PA hardware specifications Ports provides 24 Port 10 100Mbps 2 Combo Copper SFP 100BASE FX 1000BASE X Fiber ports 2 1000 Mbps Copper L2 Management Switch CPU DDRAM 64MB Max CPU Flash 16MBb Max PoE Per port power 16 8W PoE Total available power Depends on customer s definition AC Input 110 240V AC Internal universal power supply Operating Temperature 0 50 C Storage Temperat...

Page 253: ...or marking and prioritizing network traffic at the data link MAC sub layer 802 1p traffic is classified and sent to the destination No bandwidth reservations or limits are established or enforced 802 1p is a spin off of the 802 1Q VLANs standard 802 1p establishes eight levels of priority similar to the IP Precedence IP Header bit field Command Line Interface Command Line Interface CLI syntax and ...

Page 254: ...dynamic VLAN creation on 802 1Q trunk ports When GVRP is enabled the device registers and propagates VLAN membership on all ports that are part of the active underlying Spanning Tree Protocol Features topology IGMP Snooping IGMP Snooping examines IGMP frame contents when they are forwarded by the device from work stations to an upstream Multi cast router From the frame the device identifies work s...

Page 255: ...ons are one or more MSTP bridges by which frames can be transmitted The standard lets administrators assign VLAN traffic to unique paths Password Management Password management provides increased network security and improved password control Passwords for SSH Telnet HTTP HTTPS and SNMP access are assigned security features For more information on Password Management see Managing Passwords Port Ba...

Page 256: ...able faster convergence without creating forwarding loops Remote Monitoring Remote Monitoring RMON is an extension to SNMP which pro vides comprehensive network traffic monitoring capabilities as opposed to SNMP which allows network device management and monitoring RMON is a standard MIB that defines current and historical MAC layer statistics and control objects allowing real time information to ...

Page 257: ...ication level protocol that enables secure transactions of data through privacy authentica tion and data integrity It relies upon certificates and public and private keys Static MAC Entries MAC entries can be manually entered in the Bridging Table as an alternative to learning them from incoming frames These user defined entries are not subject to aging and are preserved across resets and reboots ...

Page 258: ...performed where frames are forwarded based only on their destination MAC address However a similar functionality may be configured for untagged frames Frames addressed to a destination MAC address that is not associated with any port are flooded to all ports of the relevant VLAN Web Based Management With web based management the system can be managed from any web browser The system contains an Emb...

Page 259: ...ed below are some possible troubleshooting problems and solutions These error messages include Cannot connect to management using RS 232 serial connection Cannot connect to switch management using Telnet HTTP SNMP etc Self test exceeds 15 seconds No connection is established and the port LED is on Device is in a reboot loop No connection and the port LED is off Add and Edit pages do not open Lost ...

Page 260: ...proto col Faulty ethernet cable Faulty port Faulty module Incorrect initial configura tion Configure the network address in the workstation Configure the network address in the workstation Configure the workstation with IP protocol Replace the cable Replace the module Replace the module Erase the connection and reconfigure the port Device is in a reboot loop Software fault Download and install a w...

Page 261: ...age is displayed Console reload Are you sure you want to reboot the system y n n 2 Enter Y The device reboots After the POST when the text Autoboot in 2 seconds press RETURN or Esc to abort and enter prom is displayed press Enter The Startup Menu is displayed 1 Download software 2 Erase flash file 3 Erase flash sectors 4 Password Recovery Procedure 5 Enter Diagnostic Mode 6 Back 3 Enter 4 within 1...

Page 262: ...tware updates and user documentation can be found on the D Link website D Link provides free technical support for customers within the United States and within Canada for the warranty duration For more information on locating the D Link office in your region see International Offices ...

Page 263: ...D Link DES 3010PA User Guide Page 262 ...

Page 264: ...Contacting D Link Technical Support Page 263 ...

Page 265: ...D Link DES 3010PA User Guide Page 264 ...

Page 266: ...Contacting D Link Technical Support Page 265 ...

Page 267: ...D Link DES 3010PA User Guide Page 266 ...

Page 268: ...Contacting D Link Technical Support Page 267 ...

Page 269: ...D Link DES 3010PA User Guide Page 268 ...

Page 270: ...Contacting D Link Technical Support Page 269 ...

Page 271: ...D Link DES 3010PA User Guide Page 270 ...

Page 272: ...Contacting D Link Technical Support Page 271 ...

Page 273: ...D Link DES 3010PA User Guide Page 272 ...

Page 274: ...Contacting D Link Technical Support Page 273 ...

Page 275: ...D Link DES 3010PA User Guide Page 274 ...

Page 276: ...Contacting D Link Technical Support Page 275 ...

Page 277: ...D Link DES 3010PA User Guide Page 276 ...

Page 278: ...Contacting D Link Technical Support Page 277 ...

Page 279: ...D Link DES 3010PA User Guide Page 278 ...

Page 280: ...Contacting D Link Technical Support Page 279 ...

Page 281: ...D Link DES 3010PA User Guide Page 280 ...

Page 282: ...Contacting D Link Technical Support Page 281 ...

Page 283: ...D Link DES 3010PA User Guide Page 282 ...

Page 284: ...Contacting D Link Technical Support Page 283 ...

Page 285: ...D Link DES 3010PA User Guide Page 284 ...

Page 286: ...Contacting D Link Technical Support Page 285 ...

Page 287: ...D Link DES 3010PA User Guide Page 286 ...

Page 288: ...Contacting D Link Technical Support Page 287 ...

Page 289: ...tion or if D Link determines that it is not practical to repair or replace the defective Hardware the actual price paid by the original purchaser for the defective Hardware will be refunded by D Link upon return to D Link of the defective Hardware All Hardware or part thereof that is replaced by D Link or for which the purchase price is refunded shall become the property of D Link upon replacement...

Page 290: ...o D Link No Cash on Delivery COD is allowed Products sent COD will either be rejected by D Link or become the property of D Link Products shall be fully insured by the customer and shipped to D Link Systems Inc 17595 Mt Herman Fountain Valley CA 92708 D Link will not be held responsible for any packages that are lost in transit to D Link The repaired or replaced pack ages will be shipped to the cu...

Page 291: ...REMEDIES EXPRESS IMPLIED OR STATUTORY Governing Law This Limited Warranty shall be governed by the laws of the State of California Some states do not allow exclusion or limitation of incidental or consequential damages or limitations on how long an implied war ranty lasts so the foregoing limitations and exclusions may not apply This Limited Warranty provides specific legal rights and you may also...

Page 292: ...nnect the equipment into an outlet on a circuit different from that to which the receiver is connected Consult the dealer or an experienced radio TV technician for help For detailed warranty information applicable to products purchased outside the United States please con tact the corresponding local D Link office ...

Page 293: ...Page 292 Product Registration D Link products can be registered online at http support dlink com register Product registration is entirely voluntary and failure to complete or return this form will not diminish your warranty rights ...

Page 294: ...rth Ryde NSW 2113 Australia TEL 61 2 8899 1800 FAX 61 2 8899 1868 URL www dlink com au India D Link House Kurla Bandra Complex Road Off CST Road Santacruz East Mumbai 400098 India TEL 91 022 26526696 56902210 FAX 91 022 26528914 URL www dlink co in Middle East Dubai P O Box 500376 Office No 103 Building 3 Dubai Internet City Dubai United Arab Emirates Tel 971 4 3916480 Fax 971 4 3908881 URL www dl...

Reviews: